
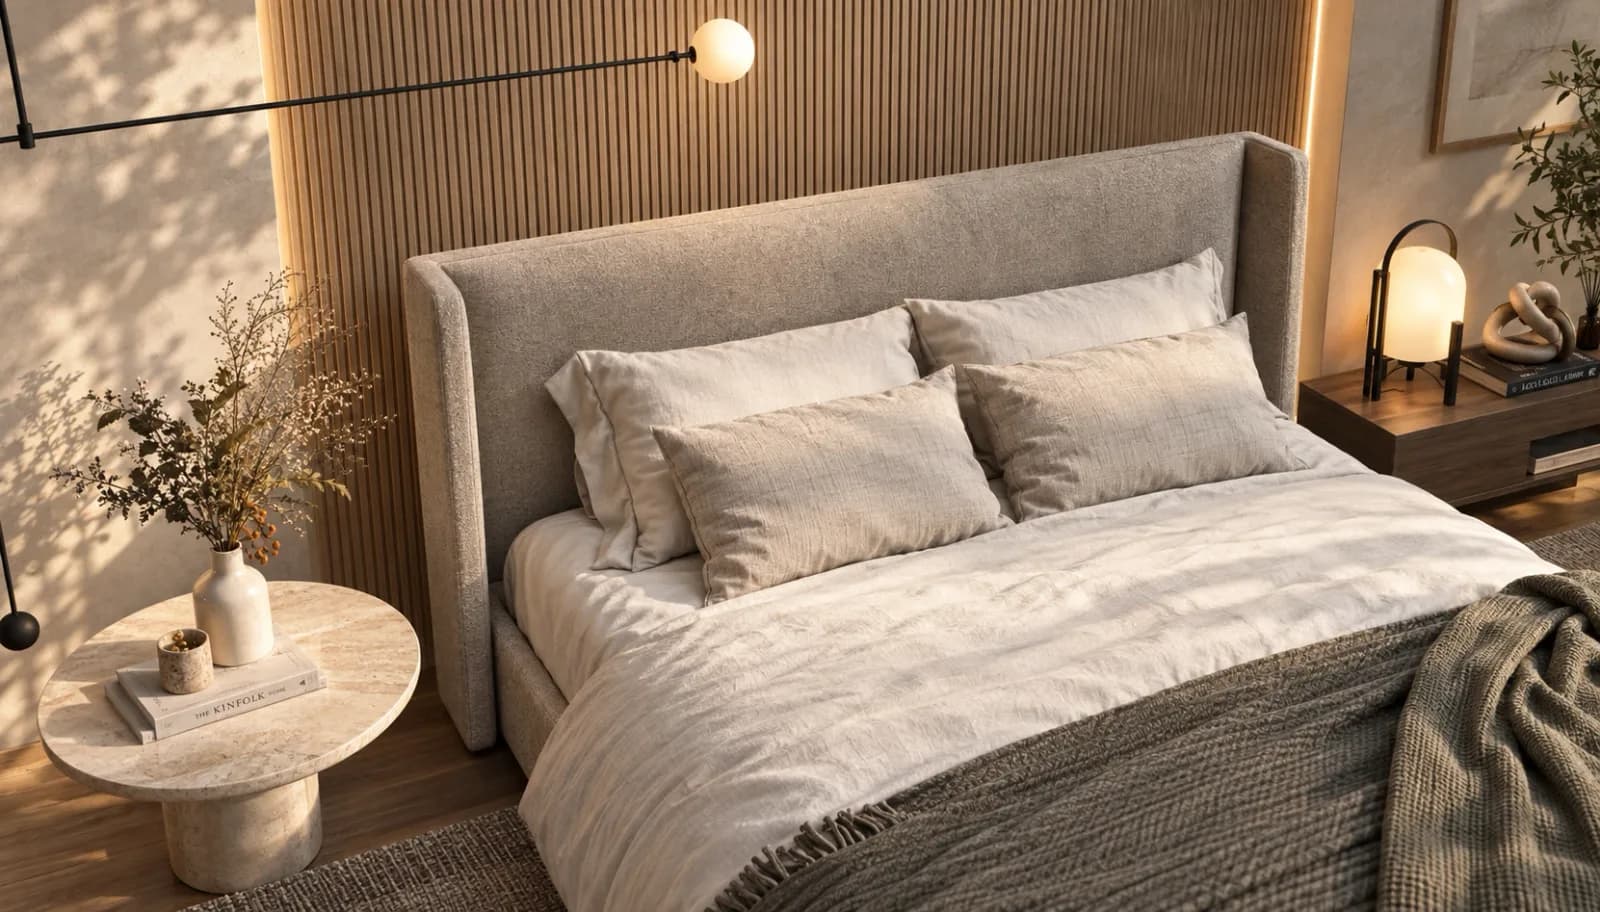
Many guides still say SketchUp has no built-in renderer. That stopped being true in SketchUp 2025, which added Photoreal Materials and Environments, and SketchUp 2026.1 added AI Render. So in 2026 you have three routes: SketchUp's own tools, a dedicated render engine, or an AI tool that works from your viewport.
This guide gives the exact steps and requirements for each and ends with a real render of a SketchUp scene, showing what the AI kept and what it made up.
How we checked. Facts about SketchUp, V-Ray, Enscape, D5, Twinmotion and Lumion come from Trimble's, Chaos's, D5's, Epic's and Lumion's own documentation, checked on 30 September 2026 and linked in the text. We make an AI render extension for SketchUp ourselves, so we describe it by the same standard, limits included. We don't list prices, because they change too often; follow the links for current plans.
Pick your route in 30 seconds
| Route | You need | Good for | Watch out for |
|---|---|---|---|
| Native Photoreal Materials + Environments | SketchUp 2025 or later | Quick, better-looking views without leaving SketchUp | A display mode with image-based lighting, not a physically based renderer; larger files |
| SketchUp AI Render | SketchUp 2024+ desktop (or iPad/Web), a Go, Pro or Studio subscription, AI credits, internet | Fast AI images from the current view | No credits on the Free plan; geometry can drift |
| Render engine (V-Ray, Enscape, D5, Twinmotion, Lumion) | A capable GPU; for D5 and Lumion, Windows | Accurate lighting, final images, animation, VR | Learning curve and hardware; some are Windows-only |
| AI plugin or upload (Syntina, ArkoAI, LookX, Visoid, Veras and others) | The plugin or a browser, plus credits | Concept and presentation images in about a minute | The model decides anything you leave open |
First, prepare the model (every route benefits)
- Organise it. Chaos's own V-Ray tutorial starts here: assign tags and build components and groups correctly. Hide what the camera can't see.
- Fix geometry. Reversed faces, holes and wrong texture scale show up badly in every renderer, AI included.
- Set the camera and save a scene. Use Camera > Field of View and, for architecture, Camera > Two-Point Perspective. Then add a scene: SketchUp saves the camera, style, shadows and environment with it, so you can return to the exact view.
- Give surfaces real materials. Even an AI tool reads your materials as hints; a flat grey box gives it nothing to go on.
- Test small, then go big. Chaos's tutorial renders at 800 × 600 before the final size.
Route 1: SketchUp's own Photoreal Materials and Environments (2025 and later)
SketchUp 2025 added two things that work together: a Photoreal Materials face style that uses physically based texture maps (metalness, roughness, normal and ambient occlusion), and Environments, which add a 360° background and image-based lighting from an HDRI or EXR file.
Steps (from Trimble's help centre):
- Open the Styles panel, go to Edit > Face Settings and choose Display Photoreal Materials. Click Update Style with Changes.
- Open the Environments panel, pick one of the default environments on the Select tab, or click Add Environment to import your own HDRI or EXR.
- On the Edit tab, turn on Use Environment as Skydome and Use Environment for Reflections, adjust Rotation Angle and exposure, and use Set Sun Location if you want the sun to match the environment (it overrides the Shadows panel's settings).
- For materials without texture maps, open the material in the Materials panel and click Generate Textures: SketchUp's AI creates the metalness, roughness, normal and ambient occlusion maps. It needs an internet connection; Trimble suggests duplicating the material first.
- Export with File > Export > 2D Graphic as PNG or JPEG, and set the width, height and anti-aliasing there.
Limits. Trimble's own warning: the new Photoreal Materials are "significantly larger" than older materials and can make your models much bigger. And this is a viewport display mode, not a path-traced renderer: nothing in the documentation describes global illumination. It makes SketchUp views look far better; it isn't a replacement for a render engine when light accuracy matters.
Route 2: SketchUp AI Render (formerly SketchUp Diffusion)
In SketchUp 2026.1, Trimble renamed Diffusion to AI Render. It combines the current viewport with a text prompt or a preset style and generates a new image. Trimble's technical notes say all current presets and tools use Google's Nano Banana model.
What you need (from Trimble's getting-started page): an active Go, Pro or Studio subscription, an internet connection and AI credits. The Free plan includes no credits. On desktop it is an extension from Extension Warehouse (search "AI Render"), and it doesn't work with SketchUp versions older than 2024. It also runs on iPad and Web.
Steps:
- Open the AI Render window from the Extensions menu or toolbar. It shows a snapshot of your current view.
- Type a prompt. The default Auto preset aims to keep your materials, geometry and camera angle.
- Optionally pick a style preset: Exterior Photorealistic, Interior Photorealistic, Aerial Masterplan, Pencil Sketch, Watercolor, Illustration or Physical Model. A reference image can be added with the No Style preset.
- Click Generate. Trimble says it takes 13 to 20 seconds.
- Refine with the Erase, Paint and Sketch tools, then Save (a PNG at your viewport's resolution) or Add Scene to overlay the result as a matched photo.
Limits. "Aims to keep" is not a guarantee: one independent field test found geometry changes in about half of its generations. That is a single test, but it matches what we see with AI rendering in general. The output resolution follows your viewport, and Trimble notes that ultra-wide or above-4K screens can distort the result.
Route 3: a render engine
For accurate light, final images, animation or VR, a render engine is still the standard. Each connects to SketchUp differently, and that decides how you work.
| Engine | How it connects to SketchUp | Real-time? | Operating system (vendor docs) | Free option |
|---|---|---|---|---|
| V-Ray for SketchUp | Extension inside SketchUp; included in the installer for SketchUp Studio subscribers | Interactive and production rendering | Windows 10/11, macOS 12+ | 30-day trial |
| Enscape | Extension inside SketchUp | Yes, model edits appear live | Windows 10+, macOS 14.8.1+ on Apple Silicon | 14-day trial |
| D5 Render | Separate app linked by the LiveSync plugin; D5 Lite runs inside SketchUp | Yes | Windows only | Free Community plan |
| Twinmotion | Separate app linked by the Datasmith Exporter (SketchUp Pro) with Direct Link | Yes; the path tracer is Windows-only | Windows and macOS | Free for eligible users, plus a 30-day trial |
| Lumion | Separate app linked by the free LiveSync plugin, or import the .skp | Yes | Windows only ("macOS is not supported") | 14-day trial of Lumion Pro |
On a Mac, your engine choice is V-Ray, Enscape or Twinmotion (without its path tracer); D5 and Lumion are Windows-only. If you already pay for SketchUp Studio, V-Ray is in your installer.
Route 4: an AI render from your viewport (a real test)
The fourth route skips scene setup entirely: you send the view you already have to an AI renderer and get an image back, either through a plugin inside SketchUp or by exporting a view and uploading it. This is our own category, so here is a real test with the Syntina SketchUp extension, shown as it came out.
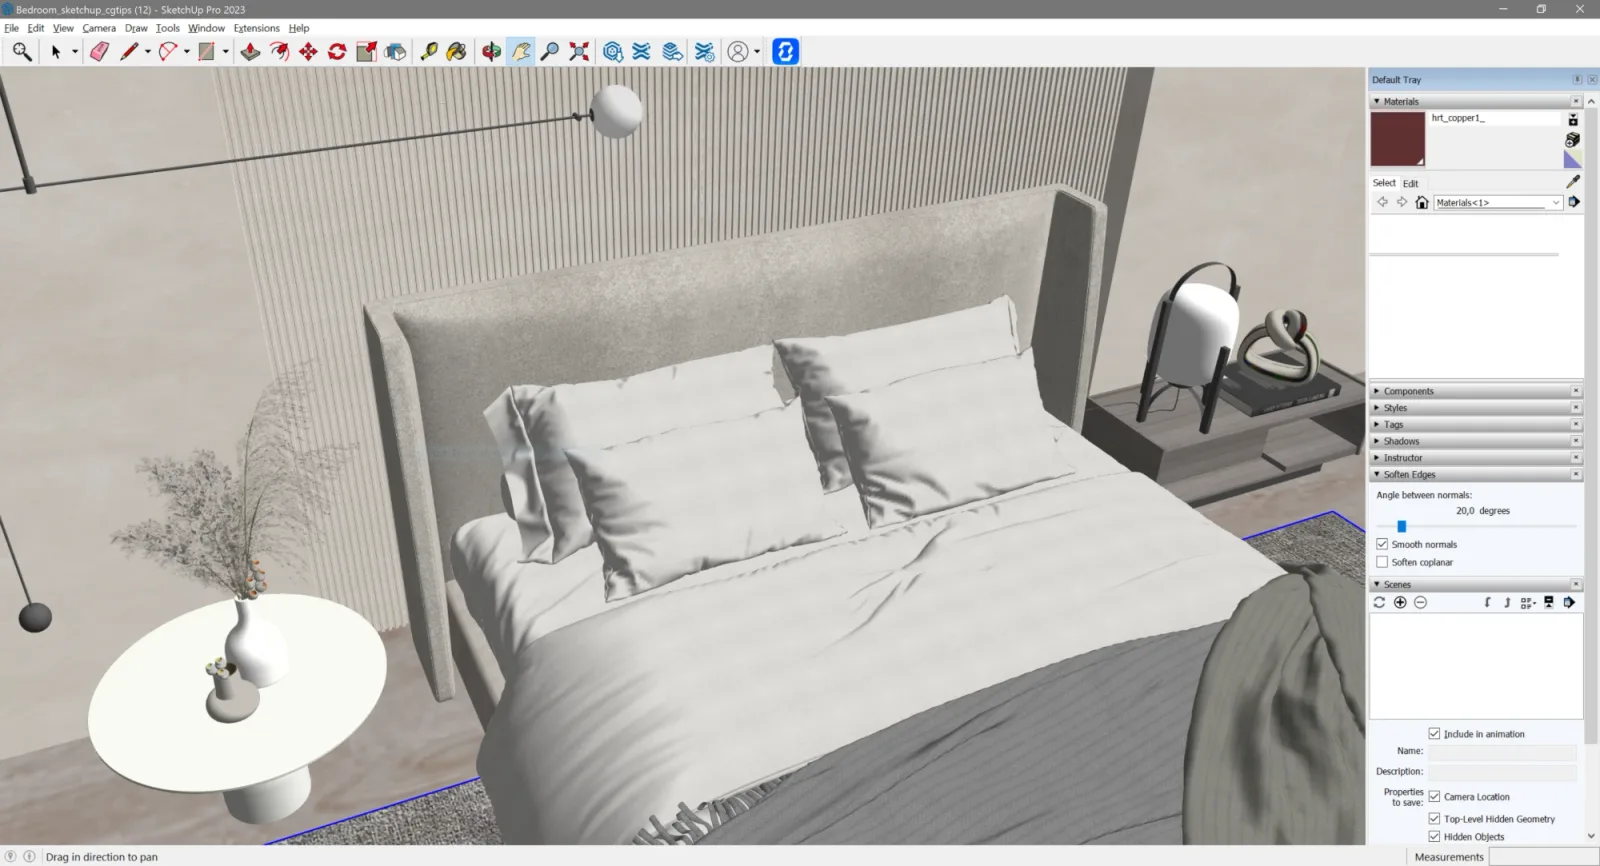
The input: a bedroom scene in SketchUp Pro 2023, with the default style and the model's own materials.
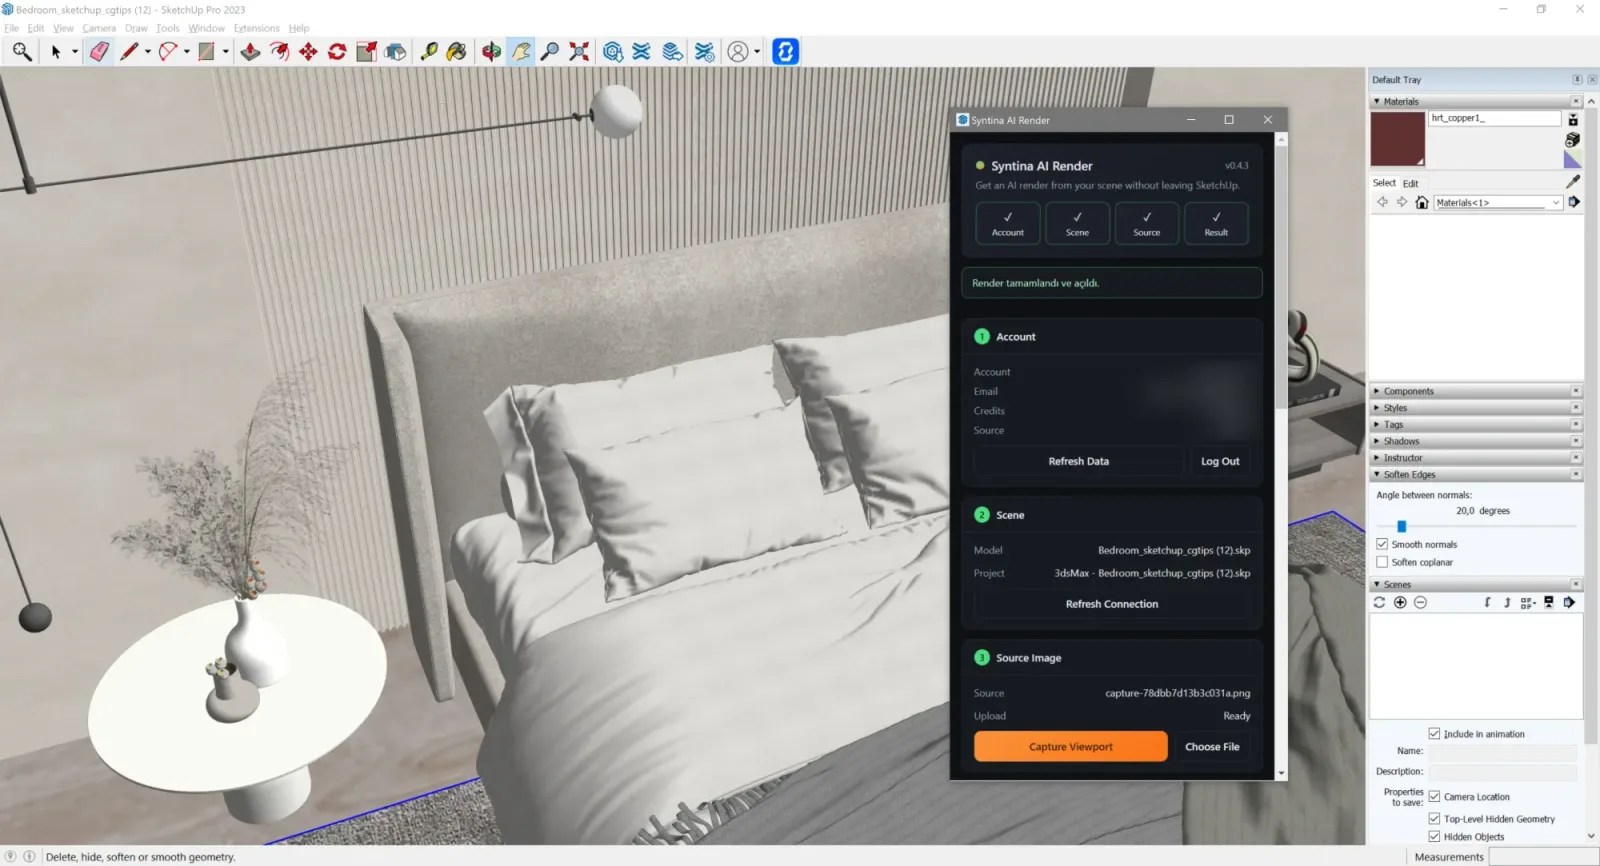
The extension: the panel docks inside SketchUp. You sign in, the scene is linked to a project, Capture Viewport grabs the current view, and the finished render opens back in SketchUp. (This screenshot shows an older 0.4 build, which still had a Turkish status line; the current version follows SketchUp's interface language. Account details are blurred.)
The result:
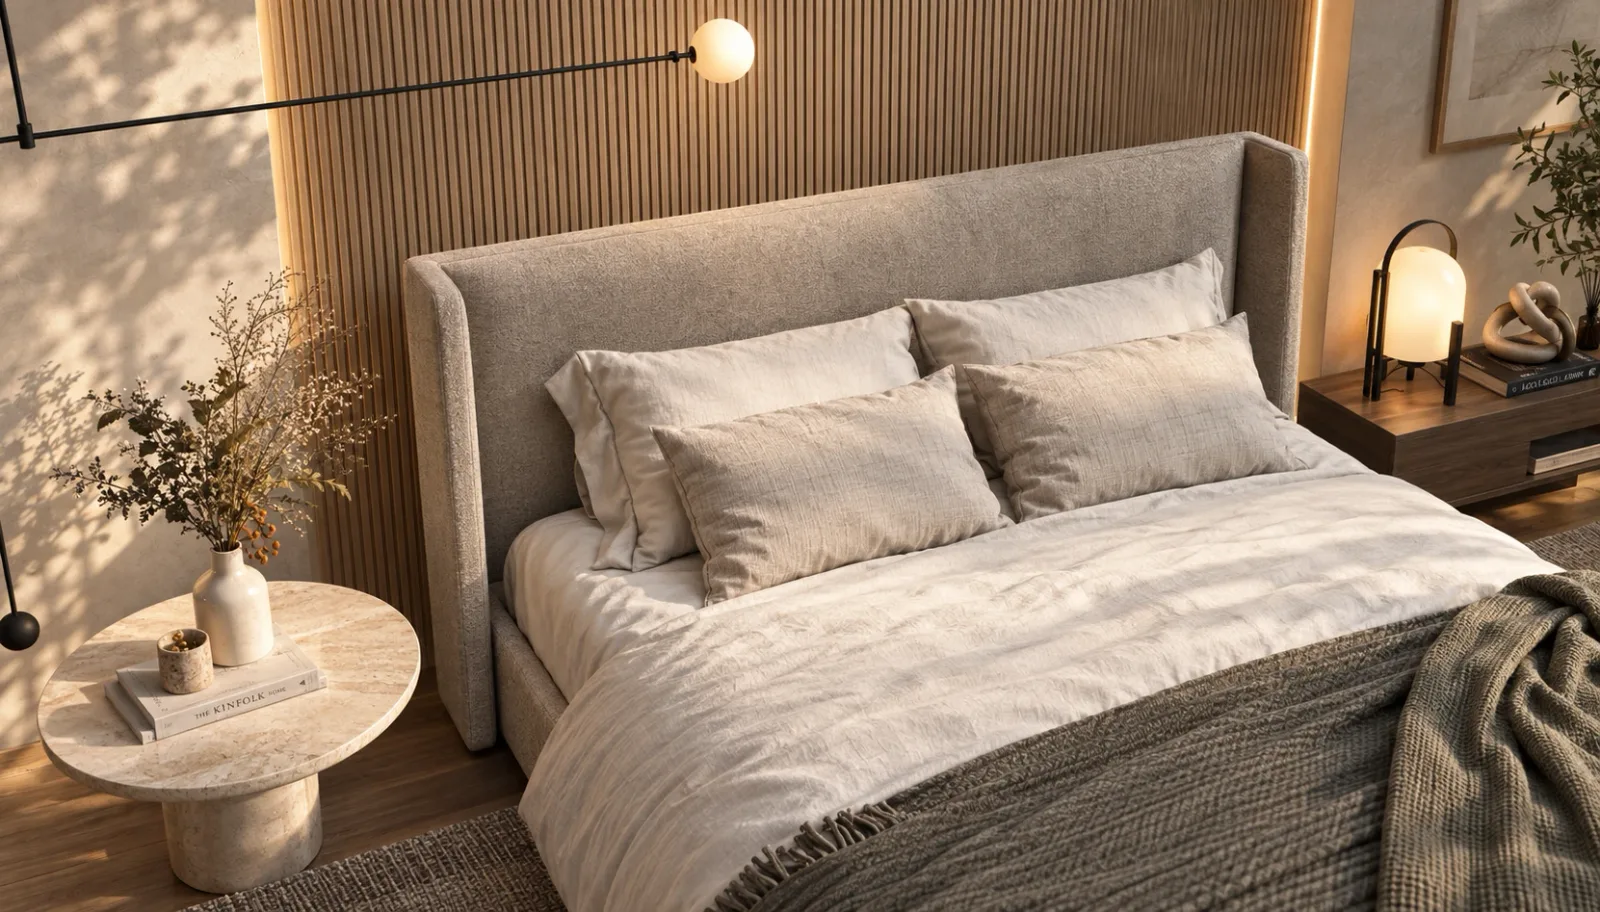
What it kept: the bed and headboard shape, the arrangement of the pillows, the round side table with its vase and dried flowers, the bedside lamp, the knot sculpture, the pendant lamp and, importantly, the camera angle. The layout of the room is recognisably the model's.
What it decided for you:
- Materials. The grey slatted wall became warm timber with a hidden light strip, and the side table became stone. Plausible and attractive, but they are the model's choices, not yours.
- Objects that aren't in the model. A stack of books on the side table, a framed picture and a plant in the corner.
- The light. Warm, low sunlight with leaf shadows. The SketchUp scene doesn't specify any of that.
The lesson: an AI renderer fills every gap you leave. If the slat wall must stay grey oak or nothing may be added to the side table, say so in the brief: name what must not change, and give materials and light explicitly. Our guide to AI rendering prompts shows how, with before-and-after examples.
Using the Syntina extension: download it from the SketchUp plugin page. It needs SketchUp 2017 or later (it uses SketchUp's built-in HTML panel); the test above ran on SketchUp Pro 2023 on Windows. The extension is free, renders use credits, and sign-up includes free credits with no card. Other SketchUp AI plugins include ArkoAI, LookX, Visoid and Veras; our comparison of AI tools for architectural visualization covers what each documents.
What each route can't do
| Route | Can't do |
|---|---|
| Native Photoreal + Environments | Physically accurate light; it's a display mode. Heavier files. |
| SketchUp AI Render | Guarantee your geometry; runs on credits and needs a paid plan and internet. |
| Render engines | Give you a result without scene setup, materials and lighting work; some need Windows and a strong GPU. |
| AI plugins and uploads | Keep every decision yours unless you write it down; exact dimensions or light studies. |
Most teams end up with two of these: an AI route for fast concept and presentation images, and a render engine for the final, technically accurate ones.
FAQ
Does SketchUp have a built-in renderer?
Since SketchUp 2025 it has Photoreal Materials and Environments, which make the viewport look far more realistic with image-based lighting, and since 2026.1 it has AI Render. Neither is a physically based render engine; for that you still add V-Ray, Enscape, D5, Twinmotion or Lumion.
Can I render in SketchUp Free?
AI Render doesn't include credits on the Free plan and needs Go, Pro or Studio. Trimble describes Photoreal Materials and Environments as available on desktop, iPad and web, but its pages don't spell out every plan limit, so check your plan. A browser-based AI tool is another route: export the view and upload it.
What's the best render engine for SketchUp on a Mac?
V-Ray and Enscape both support macOS; Twinmotion runs on macOS without its path tracer. D5 Render and Lumion are Windows-only.
Is an AI render good enough to show a client?
For concepts and presentations, often yes, as long as you compare it against your model first. In our test, the layout and camera were kept, but materials, lighting and a few objects were the model's own choices. For exact light and final delivery, use a render engine.
Will AI change my SketchUp geometry?
It can. Plugins and presets that aim to preserve geometry reduce the drift, and a clear brief helps, but check windows, stairs and proportions before a render leaves your office.
Want to try it on your own SketchUp scene? Install the Syntina SketchUp extension and render the view you already have with the free credits you get at sign-up.