
Upload a 2D plan. Get a listing-ready 3D floor plan.
Turn a flat floor plan into a furnished, legible 3D floor plan for real-estate listings, sales packages, and marketing pages — keep the same visual language across every unit type.
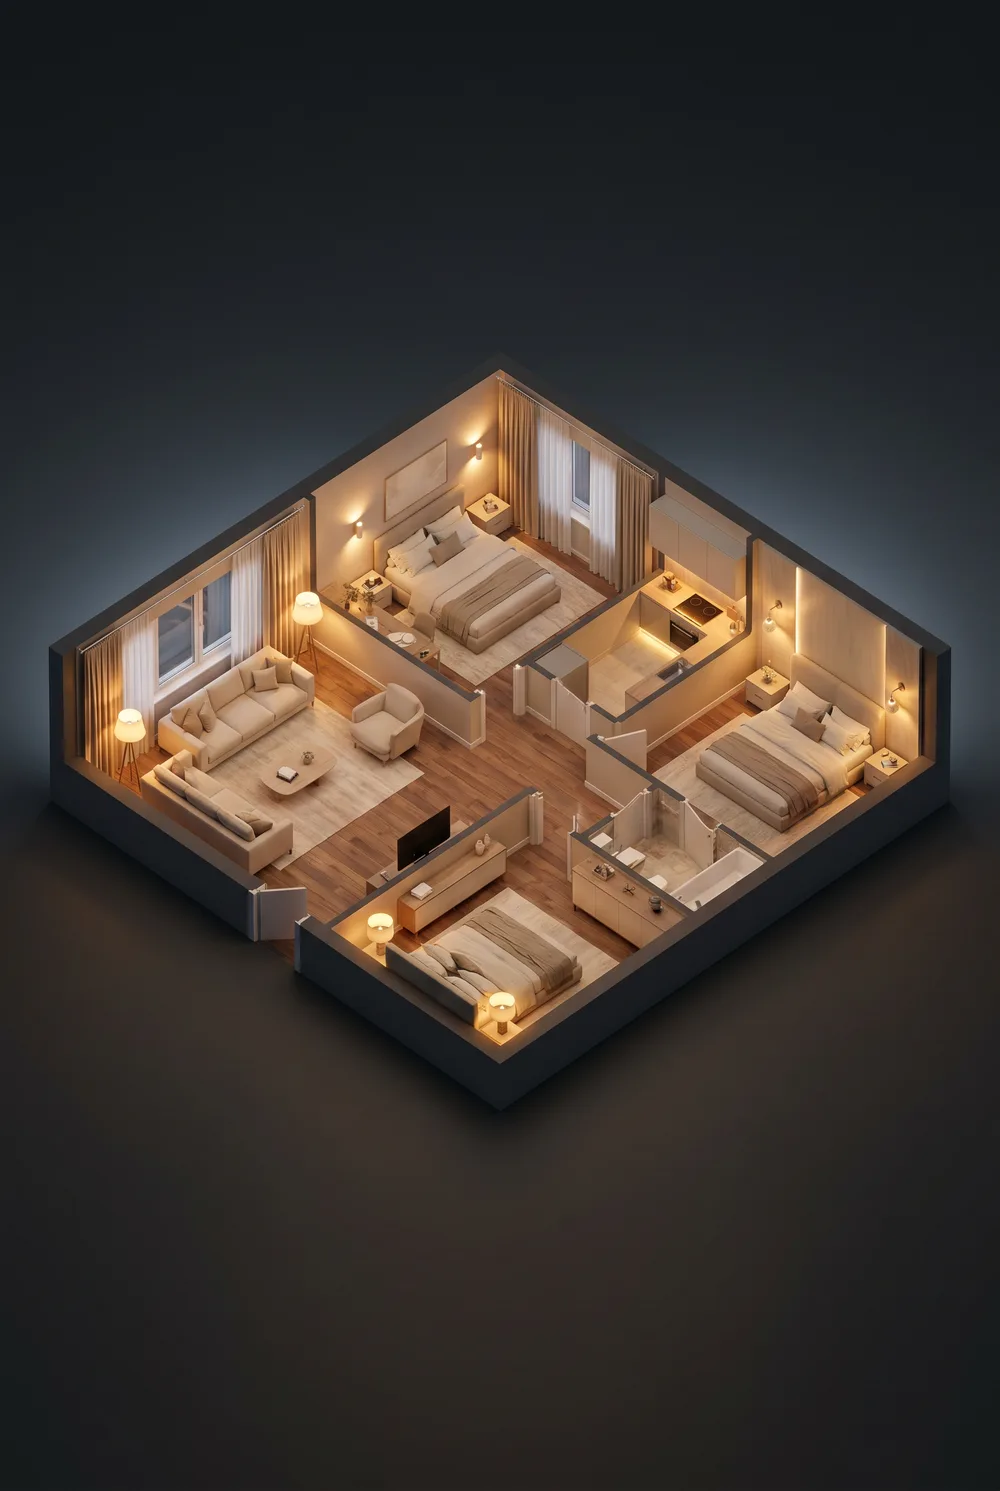 Hero output
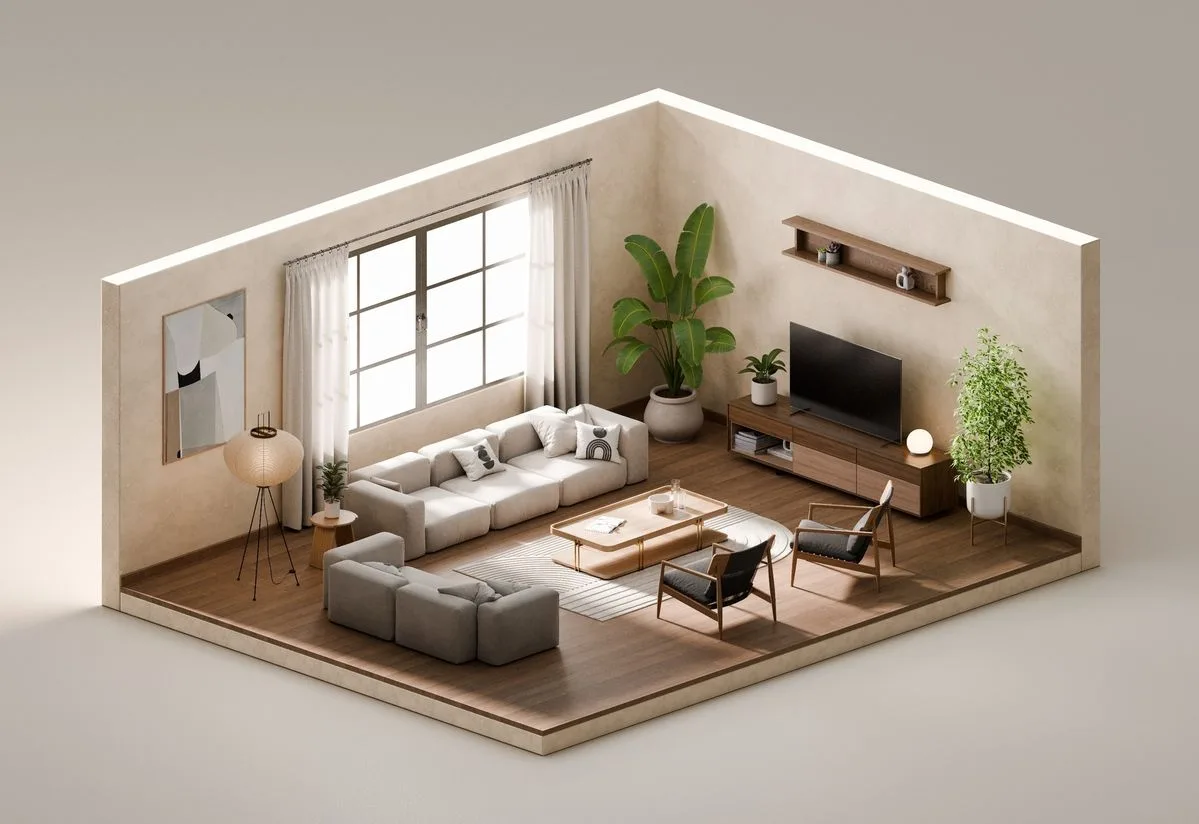 Apartment plan
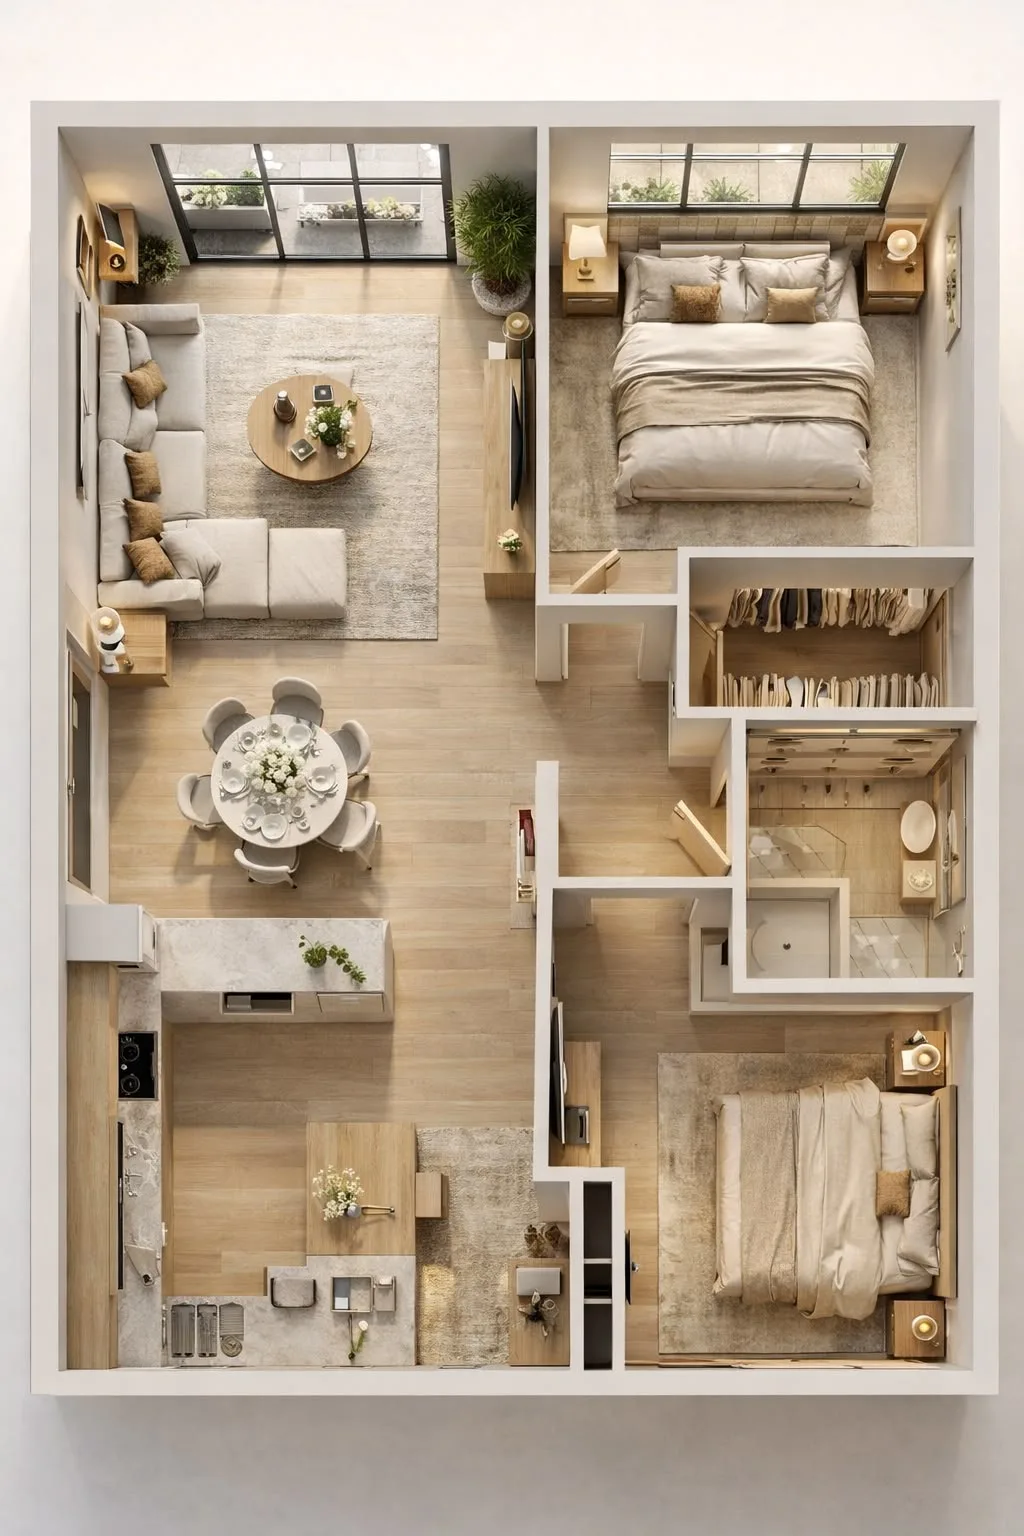 Villa plan
Understandable even without reading plans
Buyers don't have to interpret dimension lines — they see the space with its furniture and proportions.
More than a listing image
The same output works in the listing, the sales package, the proposal deck, and the project landing page.
One visual language across the portfolio
Produce dozens of unit types in the same style and angle, so types become easy to compare.
Who It's For
Show the space to buyers who can't read a plan.
This page is for real-estate offices, project sales teams, and architecture practices producing listings or presentations — if you have a scanned drawing, a PDF image, or a CAD export on hand, you can start right here.
A 2D technical drawing is a professional language. Buyers see lines and rectangles, not a space. A 3D floor plan tells the same story through furniture, proportion, and circulation. The classic route takes hours of modeling per unit; here, an existing plan is transformed in minutes through a single edit operation.
The reason is simple: the model only adds the requested layer — furniture, material, light. The room layout is locked with a protection instruction, so the result doesn't drift from the real unit. Once the same pattern repeats across every type in the portfolio, comparing types becomes easy too.
Example Outputs
Sample frames from this workflow.
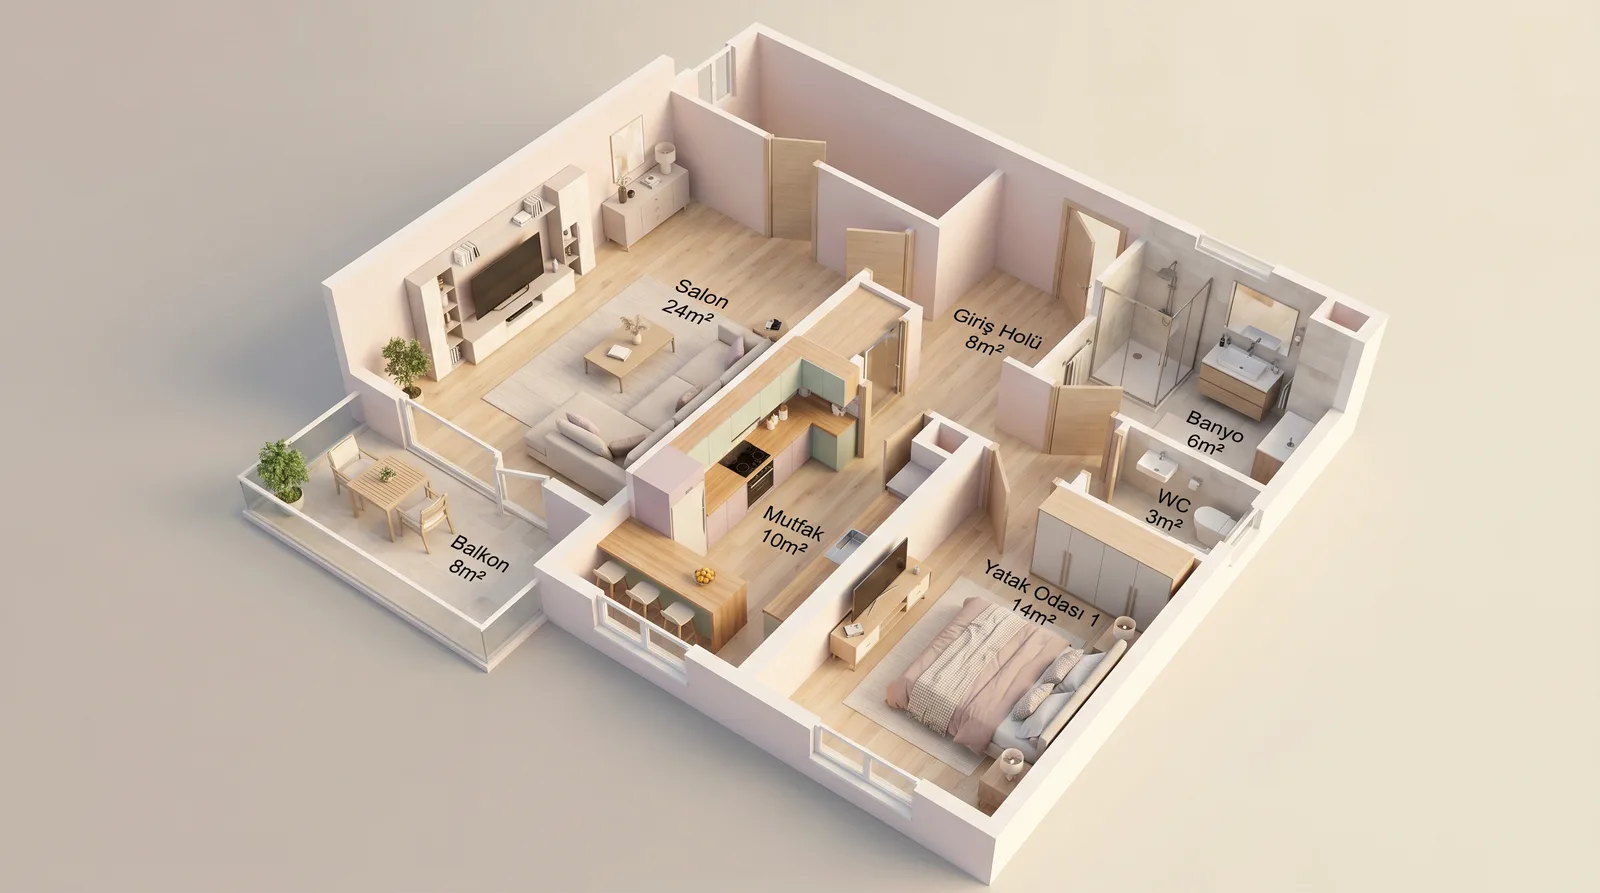
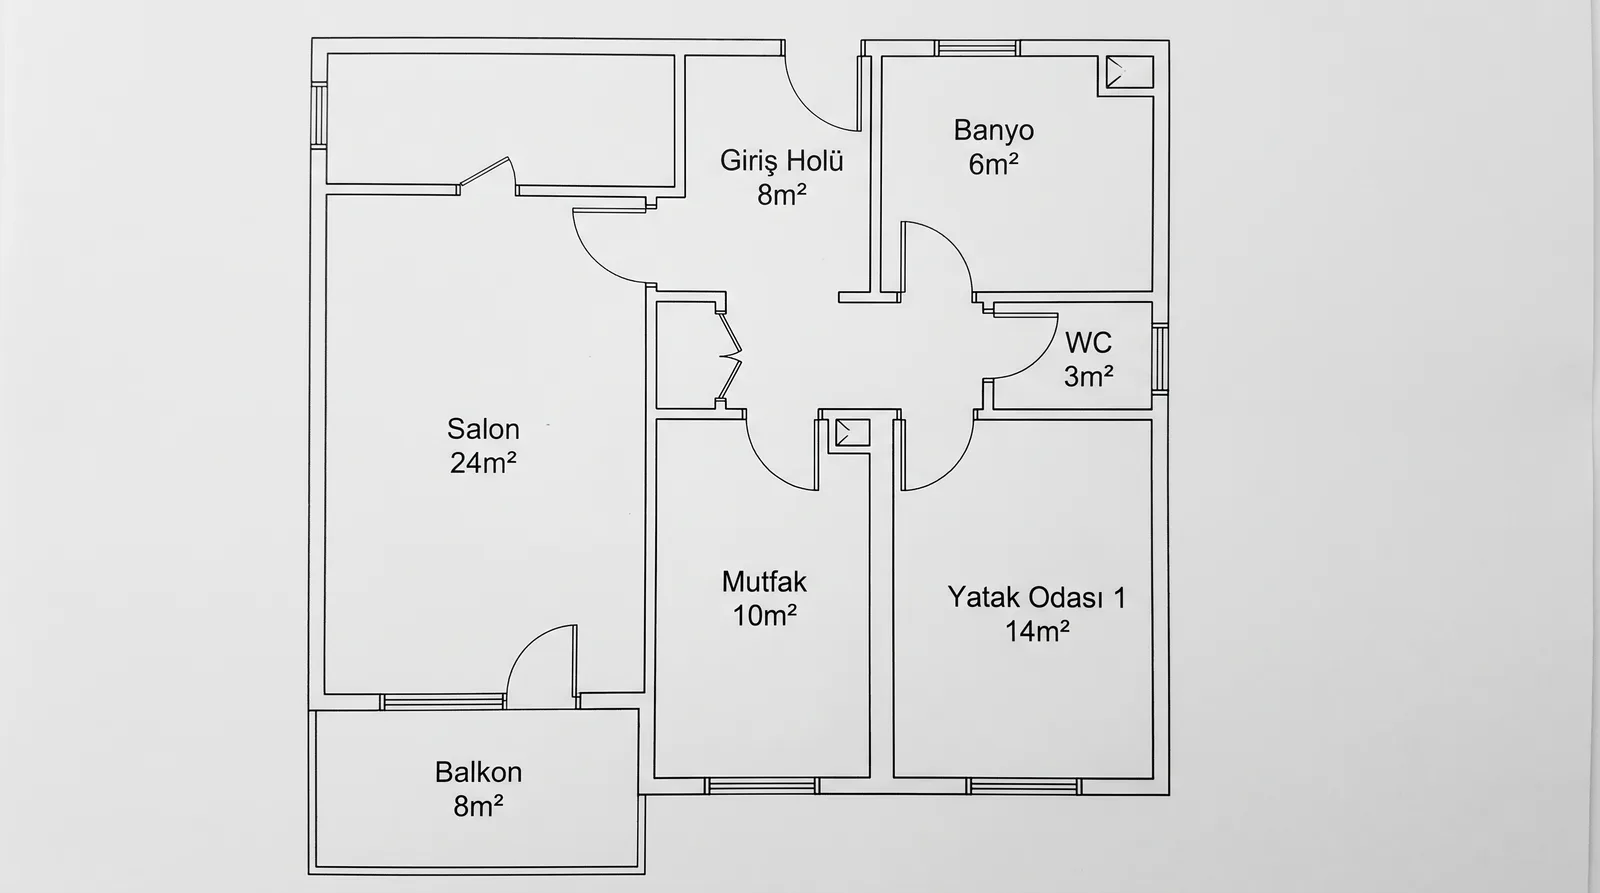
Same 3+1 layout — room labels and square footage preserved exactly; this pair was produced with Pattern 1 below.
Apartment planVilla plan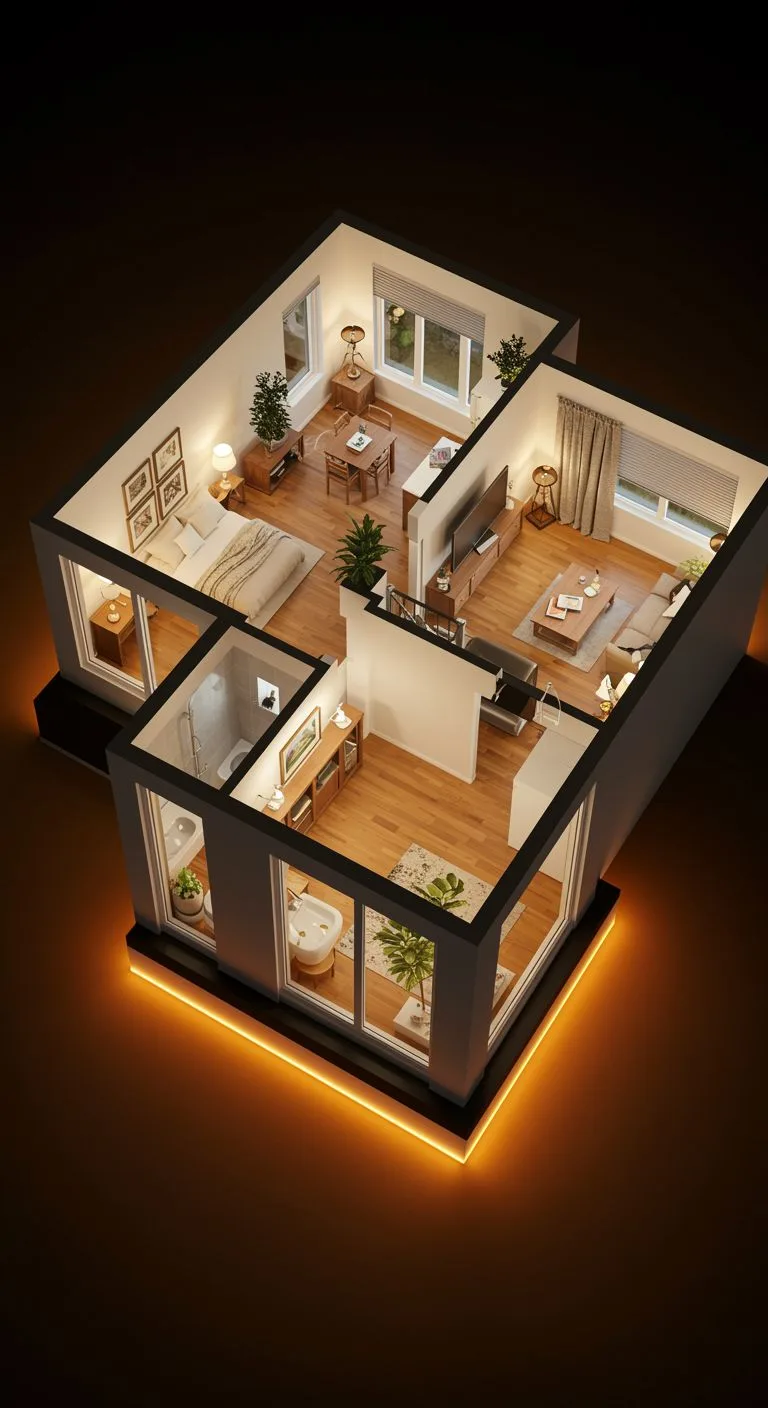 Presentation output
How It Works
From brief to output in three steps.
- 01
Bring in the plan
Upload the 2D plan as a PDF or image, and add the unit type and space-usage notes.
Input: 2D plan as PDF or image, Space-usage notes, Target style and furniture density, Brand or project references
- 02
Convert to 3D
The plan is turned into a perspective floor-plan visual with your chosen furniture density and style.
- 03
Publish it
Add the output to the listing, brochure, or sales presentation, and repeat the same format for other unit types.
Output: Presentation-ready 3D floor plan visuals, Multiple style and furniture options for the same plan, Clearer storytelling for listings and sales material
Deep Dive
4 rules for a good 3D floor plan
Lock the room layout
Without a protection instruction, the model designs a new apartment: walls shift, room proportions change, and the plan stops matching the real unit.
Pattern: "keep the room layout, wall positions, and door and window placements exactly the same."
Feed it a clean input
A blurry scan or a skewed photo gives the model more room to guess; a flat, legible, high-contrast image is essential.
Preserve the labels
Room names and square-footage values are what make a listing trustworthy.
Instruction: "keep the room names and square-footage labels exactly as they are."
Use one pattern across the portfolio
Same furniture language, same palette, same angle: buyers can compare types, and the brand reads as consistent.
Prompt Patterns
Copy, paste, try it.
Pattern 1 — 2D to 3D conversion
You have a clean 2D plan and need a furnished 3D visual for a listing.
Convert this 2D floor plan into a softly colored, furnished 3D floor plan visual. Keep the room layout, wall positions, and door and window placements exactly the same. Keep the room names and square-footage labels exactly as they are. Top-down view with no perspective distortion; soft shadows, natural material tones.
Without the protection sentences, the model may reinterpret the layout.
Pattern 2 — Empty / furnished pair
You want to show the same unit both empty and furnished.
Generate this 3D floor plan thinking of it as two versions: in this version, remove all the furniture — keep the walls, doors, windows, and labels the same; leave the floor materials visible.
For the furnished version, use Pattern 1 with the same input — the layout stays locked across both generations.
Pattern 3 — Locking a portfolio style
You want every typology on the site to share the same visual language.
Convert this plan in the same style as the previous plans: light oak flooring, cream walls, gray textile furniture, soft daylight, top-down angle. Keep the room layout and labels exactly the same.
Write the style block once, paste it as-is for every type.
Comparison
How this differs from the classic 3D floor-plan workflow
| Aspect | Classic method | Syntina workflow |
|---|---|---|
| Starting point | Building a 3D model from scratch | Your existing 2D plan image |
| Time scale | Hours per unit | Minutes per plan |
| Revisions | Back to the modeling file | A new prompt with the same input |
| Type series | Separate modeling work per type | The same style pattern repeated for every type |
| Where the output lives | Usually single-use (presentation) | Listing, brochure, and presentation draw from the same output |
Scenarios
Where it's used in the field.
- Real-estate listings
- Sales-office marketing materials
- Presentations comparing unit types
- Type series for social media and listing carousels
- Floor-by-floor layout storytelling in investor decks
Final check
Before it goes into the listing
- Do the room count and wall positions match the input exactly?
Even with the protection instruction, compare the output against the original plan and give it a visual check.
- Are the square-footage labels legible and correct?
The model preserves labels but doesn't verify them — the values in the source plan need to already be correct.
- Did you add an "illustrative layout" note?
Furniture placement is a suggestion; this should be made clear in the listing.
- Is every unit type in the same style?
When furniture language, palette, and angle repeat, the portfolio reads as if it came from a single, consistent brand.
- Is the resolution right for the publishing platform?
Listing sites, print, and social media each call for a different resolution — check the output against your target channel.
FAQ
Frequently asked questions
- How many unit types can I get from a single 2D plan?
- You can generate multiple unit types in parallel from the same plan by varying furniture density and style — no need to plan each portfolio type separately.
- Can I show the same plan with different furniture levels?
- Yes. Empty, lightly furnished, or fully furnished variations can all be prepared.
- Is the output only for listings?
- No. It also works in sales packages, landing pages, presentation decks, and proposal packages.
- Does a scanned or hand-drawn plan work?
- Yes, as long as it's clean and legible. A scan or hand sketch can be a starting input as long as the lines are clear and labels are readable; if the image is blurry or skewed, clean it up first.
- Are square footage and dimensions preserved?
- Labels are preserved through a protection instruction; the model doesn't verify or correct measurements — whatever is in the input carries through to the output as-is. The figures on your plan need to already be correct.
- Which model is recommended?
- The default model, gpt-image-1.5-edit, is enough for most floor-plan conversions. For presentations that need higher photorealism, nano-banana-pro-edit is available.
- How is the top-down angle guaranteed?
- There's no fixed camera in the code — the angle is requested through the prompt instruction. Adding a phrase like "top-down view, no perspective distortion" keeps the angle consistent.
- How does cost work?
- Generation runs on the credit system; every generation deducts credits from your balance. You can see the credit table, which varies by model and resolution, on the pricing page.
Your plan is ready — the visual is minutes away
Upload your 2D plan and send it with a protection instruction — it turns into a furnished 3D visual while the room layout and labels stay unchanged.
Start with free credits, and upgrade to a plan whenever you're ready.