
Render without leaving the scene; the final touch before delivery.
Render directly from your 3ds Max, SketchUp, and Blender scene without exporting; cut client revisions down to minutes and add a final polish layer before delivery.
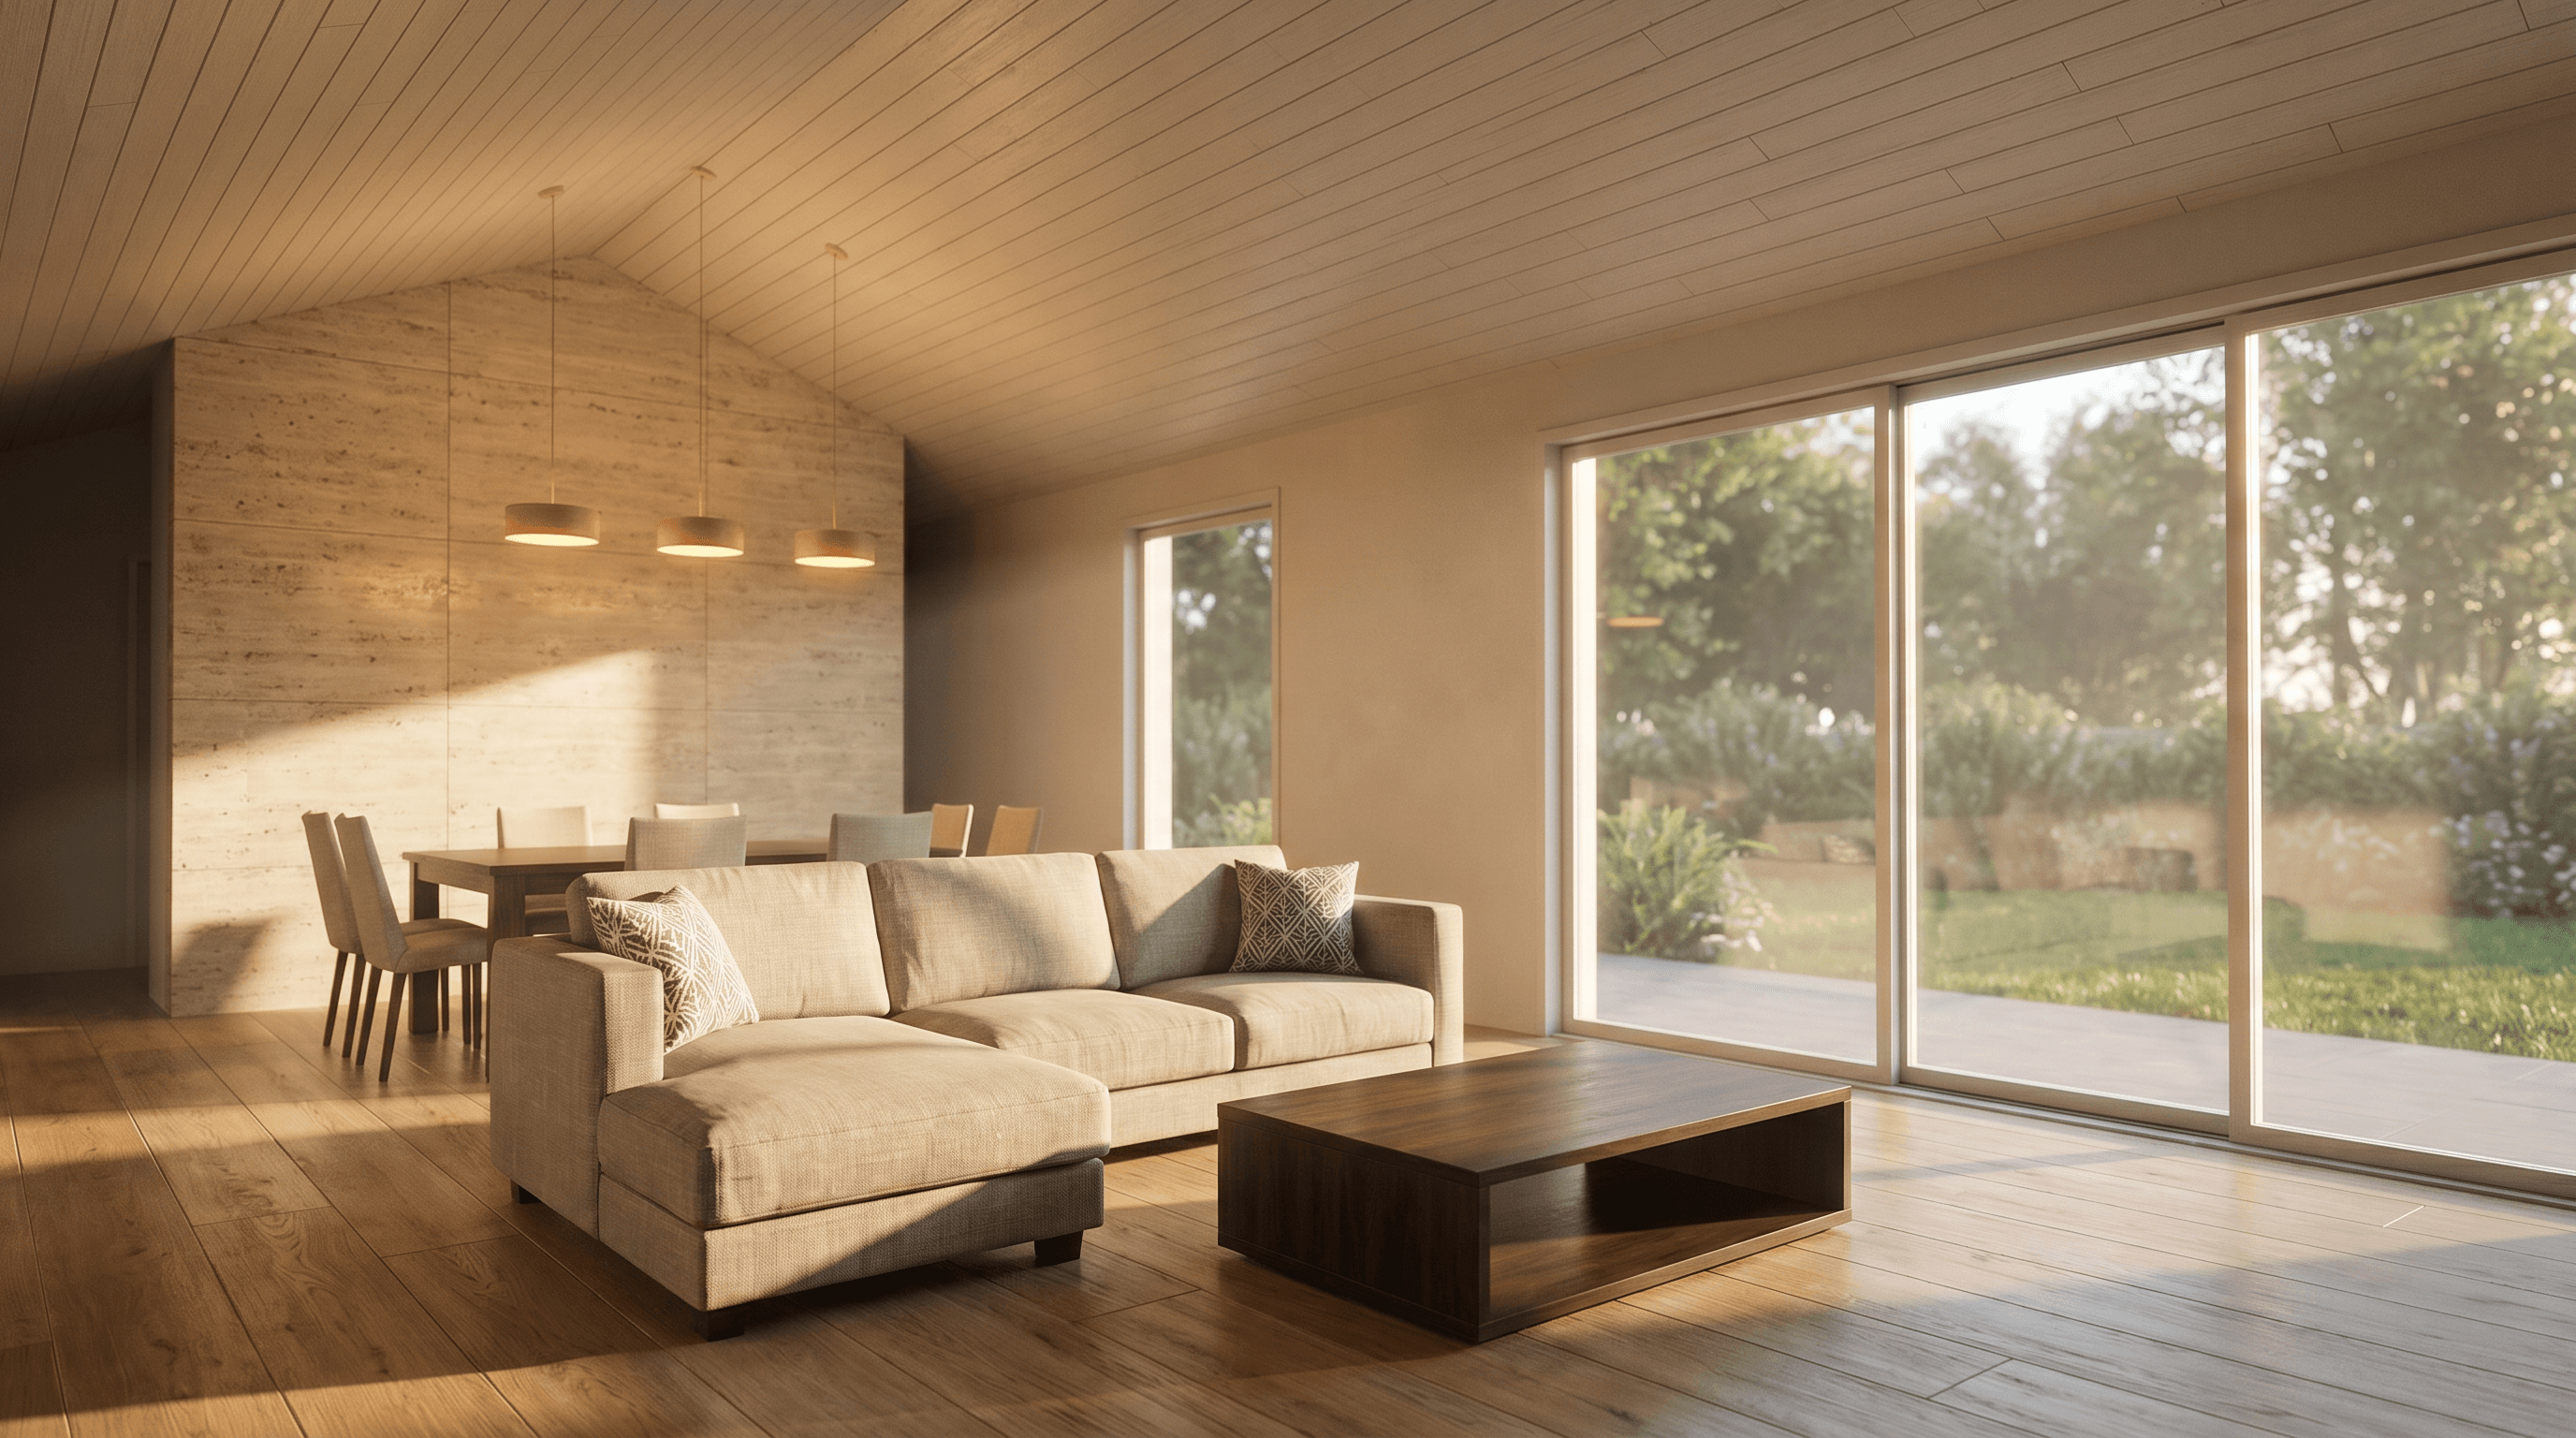 Studio output
 Golden hour variant
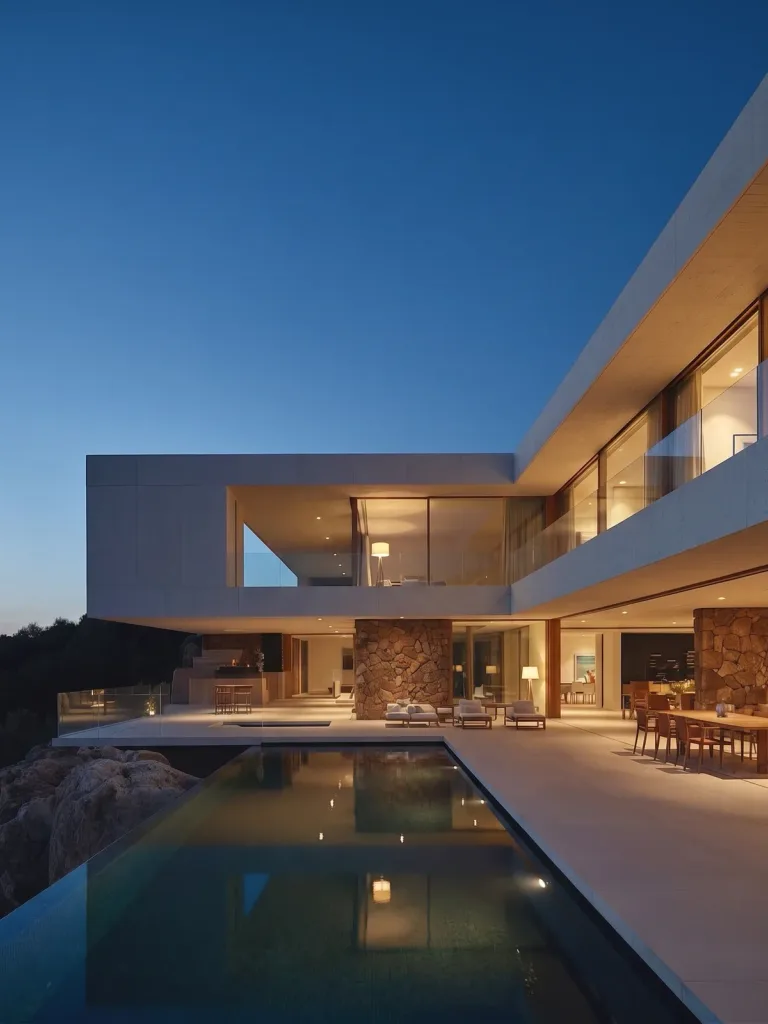 Night variant
You never leave the scene
Render directly from your 3ds Max, SketchUp, or Blender viewport — no exporting the scene to another program.
Revisions drop to minutes
When a client says "push the light to evening, change the material," you don't rebuild the scene — you generate a new variation of the same frame.
A final polish before delivery
Strengthen the frame you produced in a classic render engine with a detail and resolution layer before delivery.
A Studio's Weekly Rhythm
Five clients, five deadlines, one window.
A week at a freelance archviz studio goes like this: Monday, exterior variations for a residential project; Tuesday, a revision round for a showroom client; Wednesday, a quick preview for a new proposal. Every client brings their own scene, their own revision tempo.
Once you've built the scene in 3ds Max or SketchUp, you render straight from the viewport — without exporting the scene and moving it to another program. When a client says "change the flooring material," you don't go back into the scene and relight it; you just write a new prompt against the same frame.
Before delivery, you run the final frame you produced in a classic render engine through a polish layer to strengthen detail and resolution. You give the client not one frame but a few alternatives that clearly differ in lighting and material — approval closes on the first round.
Example Outputs
Sample frames from this workflow.
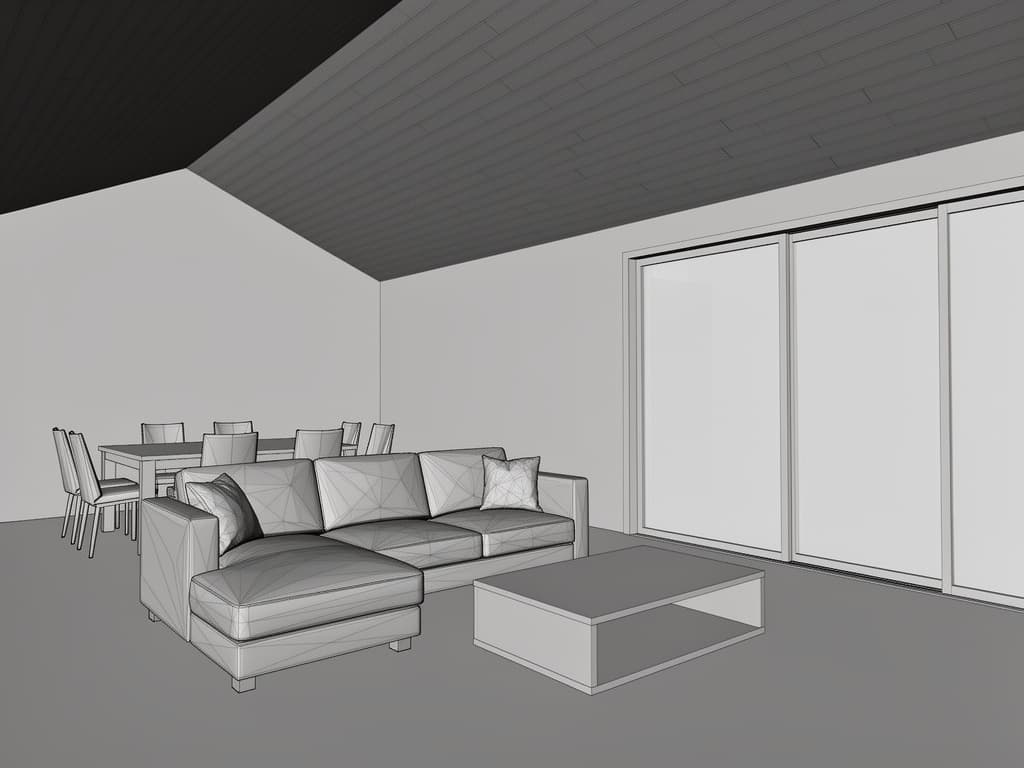
The backbone of the studio flow: a frame sent without leaving the scene becomes a client variation set in minutes.
Golden hour variantNight variant Final polish
How It Works
From brief to output in three steps.
- 01
Start from the scene or the render
Upload your 3ds Max, SketchUp, or Blender viewport, or your existing render frame.
Input: 3ds Max, SketchUp, or Blender scene image, An existing render frame, Client revision notes, Material and lighting references
- 02
Generate the variation or the polish
Try a material, lighting, or resolution change in the same composition; add the final layer before delivery.
- 03
Go to the client with a set
Present several alternatives in one package instead of a single frame; move the approved direction into your final delivery pipeline.
Output: Quick preview renders produced from the viewport, Targeted revision variations, Polished, high-detail final frames, Alternative sets ready for client approval
In Depth
3 rules for efficiency at studio volume
Produce without leaving the scene
The plugin workflow captures the viewport directly and lets you produce output without leaving 3ds Max, SketchUp, or Blender; intermediate steps like taking a screenshot and moving it to another program disappear.
This especially cuts context-switching cost in client processes with a steady stream of small revisions.
Treat a revision as a new prompt, not a new scene
Write revision requests as a targeted instruction — "only X should change, keep everything else the same" — instead of re-describing the scene from scratch; this is both faster and more predictable.
For clients you work with often, saving this pattern as a template saves time on every revision round.
Plan the pre-delivery polish as a separate step
Use the detail and resolution enhancement (enhance) step only on the final frame going to the client; skip it on quick internal previews to save credits and time.
This step doesn't replace your render engine — it's a final layer that brings its output up to delivery standard.
Prompt Patterns
Copy, paste, try it.
Quick preview from the viewport
You need to send the client a quick atmosphere preview during the proposal stage.
Convert this 3D viewport capture into a photorealistic architectural render. Keep the camera angle, geometry, and material assignments identical. Add realistic global illumination, soft natural daylight, subtle ambient occlusion, and a clean sky background.
The clearer and more accurately framed the viewport capture, the more reliable the result.
Targeted revision
The client only wants the flooring material changed — everything else is approved.
Regenerate this same render with only the flooring material changed to honed gray limestone. Keep every other element — walls, furniture, lighting, camera angle — exactly identical to the original image.
The "only X should change, keep everything else the same" pattern gives the most reliable result on revision requests.
Final polish before delivery
You want to strengthen the final frame you produced in a classic render engine before delivery.
Enhance this architectural render: increase material detail and texture sharpness, refine lighting realism and shadow softness, subtle color grading for a warm editorial finish. Keep composition, geometry, and camera framing exactly the same.
Use this step only on the final frame going to the client; it's not necessary on quick previews.
Comparison
How it differs from a classic studio workflow
| Step | Classic workflow | With Syntina |
|---|---|---|
| Render from viewport | Taking a screenshot and moving it to separate software | Direct production from the viewport via plugin |
| Revision round | Going back into the scene to relight/re-material | A new variation of the same frame with a targeted prompt |
| Multi-client volume | Every project needs its own dedicated time block | The same workflow repeats across different scenes |
| Pre-delivery polish | A separate post-production tool | An enhance step in the same workflow |
| Client approval set | Usually just one frame is presented | An alternative set with material/lighting variations |
Scenarios
Where it's used in the field.
- Freelance archviz projects
- Render studio client deliveries
- Quick viewport preview renders
- Post-classic-render final touch (enhance)
Final Check
Before you send it to the client
- Is the viewport capture clear and accurately framed?
If framing and material assignments aren't clear, the model adds its own interpretation.
- Is the revision request written as a targeted instruction?
A clear instruction like "only the flooring should change" gives more reliable results than re-describing the scene from scratch.
- Is it clear which plugin/workflow to use?
3ds Max, SketchUp, and Blender each have their own setup steps — pick the one that matches your scene.
- Is the polish step planned only for the final frame?
Skip this step on quick previews to save credits and time.
- Is the client getting an alternative set instead of a single frame?
A set with material or lighting variations speeds up approval.
FAQ
Frequently asked questions
- Which software does the plugin work with?
- We have plugins that render directly from the viewport for 3ds Max and SketchUp; there's also an add-on workflow for Blender. Each is explained with setup steps on its own page.
- Does it replace my classic render engine (V-Ray, Corona)?
- No. This workflow is for quick previews, revision variations, and pre-delivery polish; it doesn't replace your studio's final render pipeline — it complements it.
- How does it speed up client revisions?
- Requests like "change the material, push the light to evening" don't require a new scene setup; you generate a second variation of the same frame with a new prompt.
- How does credit cost scale with studio volume?
- Generations run on the credit system; the Business plan and team seats fit heavy usage. See the current table on the pricing page, and contact us for enterprise volume.
- Are our client scenes and render files safe?
- Images you upload are processed only for the generation you request; infrastructure providers such as fal.ai and BytePlus/ModelArk may be used in that process. Details are in our privacy policy.
- Can I get high-resolution output for print or a large-screen presentation?
- Yes. High-resolution output is available depending on the model and resolution setting you choose; an upscaling step can be added for very large formats.
This workflow doesn't replace your render engine — it speeds it up
This workflow is built for quick previews, targeted revisions, and pre-delivery polish; it doesn't replace your studio's established render pipeline — V-Ray, Corona, or Cycles. For deliveries that critically need photorealism and physical accuracy, a classic render engine is still the reference point.
Team seats and enterprise credit packages for high-volume studio use are on the pricing page; contact us for custom integration needs.