
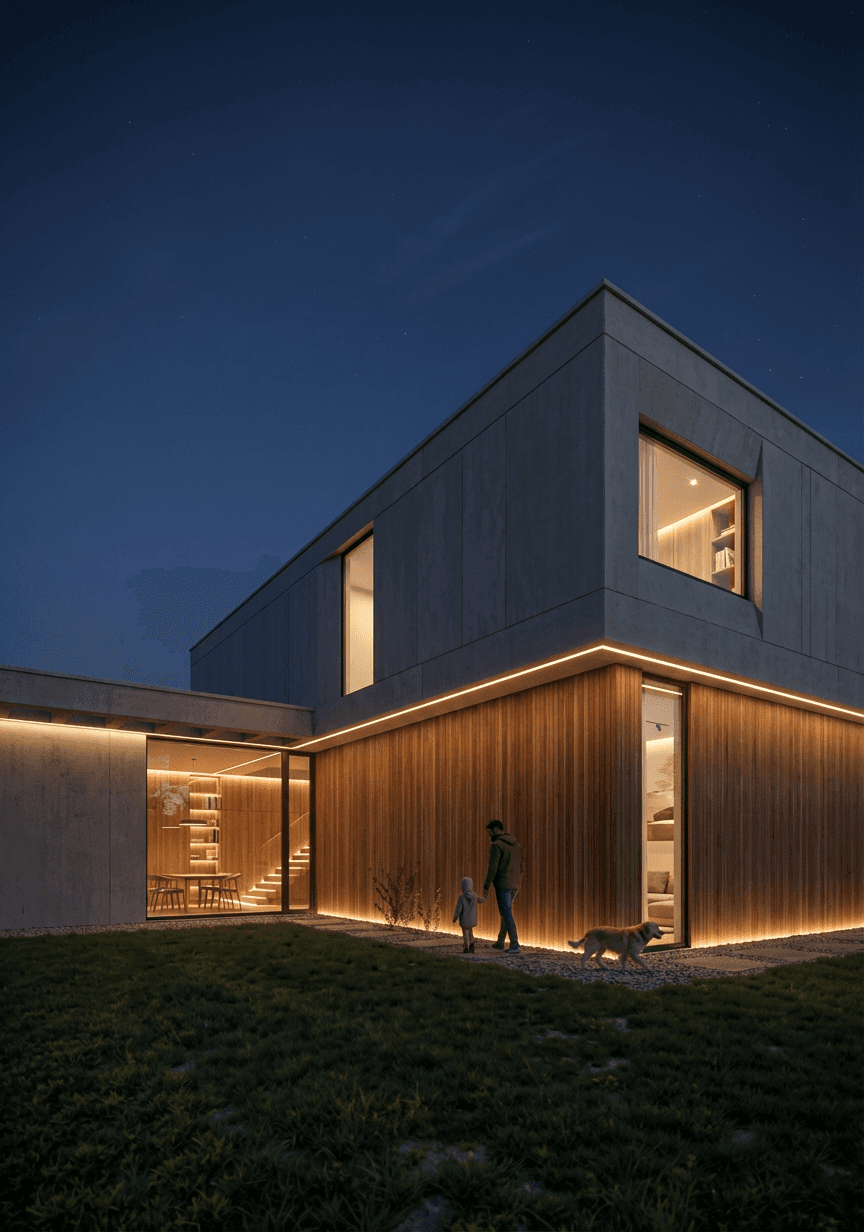
Every architect knows a project's purest form lives in the first sketch. Those spontaneous lines carry the space you had in mind before it ever reached CAD. But sitting across the table from a client, getting them to see that same potential in a rough drawing is rarely easy.
Turning a sketch into a photorealistic render fills exactly that gap. But before you use it, one thing needs to be clear: not everything survives the conversion. Some of it carries over from your sketch unchanged; some of it, the model decides for you. Skip that distinction and you'll hit the "why isn't the material what I imagined" question sooner or later.
What the sketch decides, what the model decides
When converting a hand sketch into a photorealistic render, the model reads and preserves three things from your sketch:
- Massing proportions — the building's overall volume, how many floors it has, its projections and setbacks.
- Openings — the number, position and proportion of windows and doors.
- Perspective — the camera angle and viewpoint you drew.
These are decisions your lines already made; the model doesn't try to change them, it wraps a photorealistic surface around them.
But a sketch usually doesn't say: what material is the facade? Concrete, plaster, brick? What color are the window frames? That's exactly where the second rule kicks in: any decision your sketch doesn't make, the model makes for you if your prompt doesn't make it either. This is the sketch-specific version of the "the model fills in every decision you leave blank" principle from our prompt-writing guide — and in practice, this is where most surprises happen, because most architects already have the material settled in their head while sketching, but forget to write it into the prompt.
The result: render the same sketch twice without a material sentence, and you get a random material combination each time. Name the material by name in your prompt, and that decision stays yours.
Proof: one sketch, two material languages
The sketch below is an AI-generated demo drawing made for this article — not a real hand sketch — but it goes through the exact same process as a real one would as visual input. We sent this single sketch through two separate render requests, each with a different material sentence. Massing, openings and camera angle came from the same source in both.
Source sketch:
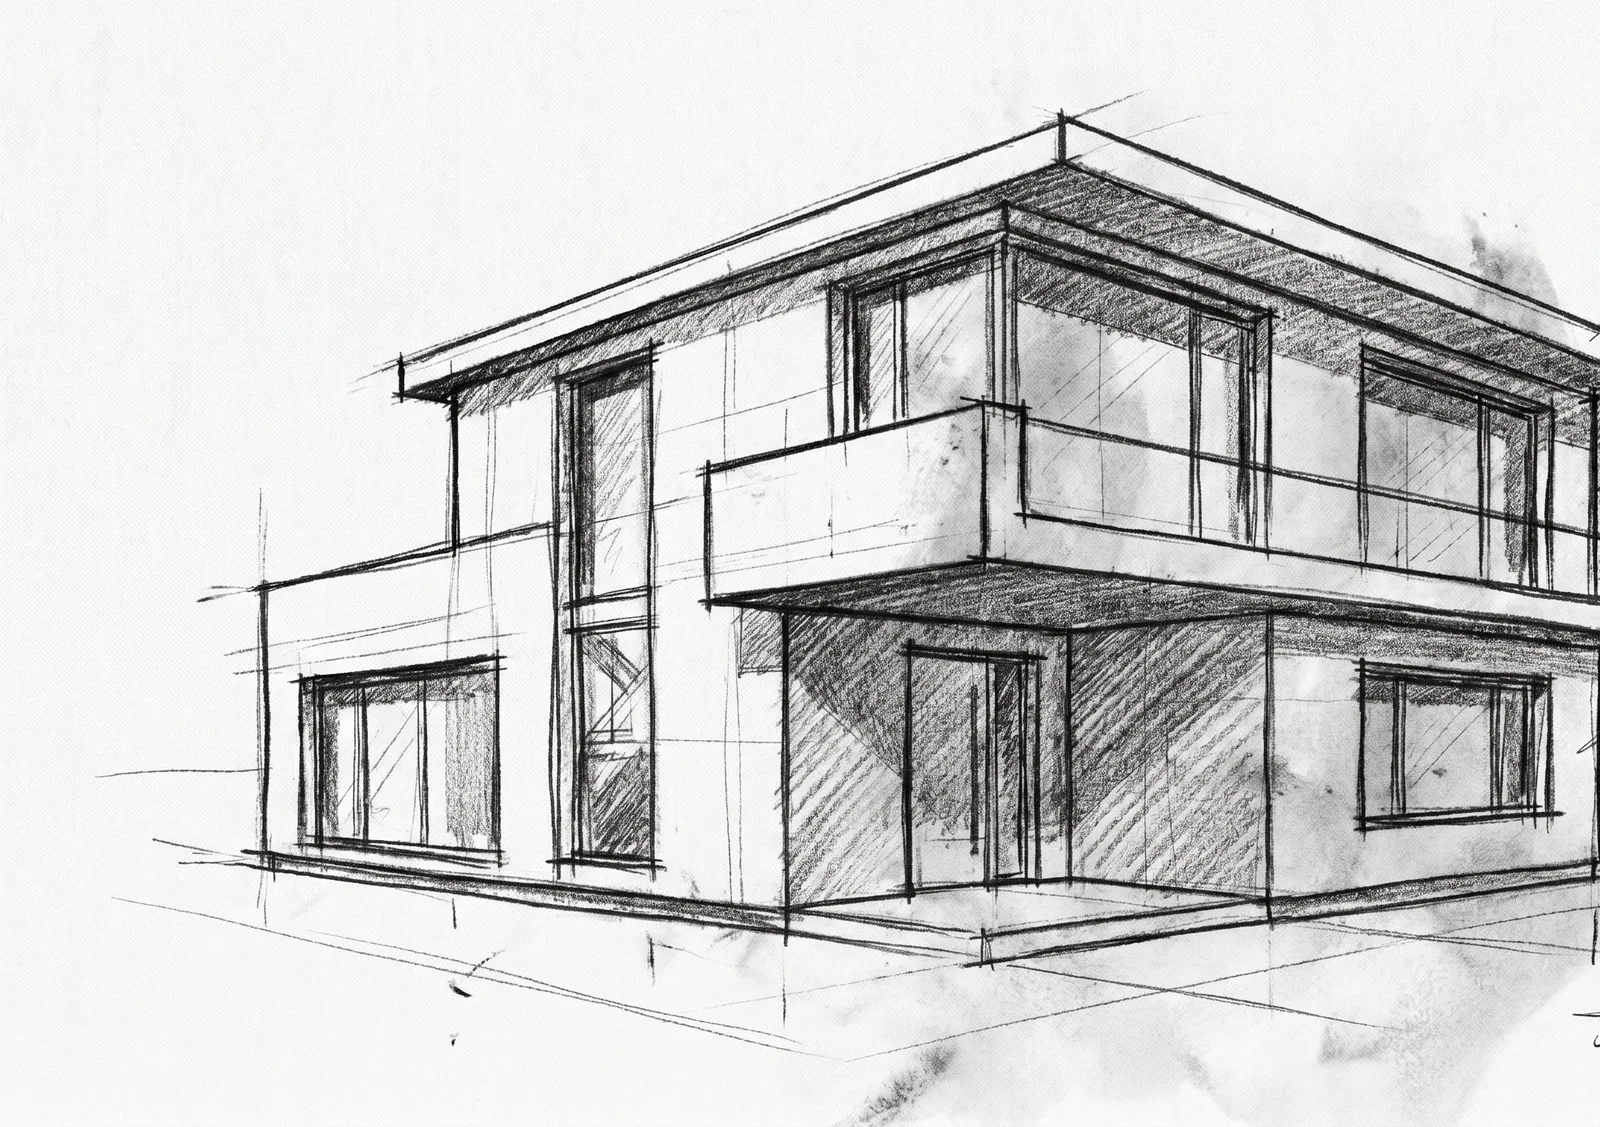
This sketch clearly describes the massing: two floors, a flat roof, an upper floor that cantilevers forward, wide glazing at entry level, a narrow vertical window strip in the middle, and a glass-railed balcony on the upper floor.
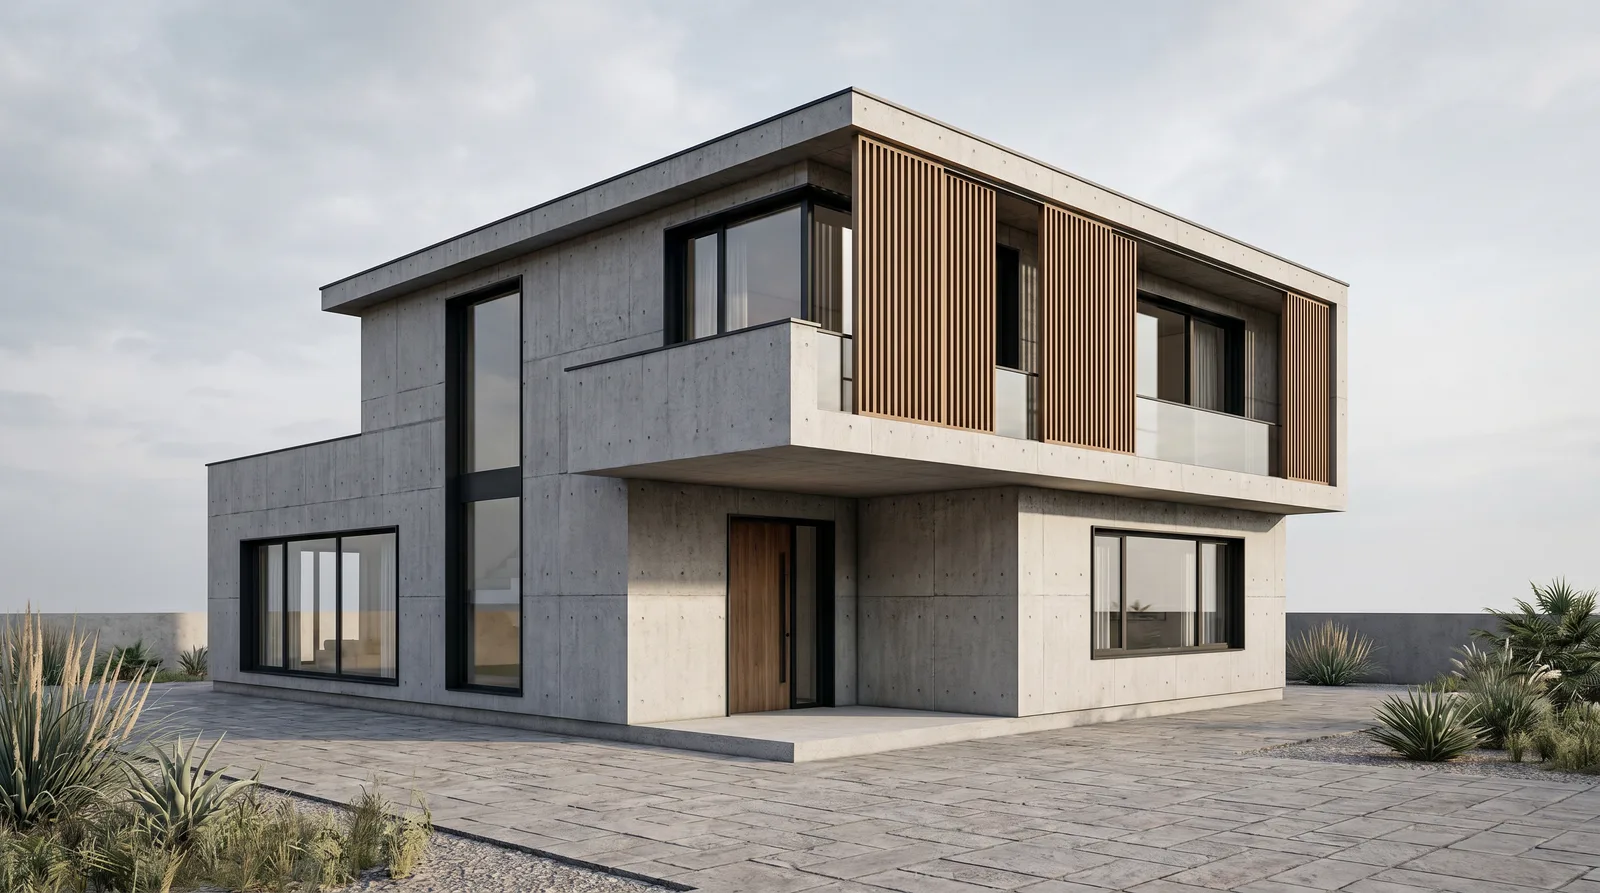
Render 1 — "Materials: raw concrete facade, wood-slat sun screen, wide glazing with black frames":
Render 2 — same sketch, "Materials: off-white stucco facade, natural stone cladding strip at ground floor, bronze frames":
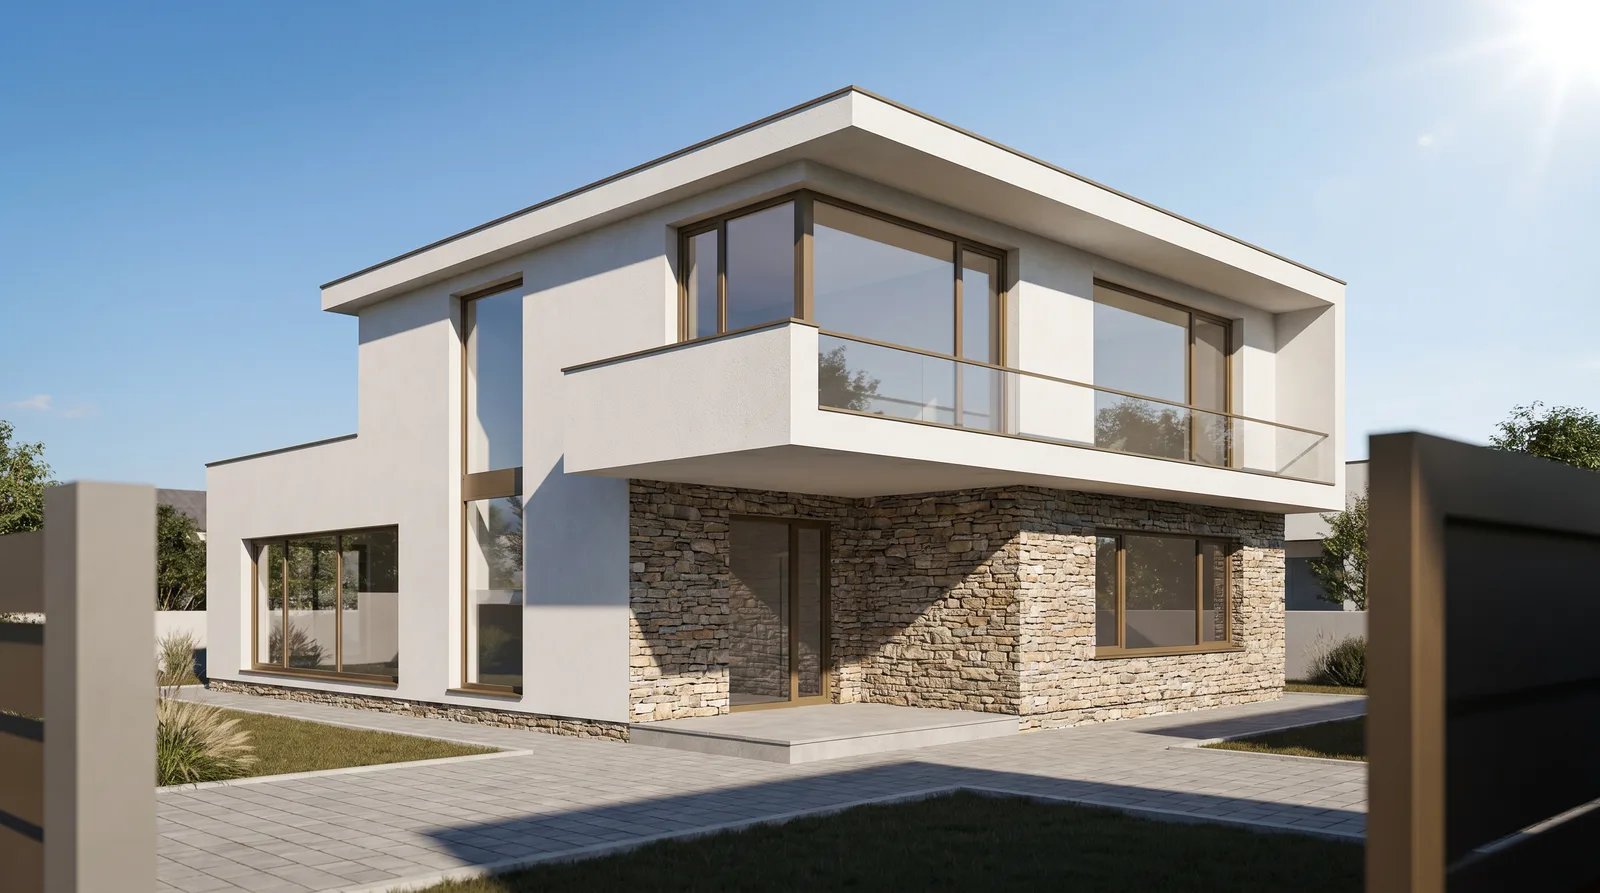
Both renders carry the same two-story massing, the same cantilever, the same balcony position, and a similar camera angle — the decisions in the sketch are recognizable in both results. But the facade identity is completely different: one is cold-industrial concrete-and-wood, the other is warm-classic stucco-and-stone. That difference isn't the model being indecisive — it's the result of two different material sentences we wrote. Without a material sentence, which one you'd get would be down to chance.
An honest note: at intersection points (say, where the wood slat meets the glass surface), the model interprets some details slightly differently from the sketch — a reminder of the gap between a "concept render" and a "construction detail." This tool doesn't produce a dimensionally precise technical drawing; it produces a presentation-quality concept image.
The workflow, step by step
- Photograph or scan your sketch in even light. A flat angle, no shadows, no glare — the cleaner the input, the more accurately the model reads your lines.
- Choose the Sketch → Render preset. It's built specifically to preserve line language and composition while adding a material/light layer.
- Write a short, concrete material sentence. Not "make it nice" — something like "raw concrete facade, black steel window frames, warm evening light." One or two sentences is enough; naming the material family reduces how much the model has to guess.
- Set the light and atmosphere. Golden hour, overcast midday, blue-hour evening — pick a time of day and mood in the same sentence.
- Generate a few variations. Because material is the biggest variable a sketch doesn't specify, running two or three material options from the same sketch is a normal, fast way to compare options before you commit.
Revising after the first result
Your first render is rarely the final one. If the client wants one material swapped after seeing the first pass, the right move isn't to re-describe the whole scene — it's an edit, built around a preservation clause:
Keep everything in the image the same — composition, camera angle, light, and every other surface unchanged. ONLY change the [material A] to [material B]; keep its form and position exactly the same.
This preserves the massing, perspective and everything else you already locked in, and only changes the one thing you asked for — the same principle the concrete-vs-stucco comparison above demonstrates, just applied to a single existing render instead of two fresh ones.
Where this fits
- Early client meetings — showing two or three material directions from the same sketch, live, before committing to one
- Competition entries — visualizing a concept sketch fast, without waiting on a full 3D model
- Design reviews — testing a material change against the same massing before touching the model
- Portfolios and student work — presentation-quality images from a hand drawing, without a render-engine license
FAQ
Can any hand sketch be turned into a realistic render?
Most concept sketches with clear massing, openings and a legible perspective work well. A sketch with an unclear or conflicting perspective (multiple vanishing points, a distorted volume) will carry that ambiguity into the render — the model doesn't correct your perspective, it builds on top of it.
Does the render keep the exact proportions of my sketch?
Massing proportions, opening positions and your drawn perspective are preserved — that's the input's job. What isn't specified in your sketch (material, color, light) is filled in by the model unless your prompt states it. A dimensionally exact technical drawing is a separate deliverable from a concept render.
How specific should the material prompt be?
As specific as you can make it. "Wood facade" is weaker than "horizontal cedar slat cladding, natural finish." Naming the material family, the finish, and the frame color gives the model far less room to guess — and gives you a far more repeatable result across variations.
Can I get multiple material options from the same sketch?
Yes — that's the normal way to use this. Keep the sketch and the massing/perspective fixed, and change only the material sentence between generations; you'll get comparable variations from the same source input.
Try it on your own sketch with the Sketch → Render preset, read the full AI architectural rendering guide for the wider workflow, or start free.