
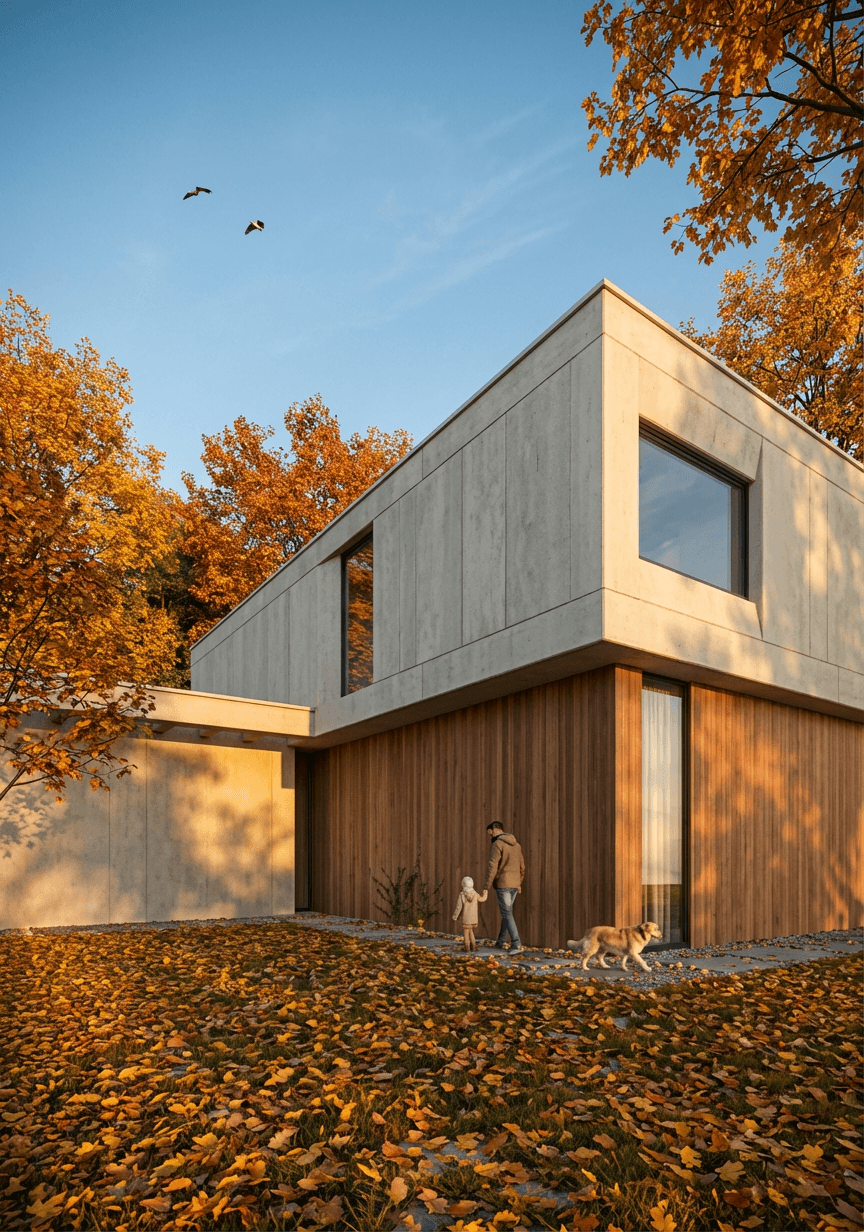
"AI architectural rendering" has moved from a curiosity to a line item in most studios' toolkits over the last two years — but the term still gets misread two ways. Some architects treat it as "a replacement render engine for V-Ray." Others expect "press one button, get a finished project image." Neither is quite right.
The real reason the interest exists is simpler: the most tedious part of a classic render pipeline — assigning materials, setting up lights, waiting for the frame to resolve — is usually spent on decisions that aren't even final yet. When a client says "what if that wall were a different color," answering that with a classic pipeline can cost hours. AI rendering exists to compress exactly that early decision-making loop.
This guide covers what AI architectural rendering actually is, how it differs from a classic render engine, which inputs it accepts, and how a real workflow runs from input to a client-ready image — including a genuine two-step revision on the same render, not just a description of one.
What is AI architectural rendering?
AI architectural rendering is the process of feeding a visual model — a sketch, a photo, a screenshot, or a floor plan — plus a short written description (a prompt) into an image-generation model, which then produces a new image. The model reads the composition, the massing, and usually the perspective of your input, and adds a layer of material, light, and atmosphere on top of it.
This is mechanically different from a classic render engine (V-Ray, Lumion, Corona, Enscape):
| Classic render engine | AI rendering | |
|---|---|---|
| How it works | Physically simulates light, materials and camera in a 3D scene (ray tracing, global illumination) | Interprets an input image and a prompt to generate a new image |
| Input required | Full 3D model + material assignment + lighting setup | A single image (sketch, screenshot, photo, plan) + a short prompt |
| Time | Minutes to hours, depending on scene complexity | Typically seconds |
| Technical accuracy | High — dimensions, shadow angles and material physics are calculated | Visually convincing, but carries no dimensional guarantee |
| Best for | Delivery-grade, technically verified final images | Fast concepts, variations, and pre-presentation alternatives |
So AI rendering isn't trying to replace V-Ray — it's trying to speed up the concept and decision stage that happens before you'd normally open V-Ray. An architect can turn a sketch or a viewport screenshot into a presentable image in minutes, without finishing the 3D model, without assigning materials, and without setting up lights first.
Which inputs does it accept?
AI rendering models accept several different input types, and which one you use shapes the character of the result:
- Hand sketch — a pencil or marker concept drawing, photographed on a phone. One of the most common entry points, because the model can preserve your line language and composition while layering material and light on top.
- SketchUp / 3ds Max / Rhino / Revit viewport screenshot — a plain, unmaterialed export straight from your modeling software. Because the camera angle and massing are already locked, the model adds a material/light layer directly on top.
- Floor plan — a 2D CAD blueprint exported as a PDF or PNG. Here the information that must be preserved isn't perspective — it's scale and proportion, so a plan needs an orthographic (top-down) preset rather than a perspective one.
- Reference photo — a photo of an existing space or façade (for renovation or material-swap work). Used to answer "what would this look like if we changed X" before touching the real building.
Each input type maps to a different generation flow. A sketch needs a different preset than a floor plan, because what has to be preserved is different — one is perspective and massing, the other is scale and proportion. Pairing the wrong preset with the right input is the most common reason a result looks "off" from what was expected.
Step-by-step: from input to image
- Prepare your input. Photograph a sketch in even light, without shadows, at a straight angle — or export your viewport at 1600px wide or more. For a floor plan, make sure the black-and-white contrast is clean.
- Pick the matching preset. If you're starting from a sketch, the Sketch → Render preset preserves your line language and composition while adding material and light. A CAD/viewport input calls for a different preset — see how it works for which preset fits which input.
- Add a short brief. Material family, time of day (golden hour, night, overcast), and an atmosphere note — a sentence or two is enough.
- Generate. Results typically arrive in seconds. Producing a few variations from the same input (different light, different material) is a normal part of the workflow.
- Pick a result, then revise if needed. The first output is rarely "final" — a couple of small edits (material swap, light shift) usually get you the rest of the way.
Choose the right operation: generate, edit, or refine
Presets give you a ready-made flow for a fresh input (sketch, plan, viewport). But if you already have a render and want to change one thing about it, picking the right operation matters as much as the prompt itself:
| What you have | Right operation | Why |
|---|---|---|
| An input (sketch/plan/viewport), starting from scratch | Generate | Reads composition from the input, adds material/light on top |
| A render, want to change one specific thing | Edit | Preserves the source image; applies only the stated change |
| A render, want to improve it overall | Refine | Composition stays fixed; general quality/style shifts |
| A material or product reference you want placed exactly as-is | Reference generation | Places the referenced image into the scene as-is, doesn't reinterpret it |
This distinction isn't cosmetic — it's how the generation pipeline itself is built. Edit requests prioritize preserving the source image; generation requests prioritize a different model tier for consistent quality. The practical takeaway: when you want to change something in an existing render, frame it as an edit — don't re-describe the whole scene. The exact prompt patterns for each operation, with real outputs, are in how to write AI architectural rendering prompts.
Proof: a real two-step revision on the same render
Above we said "the first result is rarely final." Here's what that looks like, not as a claim but as an actual two-step chain on one render.
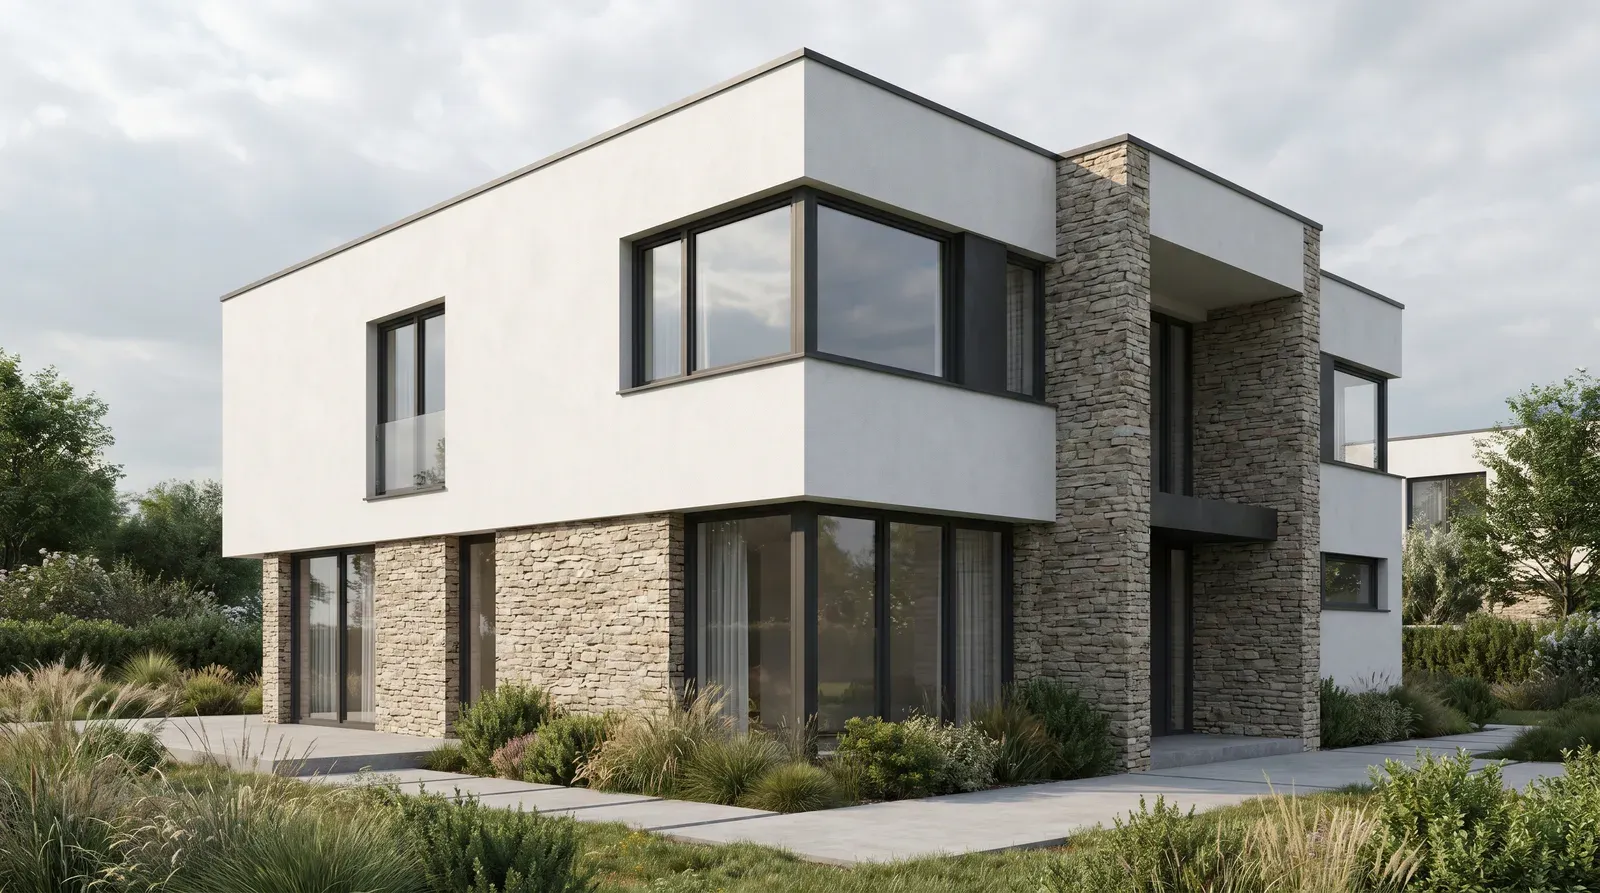
Step 1 — Generation: a photorealistic render from a sketch (white plaster façade, stone-clad ground floor, anthracite window frames).
Step 2 — Revision (edit): "Keep everything in the image the same — composition, camera angle, light, landscaping, stone cladding and window frames unchanged. ONLY change the white plaster upper facade to horizontal wood cladding."
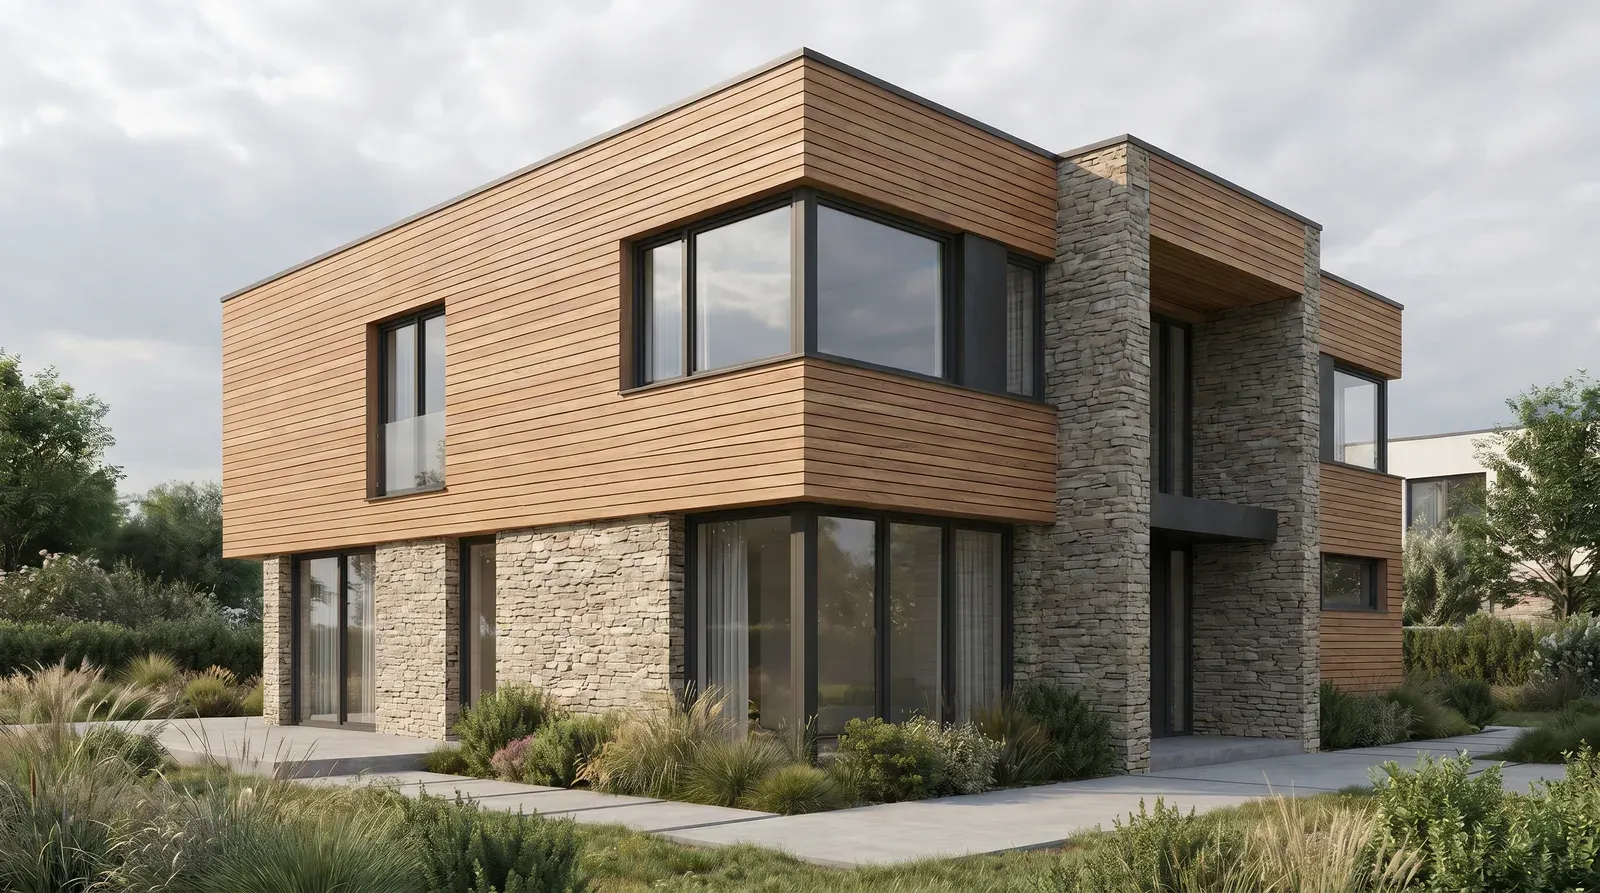
Composition, camera angle, garden, stone-clad ground floor and window frames are identical between the two images — the single requested change, the upper facade turning to wood, is the only thing that moved. That's the real difference between "rewriting a render from scratch" and "revising a render": when a client says "show me that facade in wood," what you need isn't a new generation — it's exactly this: an edit request built around a preservation clause.
Honest limits
AI rendering is a strong concept and presentation accelerator, but it isn't the right tool for every job:
- No dimensional guarantee. The model produces a visually convincing composition, but it doesn't physically calculate that a room is really 4x5 meters. Technically verified drawings (permits, construction documents) still need CAD and a classic render pipeline.
- It predicts what it can't see, it doesn't know it. A facade's unseen back, or a material never specified, gets filled in with the model's "most likely" guess — which won't always match your actual design intent.
- It doesn't replace final technical drawings. This is a concept and presentation tool; permit drawings, structural documentation and construction details still need engineering-approved output.
In short: dimensional and technical accuracy always stay under the designer's control. AI doesn't remove that responsibility — it speeds up the concept and presentation stage before it.
Who is this for?
- Architects at concept stage — showing multiple style or material alternatives live, in the first client meeting
- Competition-entry studios — teams that need to visualize dozens of variations fast, under a tight deadline
- Interior designers — fast answers to "what would this look like" before a renovation
- Students and interns — presentation-quality images for a jury or portfolio, without a render-engine license
- Sales and marketing teams — need a visual for a listing or pitch deck before the project is finished
FAQ
How do I turn a sketch into an AI render?
Photograph your sketch in even light or prepare a digital file, choose the Sketch → Render preset, add a short brief for material/light/atmosphere, and generate. Results typically arrive in seconds; composition and perspective are preserved while material and light are added.
Does AI rendering replace a classic render engine?
No — they serve different purposes. Classic render engines (V-Ray, Lumion, Corona) calculate physical light and produce technically verified final images. AI rendering is for concepts, variations, and pre-presentation speed. Most studios use both: AI for fast client-facing alternatives early on, a classic pipeline for the technically verified final delivery.
Do I need a finished 3D model to use AI rendering?
No. A hand sketch, floor plan, or reference photo is enough as a single input. If you already have a 3D model, a viewport screenshot works too — you don't need a fully materialed 3D scene.
Can results be used in a client presentation?
Yes, at the concept and decision stage — it's a strong tool for showing fast alternatives and getting style sign-off. For final technical deliverables (permits, construction documents), classic rendering and engineering-approved drawings are still required.
Ready to try it? Start with the Sketch → Render preset, see the full workflow on how it works, or start free.