
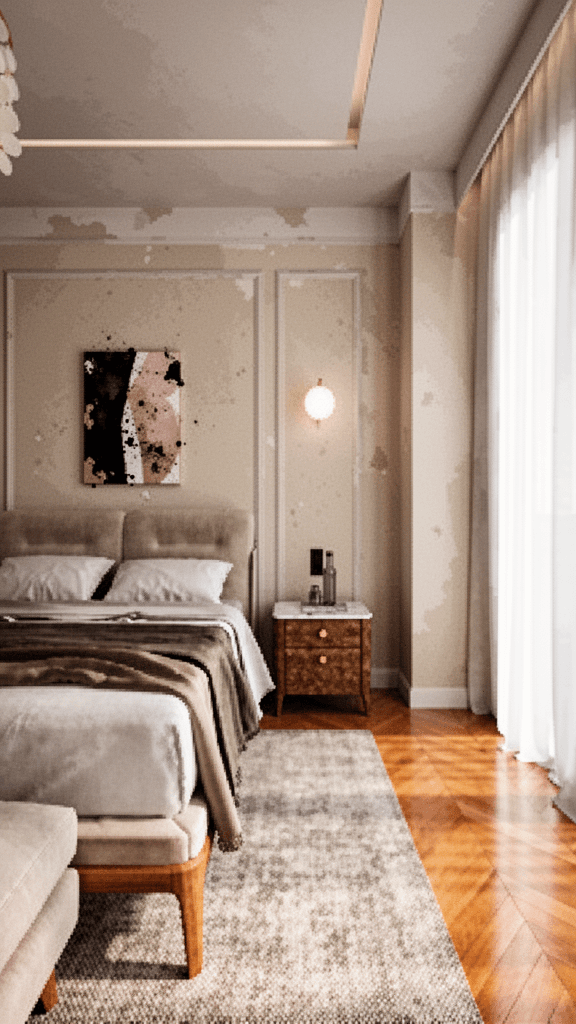
SketchUp is one of the most widely used modeling tools in architecture and interior design studios worldwide. The problem is what comes after modeling: rendering usually means a separate piece of software, a separate learning curve, and a separate wait — installing V-Ray or Enscape, assigning materials, setting up lights, queuing the render. For a small studio or a solo architect, every one of those steps costs time you don't have.
AI-powered render plugins aim to shorten that gap: produce a presentable image in minutes, without leaving your viewport. No exporting the model, no uploading it to another program, no round-trip to bring the result back — you render straight from the view you're already looking at.
This article covers the AI rendering options available inside SketchUp today, walks through Syntina's SketchUp workflow based on the plugin's actual interface, and gives practical tips for better quality — being explicit about which step lives in the plugin and which stays on the web dashboard.
Why rendering without leaving the viewport matters
A classic SketchUp render workflow typically runs: export the model into an engine like V-Ray or Enscape, reassign or check materials, set up lighting, position the camera, and queue the render. Want to try three different lighting scenarios for one facade? That loop repeats three times.
Plugins that work by capturing the viewport shorten this loop technically: the plugin writes the active view straight to an image on disk using SketchUp's own write_image function — the model isn't exported, the .skp file is never touched, and only an invisible identifier (so the plugin remembers which project you're connected to) gets added to the scene. Your camera angle, your model layout, your composition — exactly as they are — get a material and light layer added on top, driven entirely by what you type in the prompt box. No render-engine setup, no material reassignment required.
That comes with a real trade-off: the full control a render engine gives you — tuning every material's physical properties individually, precise light simulation — isn't there in a viewport-capture flow. So this workflow is strongest for fast concepts and pre-presentation alternatives, not for technically precise final delivery.
AI rendering options inside SketchUp
Syntina plugin
Syntina's SketchUp plugin captures your active viewport and sends it into Syntina's AI render pipeline. Your scene, camera angle and model layout stay exactly as they are in SketchUp — no exporting, no uploading to another program, no bringing the result back manually. A material, light and atmosphere layer is added on top of the captured view, based on what you write in the prompt. The same plugin architecture shares a backend with Syntina's 3ds Max plugin and Blender add-on; only the interface and viewport-capture layer differ.
SketchUp Diffusion (Labs)
Part of Trimble's experimental SketchUp Labs features, SketchUp Diffusion is a fast stylized-preview tool that runs inside SketchUp itself. It lets you see a style try-on directly in the SketchUp interface without exporting the model — a speed-first, early-stage preview tool.
Veras
Veras (EvolveLab) is a plugin that works across SketchUp as well as Revit, Rhino and Archicad. It adds a render layer on top while staying faithful to the underlying BIM/CAD geometry — particularly favored by teams that need a tight link to model data.
What these three options share: none of them require you to take your model out of SketchUp. They diverge on interface depth and language support. Syntina's SketchUp plugin itself is currently limited to producing a single still image at a time — if you want variations or a video conversion after the render, you can move the result into your Syntina account's Chat or Canvas and continue from there.
The real Syntina SketchUp workflow: 5 cards, in order
The plugin panel is a single HTML dialog made of 5 cards that open in sequence — each one only activates once you complete the previous one, so here's the flow exactly as it runs, no steps skipped:
- Account. On first launch, you click "Connect Account" and approve your account once, via a code shown in your browser. Why it's needed: the plugin doesn't authenticate on its own — it runs generations against your Syntina account's credit balance.
- Scene. "Connect Scene" links your active
.skpfile to a Syntina project — an invisible identifier gets written into your model file; geometry and materials don't change. Do this once per file and it won't ask again. - Source image. "Capture Viewport" writes whatever view you're currently looking at in SketchUp straight to an image on disk (
view.write_image) and uploads it automatically; you can also upload a prepared image with "Choose File" instead. Don't capture before your camera is settled — an unstable frame carries that instability into the render too. - Generate. Three things live here: model/engine selection (a dropdown), a single free-text prompt box, and engine-specific settings. A "preset" name is visible in the panel, but it's not a selectable list — it's the read-only name of a fixed generation setting assigned automatically in the background. Material family, time of day, atmosphere — you write all of it into that one prompt box; if writing a detailed brief is slow going, our free AI prompt generator has ready-made templates. "Calculate Credits" shows the cost before you commit, then you click "Generate."
- Queue and result. Generation goes into a background queue (status is polled every few seconds), and once it's done, "Open Image" and "Open URL" buttons activate. The result doesn't appear inside the plugin panel itself — "Open Image" opens it in your computer's default viewer, "Open URL" opens it in a browser. Your scene in SketchUp never changes. Because the source image stays in state, you can try different light or material variations from the same frame back-to-back — just edit the prompt and hit "Generate" again.
The one step still missing today: bringing the result back into SketchUp directly as a texture or image isn't there yet — it's listed as a next step on the plugin's own roadmap. In today's workflow, once you open the result, you bring it into your presentation yourself (the downloaded file is already waiting on disk).
Quality tips
- Lock down your view angle first. An unstable or skewed viewport carries that ambiguity into the render — the model doesn't correct your camera angle, it only adds a layer on top. Fix the camera and clean up the frame before you capture. Extremely wide angles with multiple vanishing points (fisheye-like views) can cause the model to misread the geometry.
- Keeping shadows on is generally a good habit — it makes light direction easier to read — but we won't oversell this as a plugin-specific requirement: the capture reads whatever's on screen at that moment rather than passing your shadow setting through as a dedicated render parameter. So the shadow-on/off difference is exactly as useful here as it would be in any screenshot.
- Keep your style note short and concrete. "Make it nicer" produces far less consistent results than "golden hour, wood and stone cladding, soft shadows." That note lives in a single prompt box in the plugin — naming the material family and time of day explicitly reduces how much the model has to guess (see our prompt-writing guide).
- Watch your model cleanliness. Objects not visible in the viewport, or left half-finished (holes in walls, floating furniture), can still show up in the render — the plugin doesn't auto-clean your scene, it captures exactly what's on screen. Hide unfinished or unnecessary elements before capturing.
- Window size doesn't raise resolution indefinitely. Capture scales the long edge to a fixed pixel value; enlarging your SketchUp window helps capture the aspect ratio more accurately but doesn't itself increase output resolution. What actually determines quality is a clean, well-framed capture.
Limits: when to switch to a classic render engine
A viewport-capture workflow is fast and practical, but it isn't the right tool for every stage. For final deliverables where a material's physical accuracy (reflectivity, IOR) needs technical verification, or for outputs where dimensional accuracy is critical — permit drawings, construction documents — a classic render engine (V-Ray, Enscape, Corona) is still the right tool. Syntina's SketchUp workflow is built to speed up the concept stage and generate pre-presentation alternatives — it isn't a substitute for final technical delivery.
Who this is for
- Solo architects and interior designers — need a client-presentable image fast, without setting up a render engine
- Small studios — can't dedicate a render specialist to every project, want speed at the concept stage
- Students and interns — want jury- or portfolio-quality images without a V-Ray or Enscape license
- Real estate and sales teams — need fast marketing visuals from a SketchUp model before the project is even finished
FAQ
Is there an AI render plugin for SketchUp?
Yes. Syntina's SketchUp plugin captures your active viewport and sends it into an AI render pipeline; SketchUp Diffusion and Veras are two other options that also run inside SketchUp. All three work without taking your model out of SketchUp, but they differ in interface language, post-render workflow (video, variations, team sharing) and integration depth.
Do I need to export my SketchUp model?
No. Syntina's plugin captures your viewport directly — you don't need to export it, upload it to another program, or bring the result back into SketchUp manually. Your scene, camera angle and model layout stay exactly as they are in SketchUp; the plugin only sends the frame you're looking at for processing.
How long does AI rendering take in SketchUp?
After capturing your view, generation goes into a queue and typically finishes in under a minute, depending on the model and settings chosen. A classic render engine producing the same frame with full material and light setup can take hours — viewport-capture rendering brings that down to under a minute, but it isn't instant: generation runs in the background and its status is polled every few seconds.
Learn more on the Syntina SketchUp AI Render page or browse every plugin integration. To try the viewport-to-render flow yourself, see the 3D Model → Render preset.