
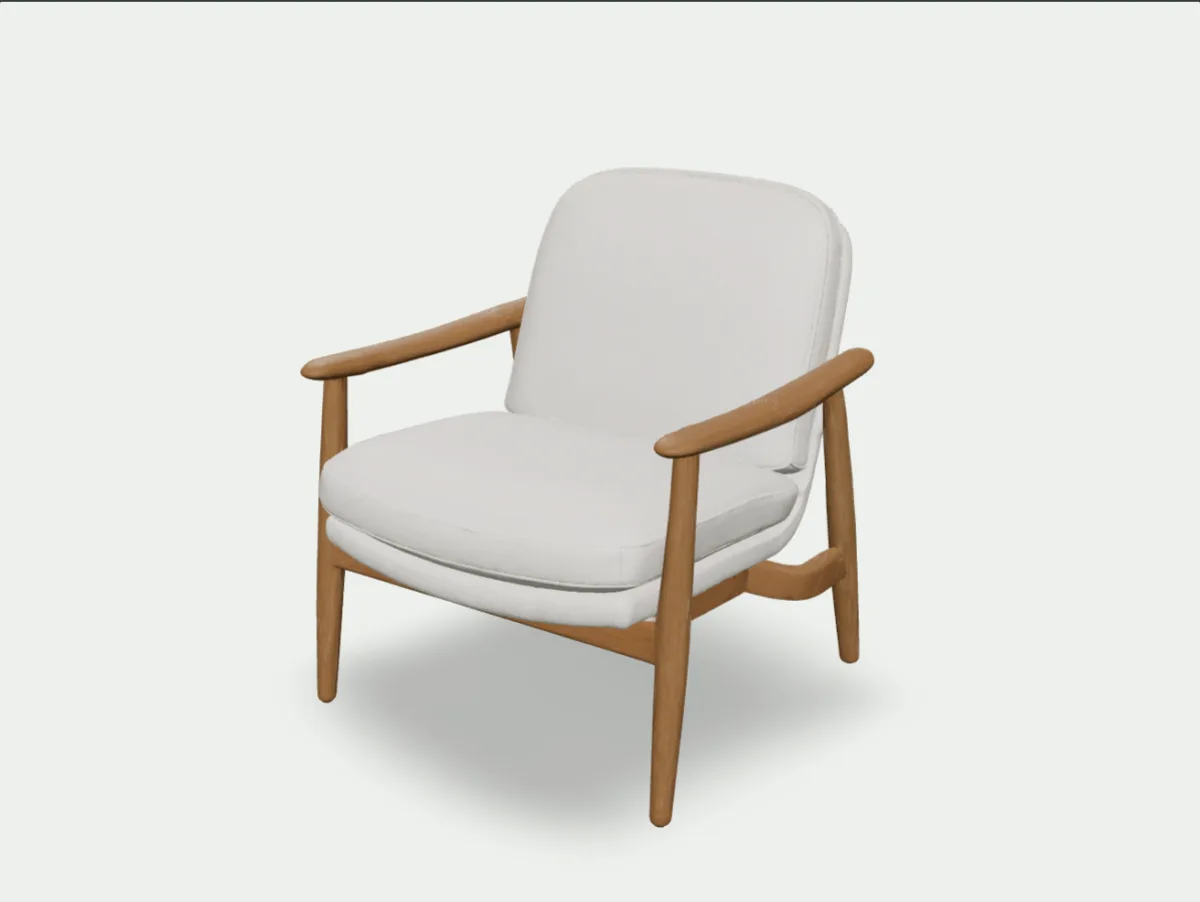
Syntina's 3D Model page has been connected directly to Meshy's own API since 26 October 2026, and our default 3D engine is Meshy 7.1. You upload a photo or a render, and a few minutes later you download a real-world-scale, textured model you can bring into 3ds Max or Blender.
This guide walks through that flow with a real generation: which images work, what each setting does and what it costs, and what you can do once the model is ready. There are two architecture examples (a lounge chair and a pavilion) and, at the end, an anime character that shows where the same engine could take us for games and animation.
How we made this. We generated the chair and its material change in the live app on 14 November 2026; the screenshots come from those runs and show the app in Turkish (the English interface has the same layout). The pavilion and the character were generated with the same Meshy 7.1 settings directly through Meshy's API. All three input images were generated in Syntina. We blurred the credit balance in the screenshots. Facts about Meshy come from Meshy's own blog posts and API docs; more about the company is on our Meshy integration page.
In 30 seconds: settings and credits
| Setting | What it does | Credits | When |
|---|---|---|---|
| 4K PBR textures (default) | Model with colour, metal/roughness and normal maps | 120 (model) | Almost always |
| No textures | Geometry only | 80 | Massing studies, or when you assign your own materials |
| 8K textures | Sharper textures | +20 | Close-ups |
| Ultra geometry | Finer detail, 3-5 min | +20 | Profiled, carved or slatted objects |
| Mesh: light | Brings the triangle count down to your target | same | SketchUp and 3ds Max scenes |
| Real-world size (on by default) | Scales the model to its real size, base on the ground | same | Anything going into a scene |
| Character pose | Puts a human figure in an A- or T-pose | same | Characters only |
| Lighten model (afterwards) | Rebuilds the finished model's mesh | 20 | When the model is too heavy |
| Change material (afterwards) | New textures on the same geometry | 40 (60 at 8K) | Material options |
4K PBR textures are included in the model price and selected by default.
Start with the input: which images work?
Meshy turns what it sees into 3D and infers what it cannot see. So:
- Show the whole object. A cropped leg or a cut-off roof edge will be missing in the model too.
- Use a plain background. A flat, light background makes it easy to separate the object.
- Three-quarter view. A view from the front and slightly to the side shows both the face and the depth.
- Add more angles if the back matters. In Syntina you can add back, left and right views next to the front image; the request then goes to Meshy's multi-image endpoint.
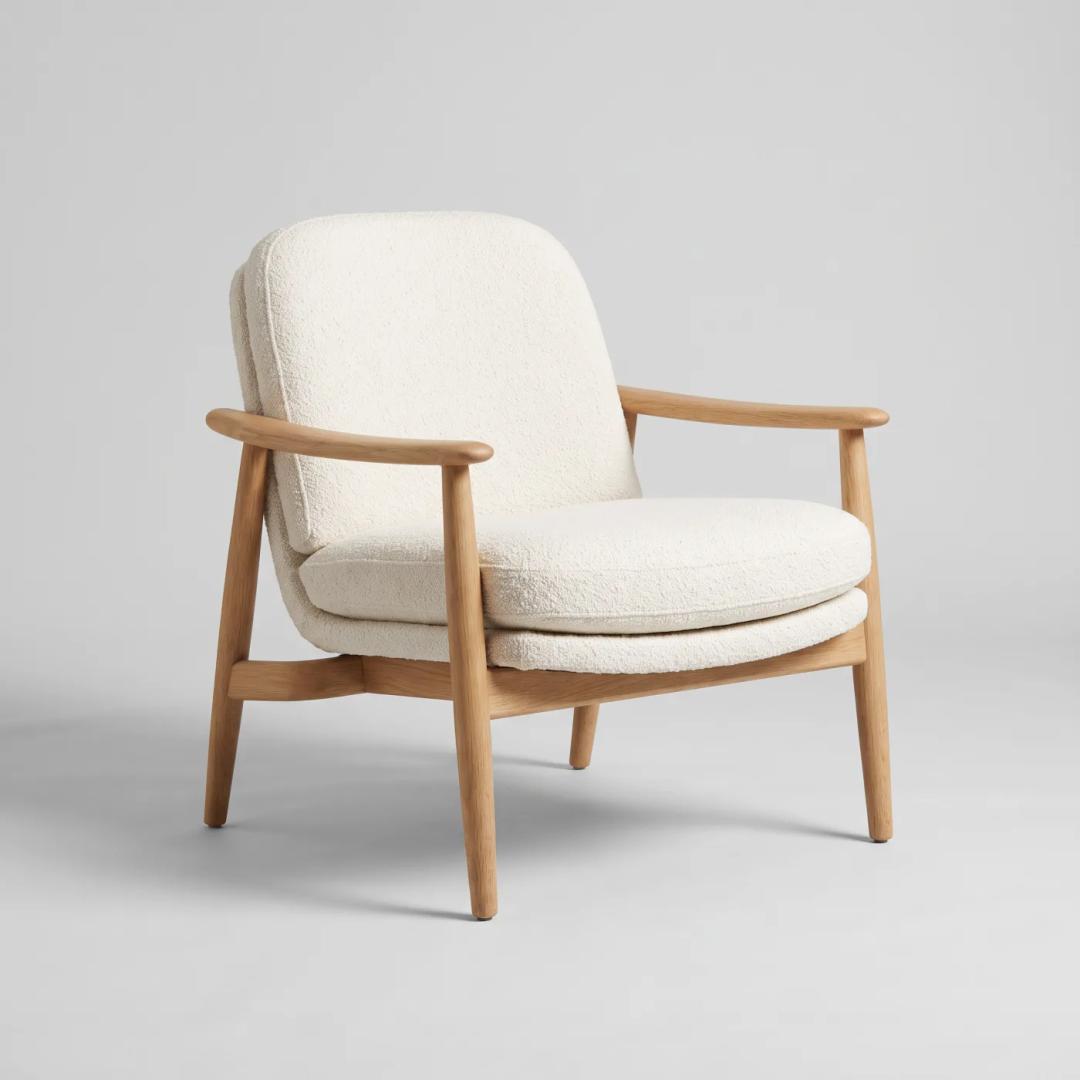
Here is the input for our first example: an oak-framed boucle lounge chair on a light grey background, a product photo we generated in Syntina.
Step 1: Open the 3D Model page
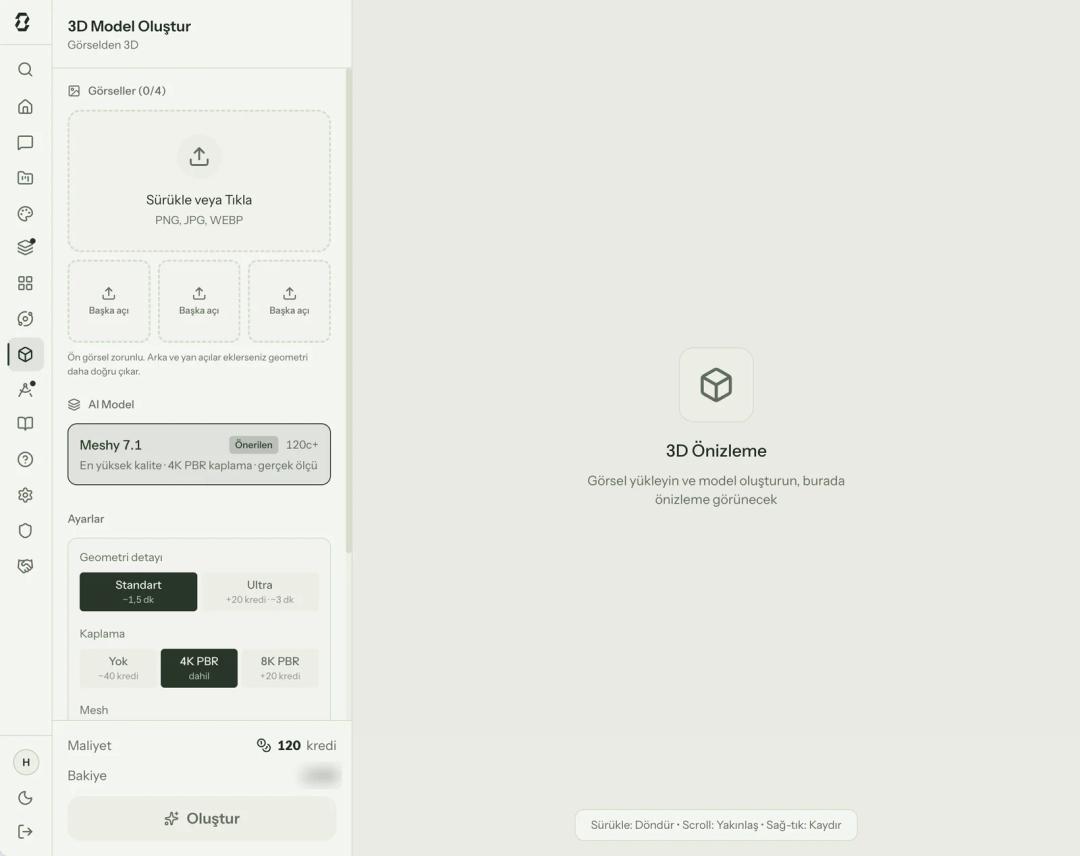
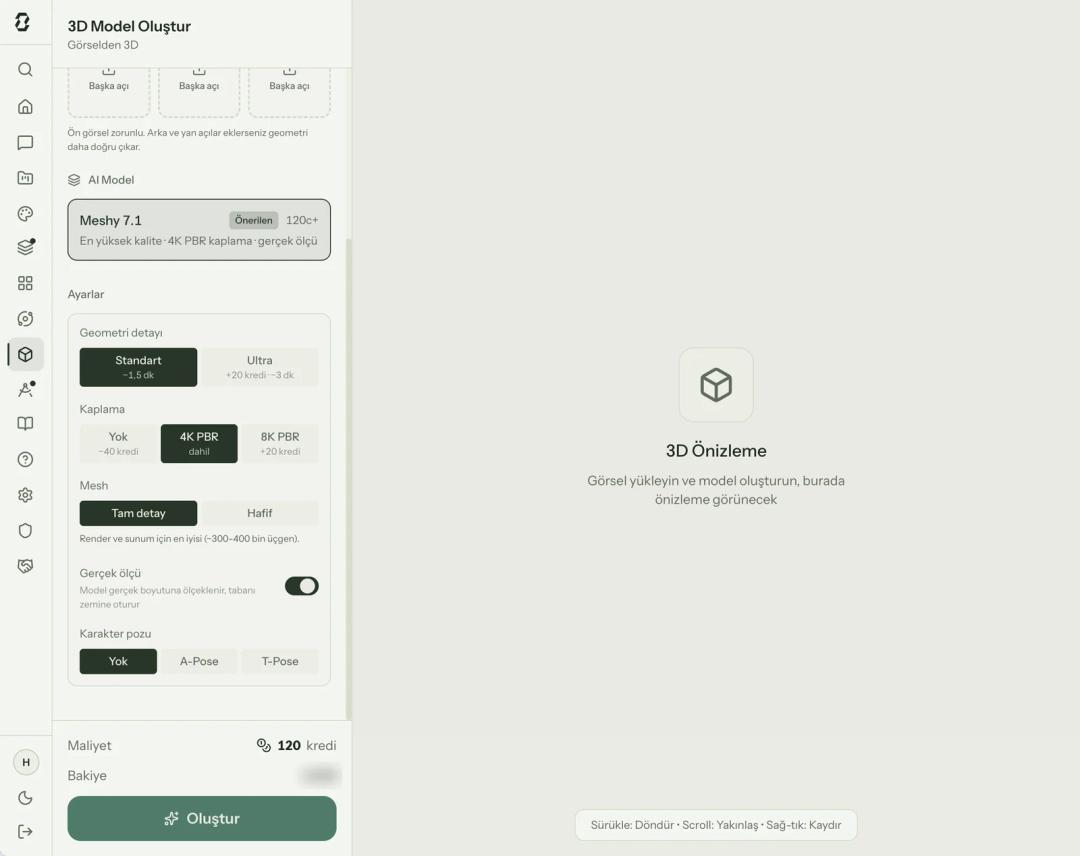
Go to 3D Model in the app. Meshy 7.1 is preselected in the model picker and marked "Recommended".
Step 2: Upload the image
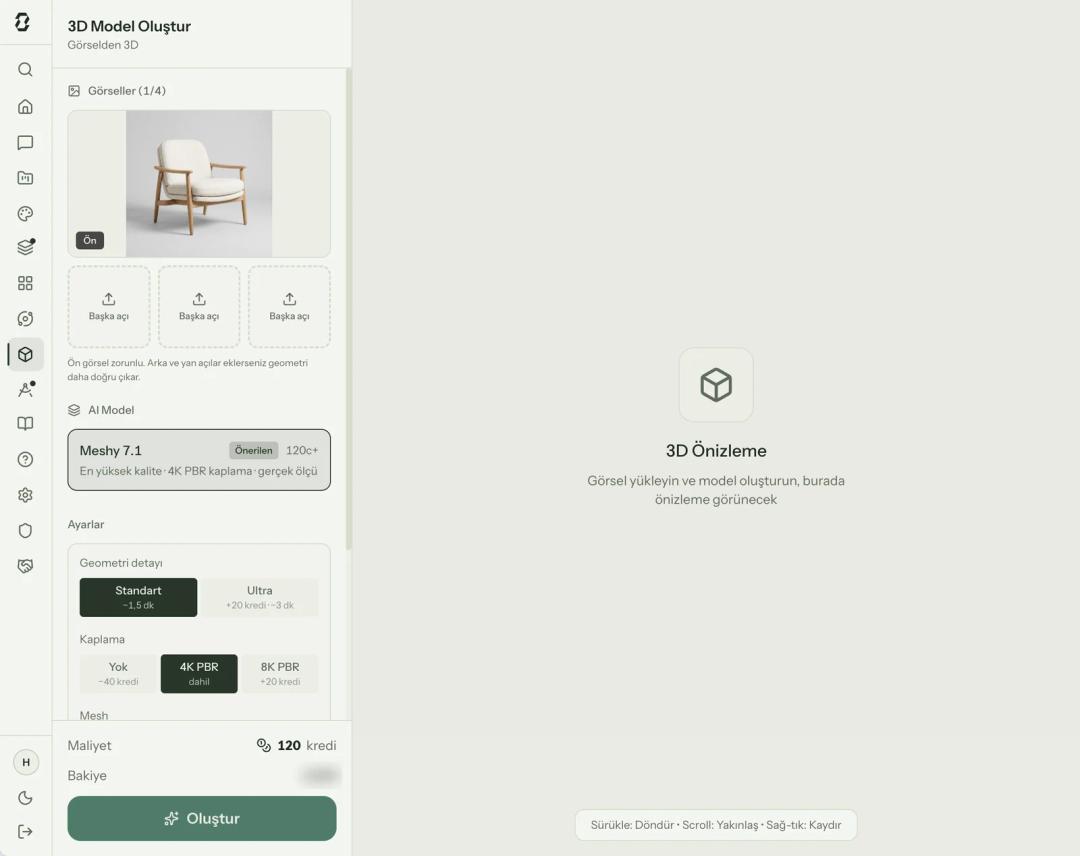
Drag and drop the front image or click to choose it (PNG, JPG, WEBP). If you have other angles, Add Other Angles opens back, left and right slots. The prompt field is optional; Meshy works from the image.
Step 3: Pick the settings
The settings panel shows the credit difference next to every option, so you see the total before pressing Generate.
- Geometry detail: Standard (~1.5 min) or Ultra (+20 credits, 3-5 min).
- Textures: 4K PBR (included), 8K PBR (+20 credits) or none (−40 credits). PBR maps included.
- Mesh: Full detail for rendering and presentations; choose Light to set a polygon target with the slider.
- Real-world size: Leave it on; the model is scaled to its real size with its base on the ground.
- Character pose: A-Pose or T-Pose, only when generating a human figure.
For the chair we used the defaults: Standard geometry, 4K PBR, full detail, real-world size on. 120 credits in total.
Step 4: Generate
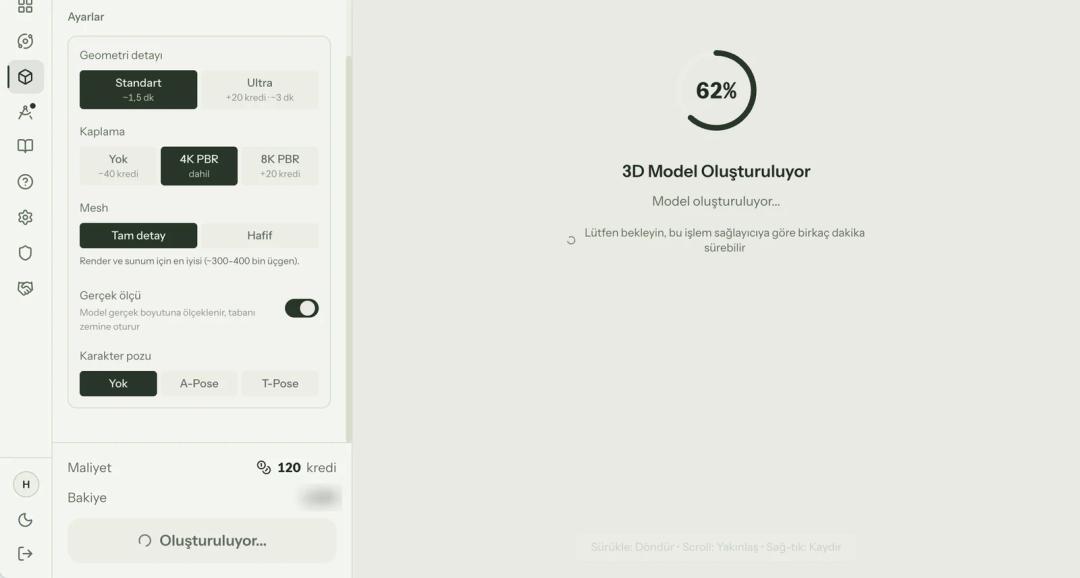
After you press Generate, the image uploads first (our 5 MB PNG took 29 seconds), then a progress ring appears in the preview area. You can leave the page; the finished model lands in Recent Models.
Step 5: Inspect the result
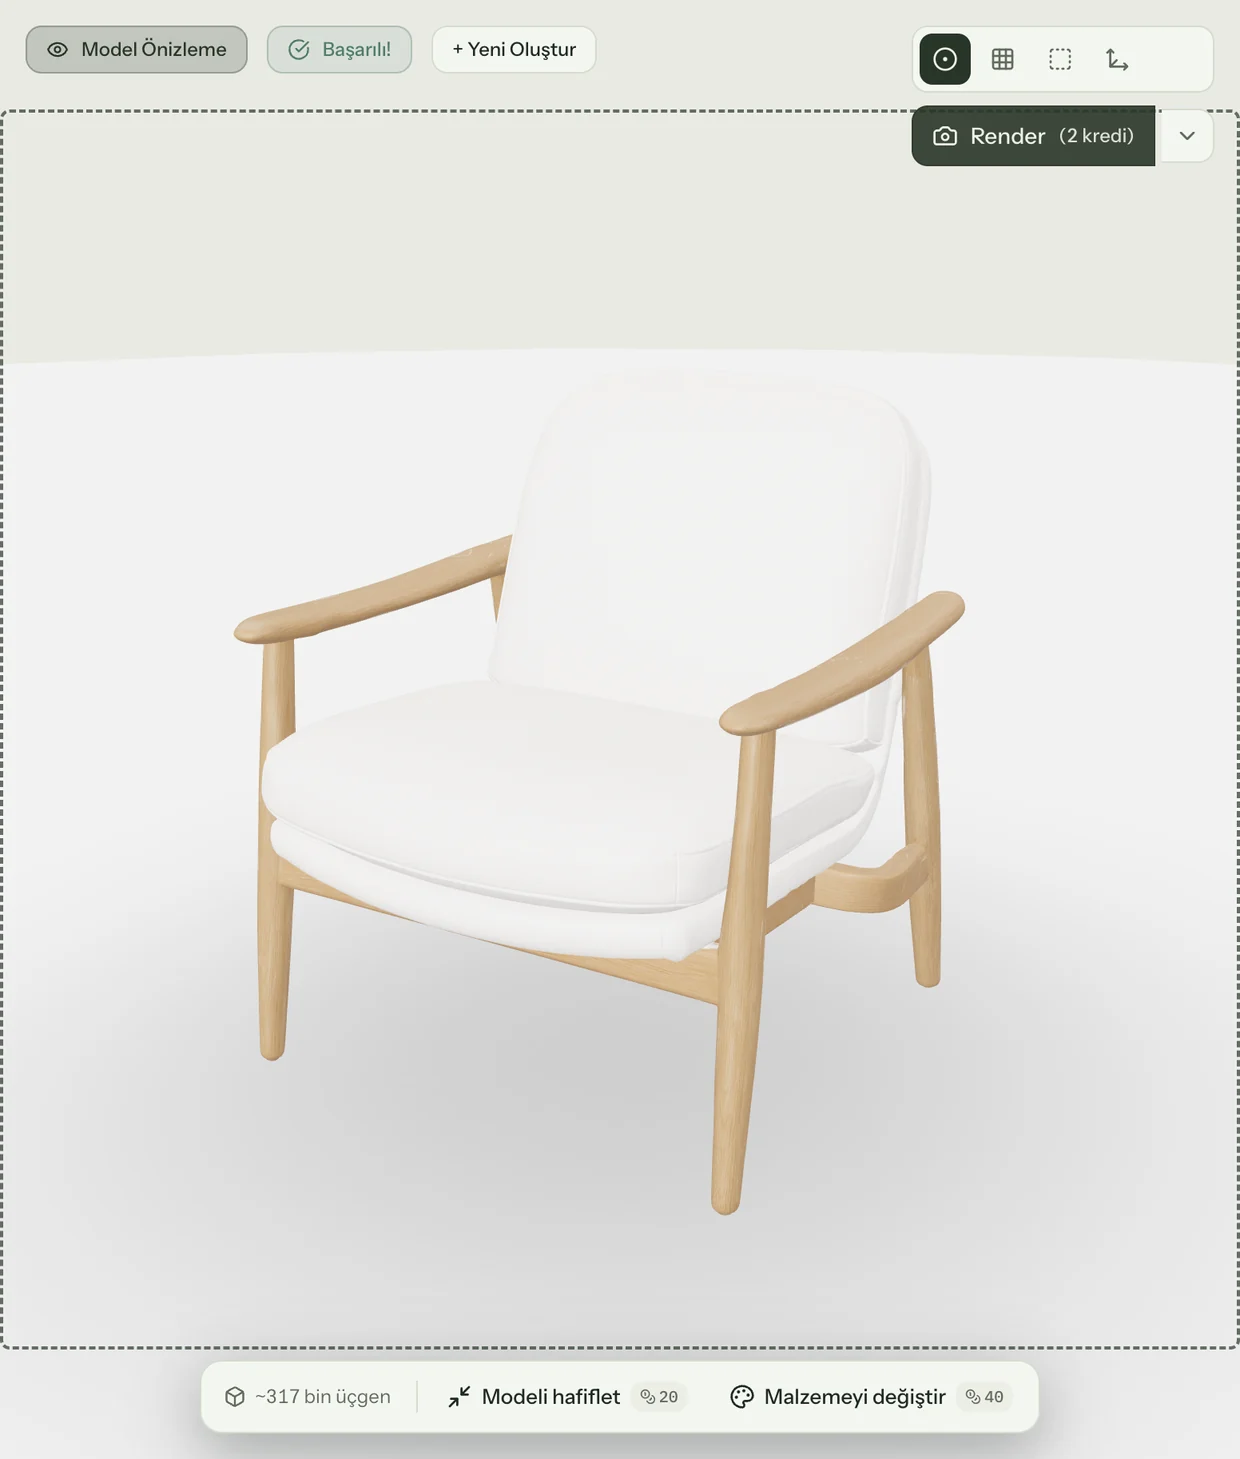
The model opens in the viewer with a Success! label. Drag to rotate and scroll to zoom. The view modes at the top right switch between Textured, Wireframe, Flat and Normals; wireframe shows at once how dense the geometry is. The bar at the bottom shows the triangle count: about 317 thousand for our chair.
You can rotate the same model right here:
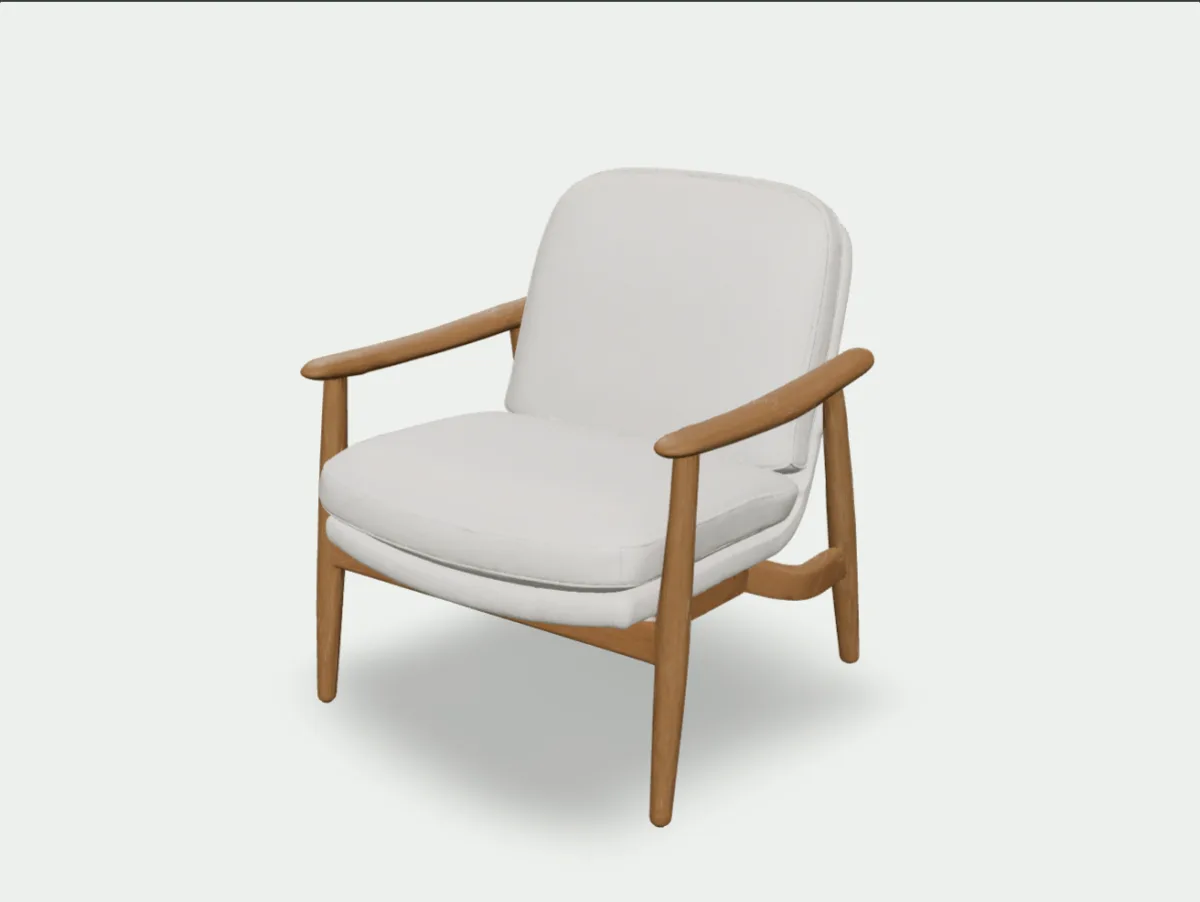
What came out? After the upload, generation took about 100 seconds. The raw model has 317,170 triangles; with real-world size on, it came in with a 71 × 79 cm base, 80 cm tall, its base at zero. You do not have to scale it by hand when you import it.
What it kept: the oak frame, the curved armrests, the two-cushion seat and back, the tapered legs and the rear stretcher. The proportions match the chair in the input.
What it lost: the looped texture of the boucle. The cushions read as a smooth, slightly glossy fabric. The next step tries to fix it.
Step 6: Lighten, change the material, download
The bar under the viewer shows the model's triangle count and two actions:
- Lighten model (20 credits): a full-detail model can be 300-400 thousand triangles, which slows SketchUp and 3ds Max down. Pick a target triangle count and topology (quad or triangle); the textures are kept.
- Change material (40 credits, 60 at 8K): new textures on the same geometry, from a short description or a style image.
To fix the chair's fabric we pressed Change material and typed this into the Text tab: "Off-white boucle upholstery with pronounced, textured loops. Solid light oak frame, matte oiled finish, visible wood grain." (We wrote it in Turkish; Syntina passes the description to Meshy as written, without translating it.) The note at the bottom of the window matters: the new texture is applied to the whole model, and you cannot pick a single part.
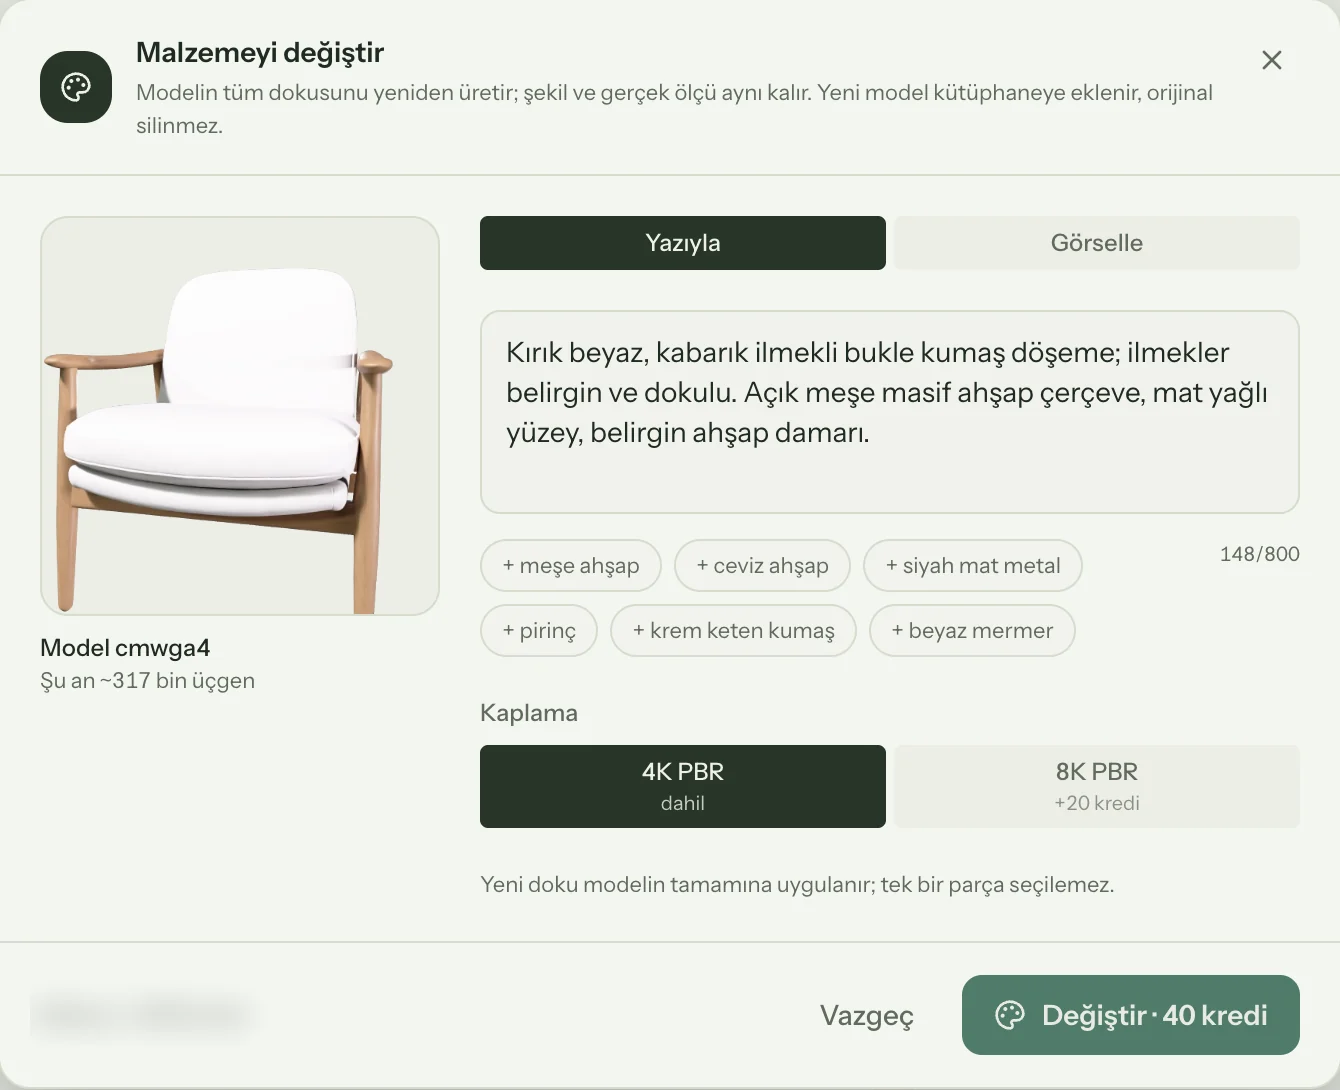
About a minute after pressing Change · 40 credits, the new model was added to the library; the original was kept:
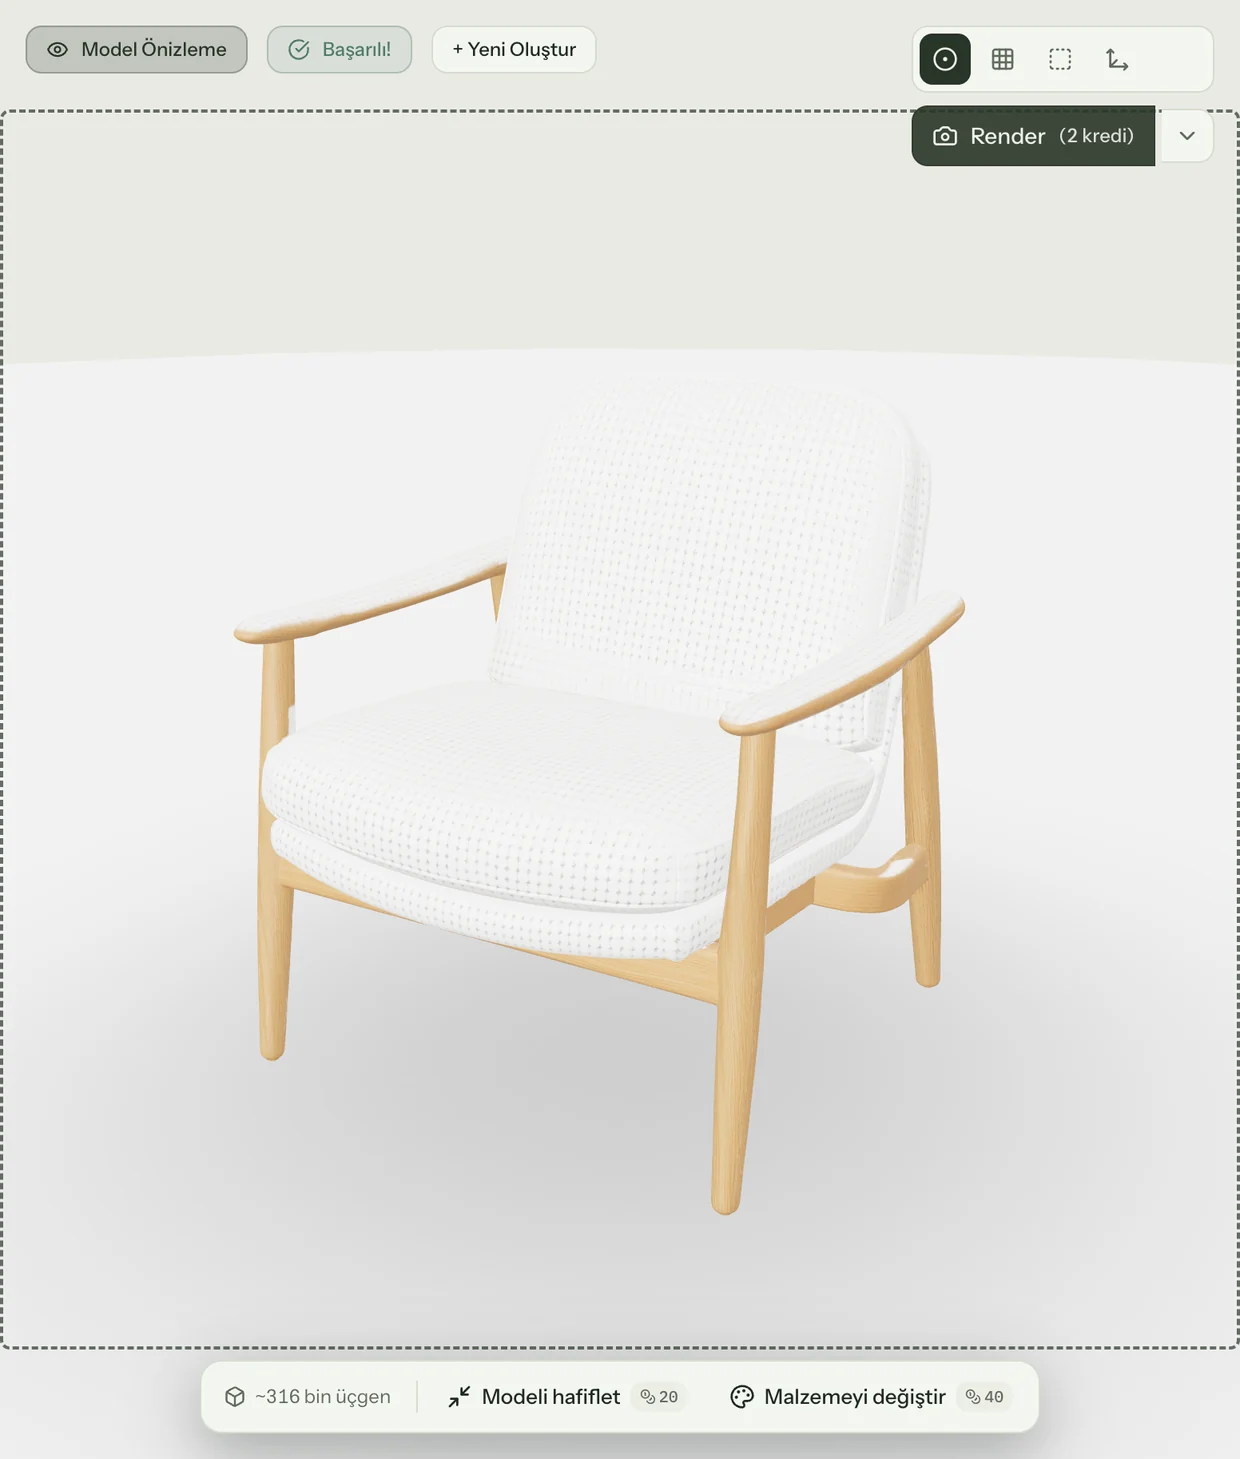
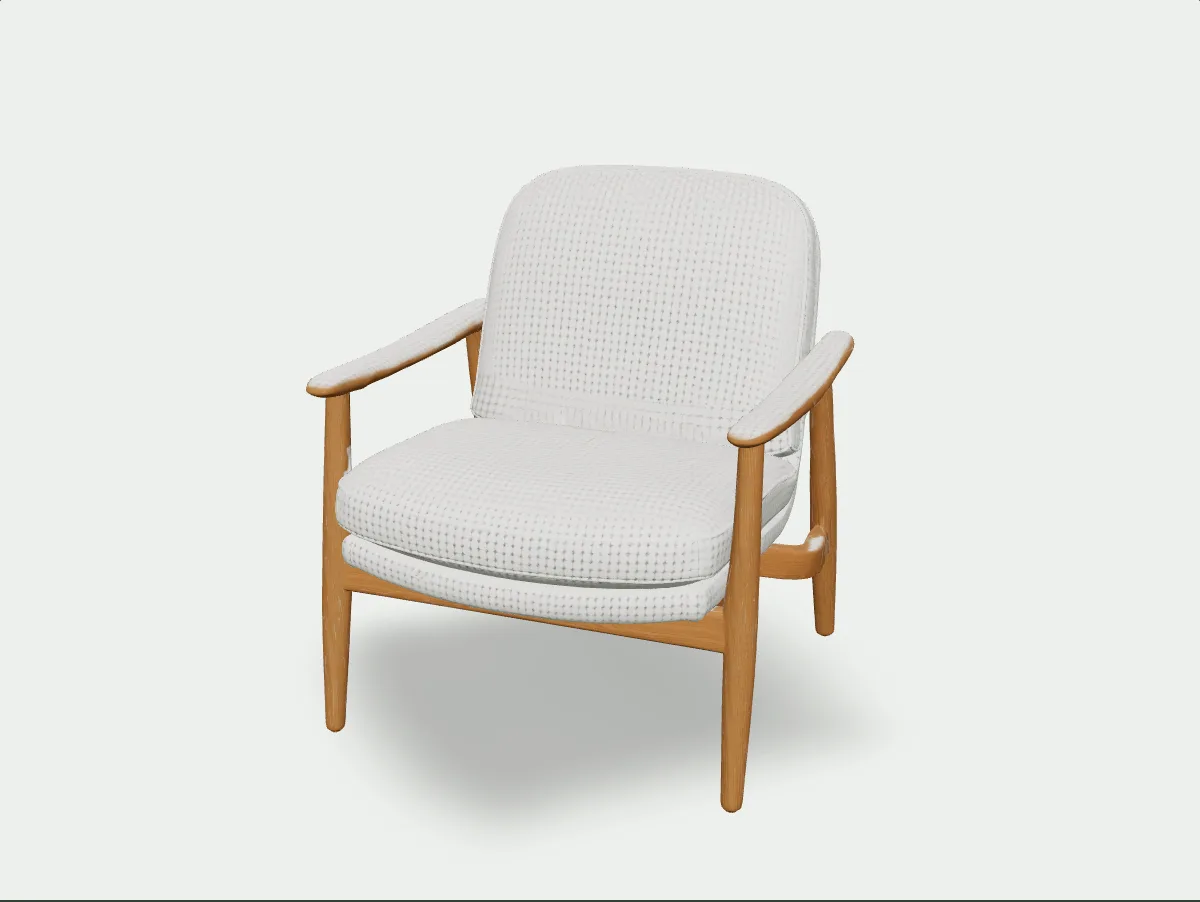
What happened? The cushions got a texture that suggests boucle, and the wood grain came through. Two things to watch:
- The texture is regular. Real boucle loops are irregular; here small dots sit in a grid. A material change does not touch the geometry, it only repaints the textures, and boucle loops are relief that a texture can only imitate.
- The fabric spilled onto the armrests. The tops of the armrests and a small patch on the rear stretcher picked up the fabric texture. That is exactly what the window warns about: the model repaints every surface without separating parts.
Lesson: a material change is good for showing a quick alternative; when you need part-by-part control, make the final fix in your render engine with your own materials. Stating which parts must stay wood in the description may also help; we did not test that for this post.
The download menu has GLB (web and most 3D tools) and FBX (3ds Max). We produce the FBX on our own servers from the GLB Meshy returns.
A presentation image from the model: the Render button in the viewer (2 credits) turns the current angle into a product image with a background colour and a short description. Earlier renders stay in a gallery under the same model.
Example 2: a massing model from a concept render
The second use for architects: pulling a rough 3D massing out of an early render. The input is a garden pavilion on a white background in three-quarter view: thin concrete roof, timber slats, glazed front, stepped plinth.
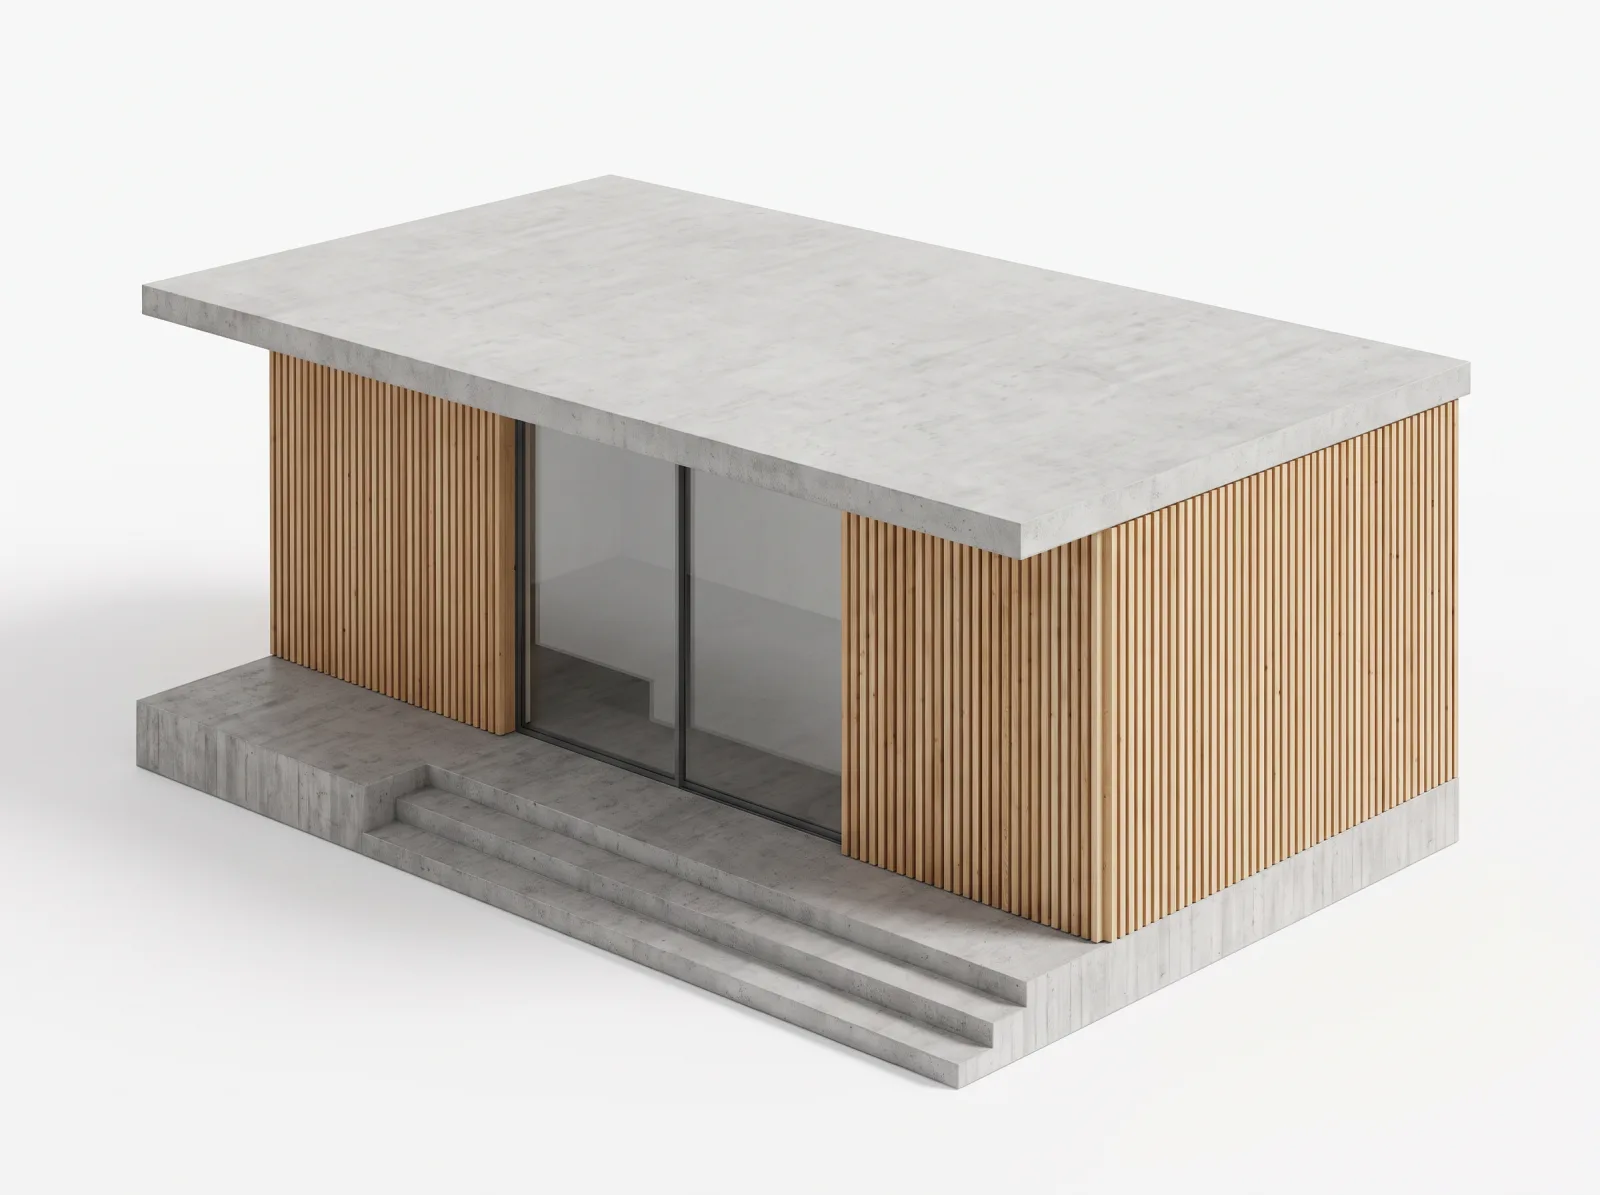
This time we used Ultra geometry (140 credits in Syntina):
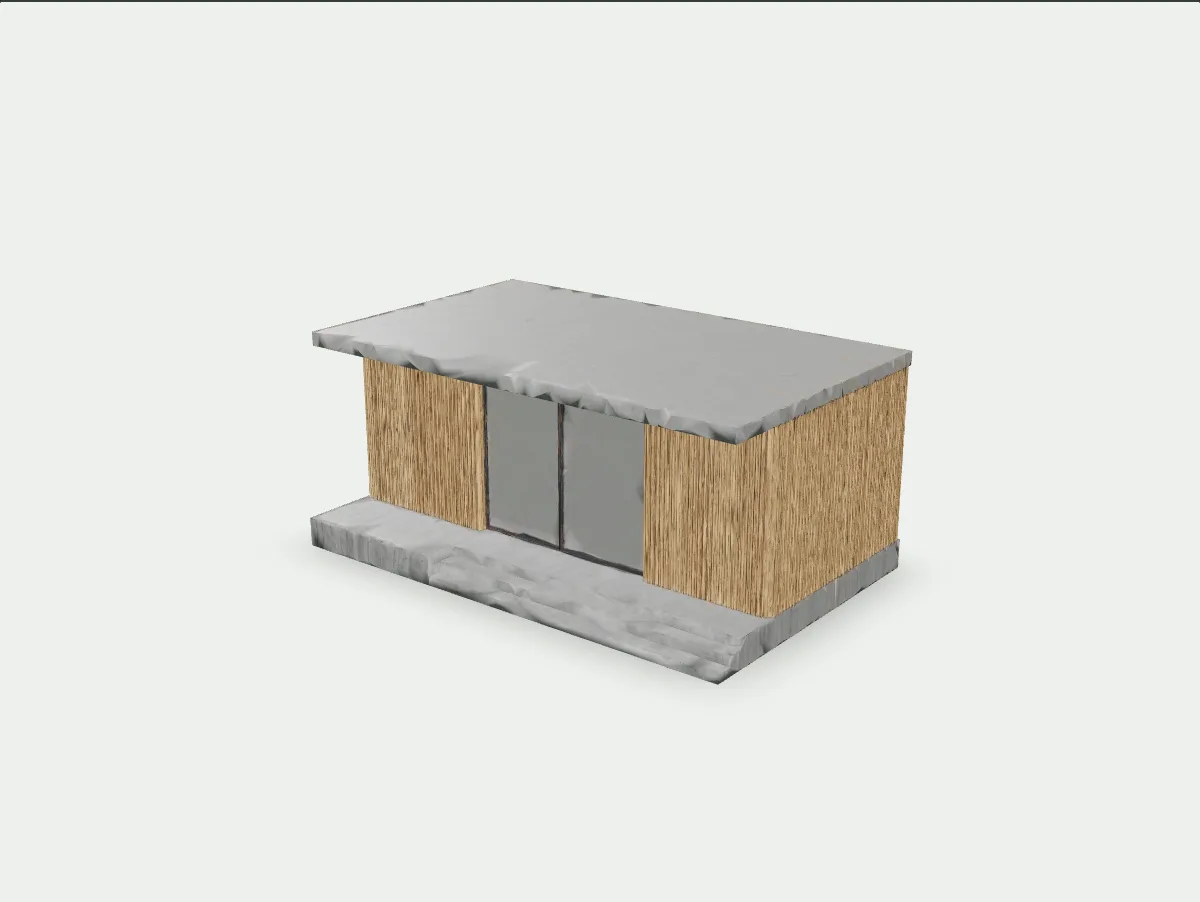
What came out? The interface says about 3 minutes for Ultra; this pavilion took 267 seconds, about 4.5 minutes. The raw model has 807,528 triangles and real-world dimensions: a 6.8 × 4.3 m footprint, 3 m tall. A plausible size for a garden pavilion.
What it kept: the overall massing, the thin roof overhanging the front and side, the two timber walls, the glazed sliding door in the middle and the raised plinth.
What it decided for you:
- The slats became texture. The timber slats were not modelled one by one; they are a vertical wood texture on a flat wall.
- Edges softened. The concrete roof and plinth edges are wavy and the steps are vague.
- Opaque glass. The glazing came in as a grey material, not transparent.
Lesson: this is a concept massing. It is enough to turn the view and discuss context and scale; it is not a construction model with straight edges, real slats and glass. Where you need crisp geometry, build it yourself in SketchUp or 3ds Max and use the Meshy output as a reference.
Beyond architecture: an anime character and its animation
We build Syntina for architects today. But the same 3D engine does not only make furniture and buildings; it also makes characters that game developers and animators can use. We ran a small test to see how far it goes.
1. The illustration. We had Syntina draw an original anime character: a young architect with a short teal bob, round glasses, a mustard jacket and a drawing tube on her back. Arms away from the body, in an A-pose; that matters for the rigging step.
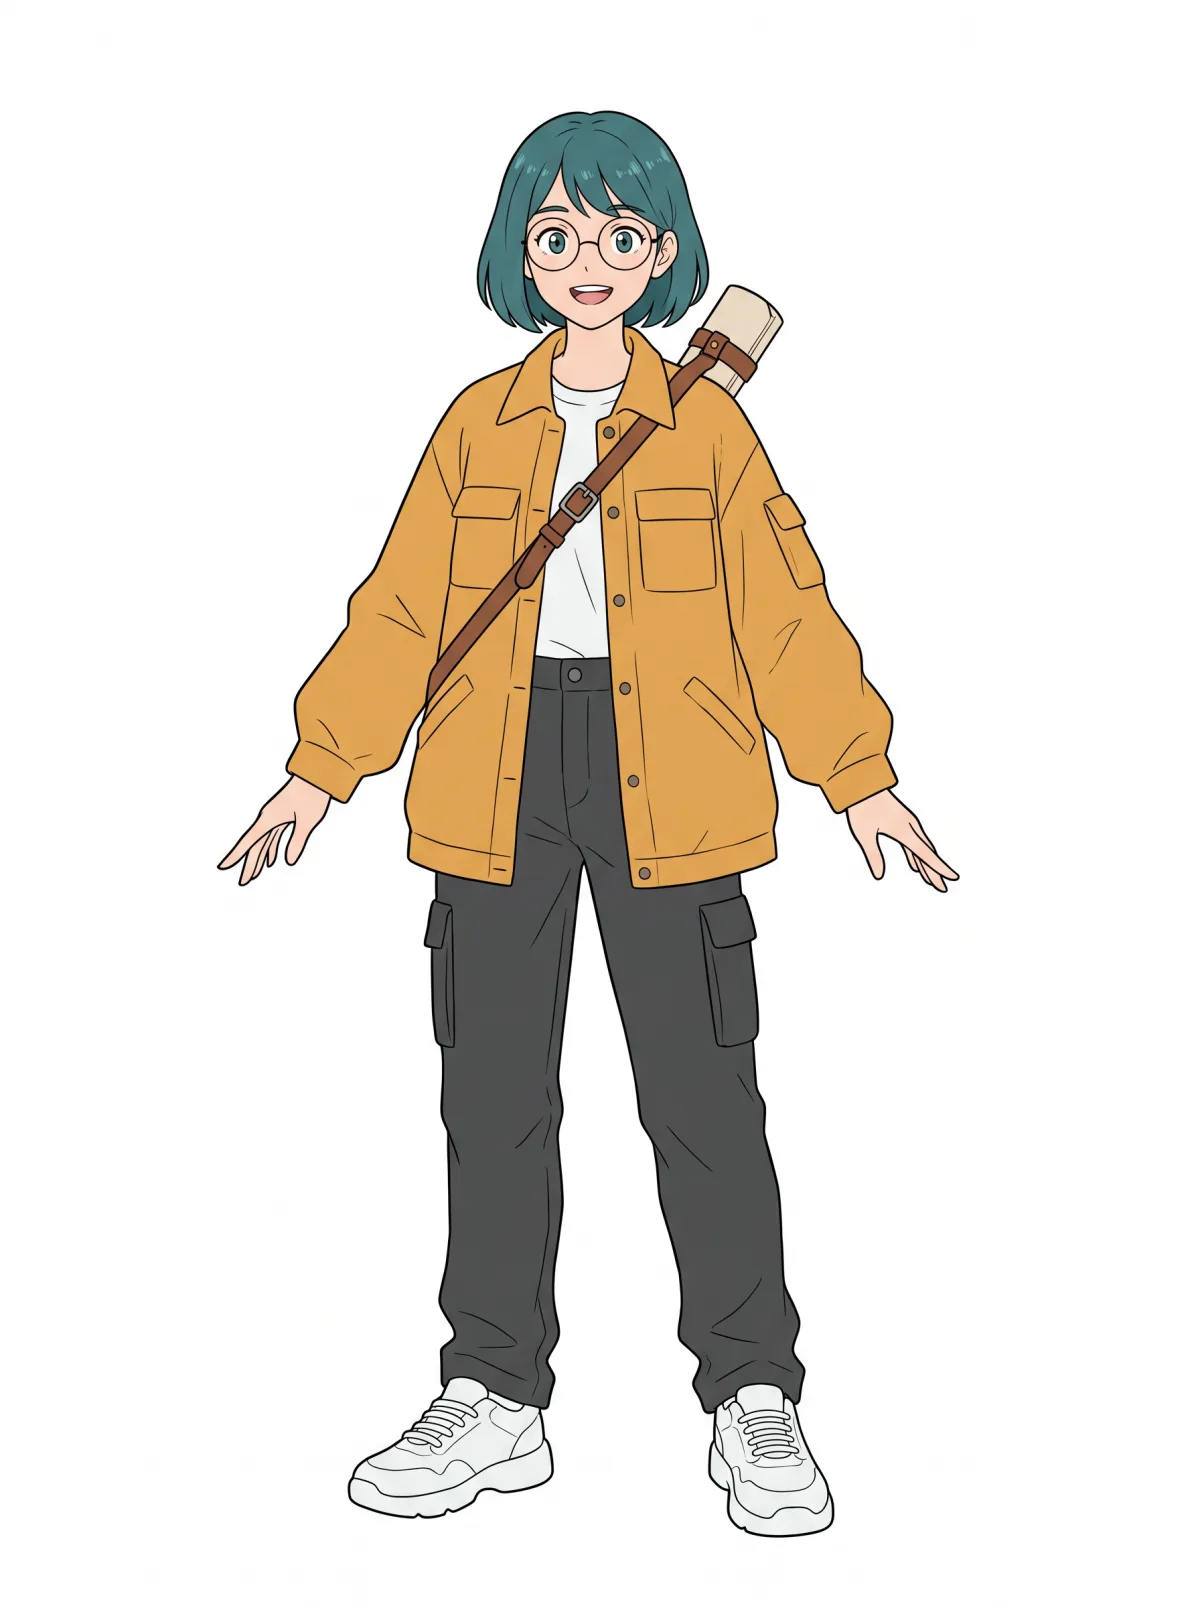
2. The 3D model. Rigging and animation are not in the Syntina interface yet, so we ran this whole test on Meshy's API. For the 3D step we used the 3D Model page options: Meshy 7.1, A-Pose, light mesh (60 thousand triangles). Only the textures we asked for at 2K, to keep the model light on the web. It took 130 seconds. The glasses, jacket pockets, strap and the tube on her back are all in the model.
3. Rigging and animation. Auto-rigging was ready in 29 seconds and came with walking and running animations. We then picked a dance and a wave from Meshy's motion library (678 ready-made moves today); each took 12-18 seconds.
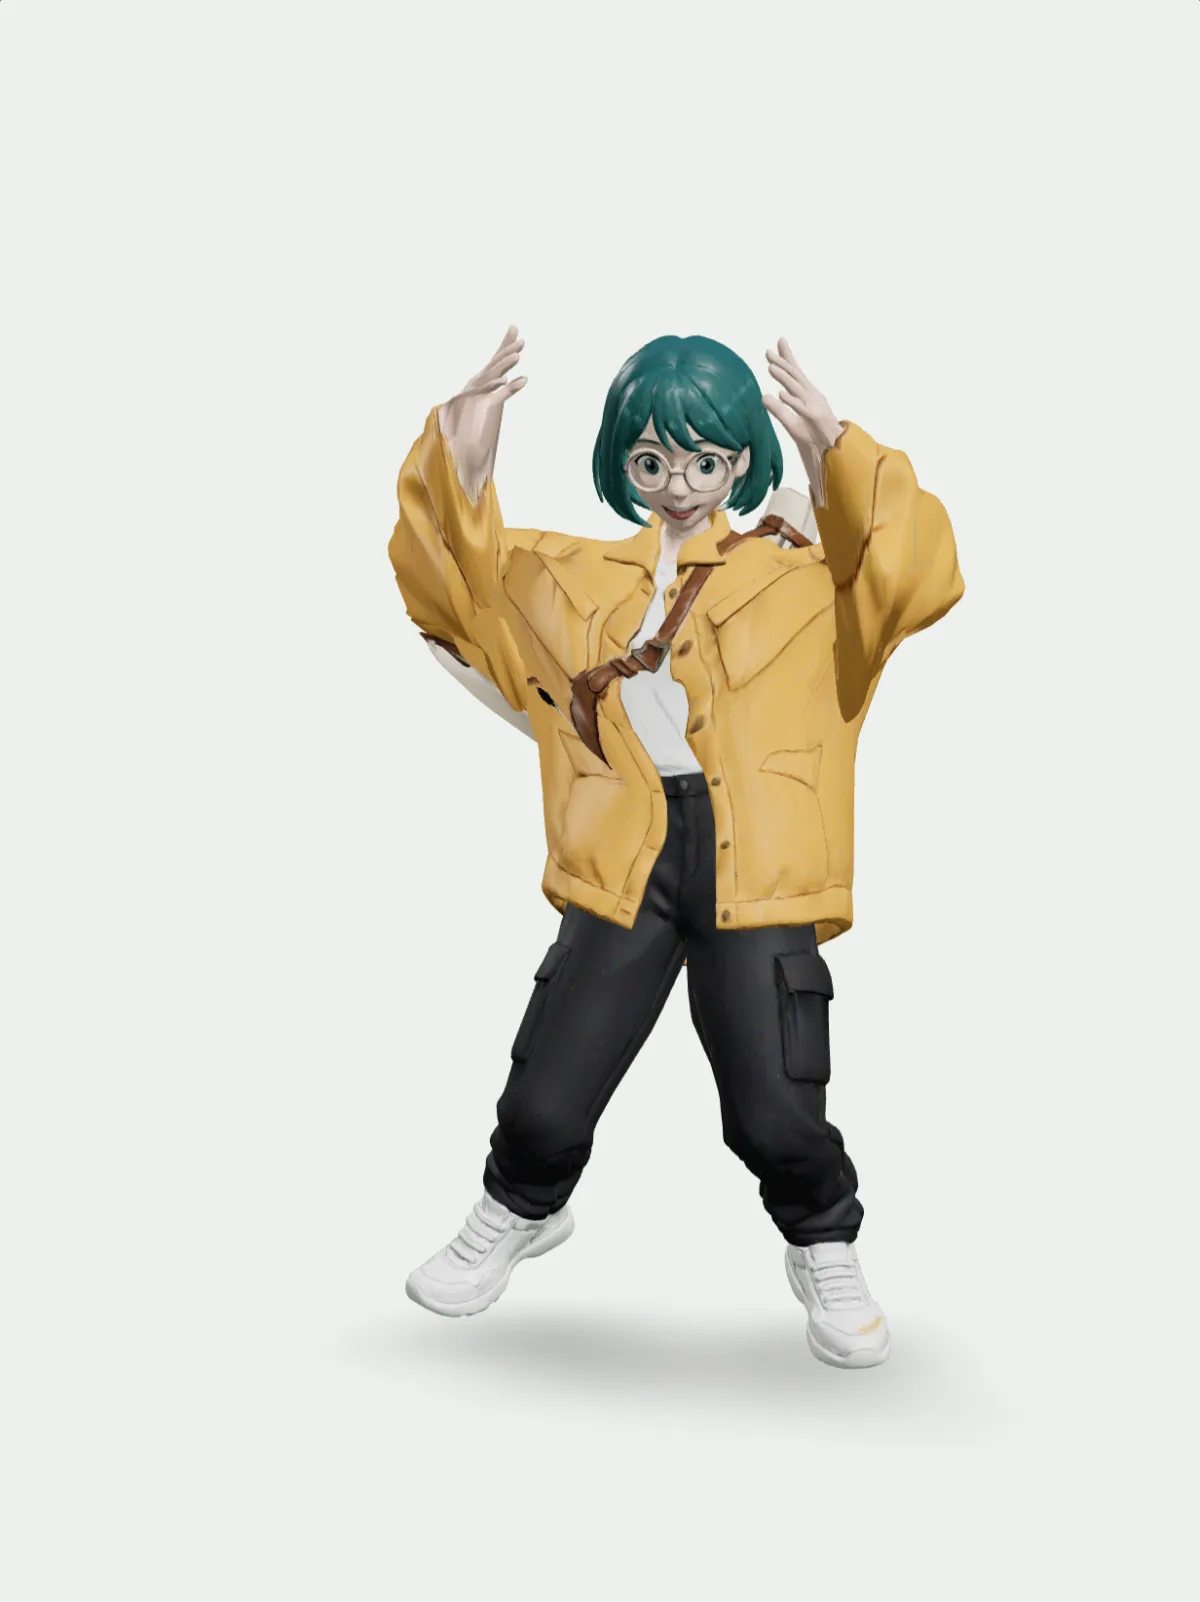
On Meshy's side this cost 30 (model) + 5 (rig) + 3 per animation Meshy credits. The character comes as GLB and FBX, formats game engines read, and Meshy can also output the skeleton as standard templates such as Mixamo, Unreal and Unity.
This is a direction we are considering opening up for game developers and animators. If that interests you, get in touch.
Limits
- One photo only knows the visible side. Back and bottom surfaces are inferred; upload more angles if they matter.
- The size is an estimate. Good enough for scene layout; check dimensions yourself for fabrication or construction drawings.
- Raw models can be heavy. If your scene slows down, lighten the model to 50-100 thousand triangles.
- Animation is for humanoid characters only, and it is not in the Syntina interface yet.
Frequently asked questions
Do I need a separate Meshy account?
No. Meshy runs inside Syntina and generations use your Syntina credits.
How many credits is a 3D model?
A textured (4K PBR) model is 120 credits, untextured 80. 8K textures or Ultra geometry make it 140, both 160. Lighten model is 20 credits, Change material 40 (60 at 8K).
How long does it take?
About 1.5-2 minutes for standard geometry (our chair: about 100 seconds) and 3-5 minutes for Ultra (our pavilion: 267 seconds). Uploading a large image can add a few seconds to half a minute.
How do I get the model into SketchUp or 3ds Max?
Download GLB or FBX from the download menu. FBX imports straight into 3ds Max. If the model is heavy, use Lighten model first to bring the triangle count down.
Can I make a 3D model from text?
On the 3D Model page Meshy works from an image. If you have no image, first generate one of the object in Syntina, then turn it into 3D; all three inputs in this post were made that way.
When will animation come to Syntina?
There is no date yet. The character in this post is a test to show what the same engine can do.