
Take your SketchUp, Rhino, or Revit viewport to V-Ray-quality render
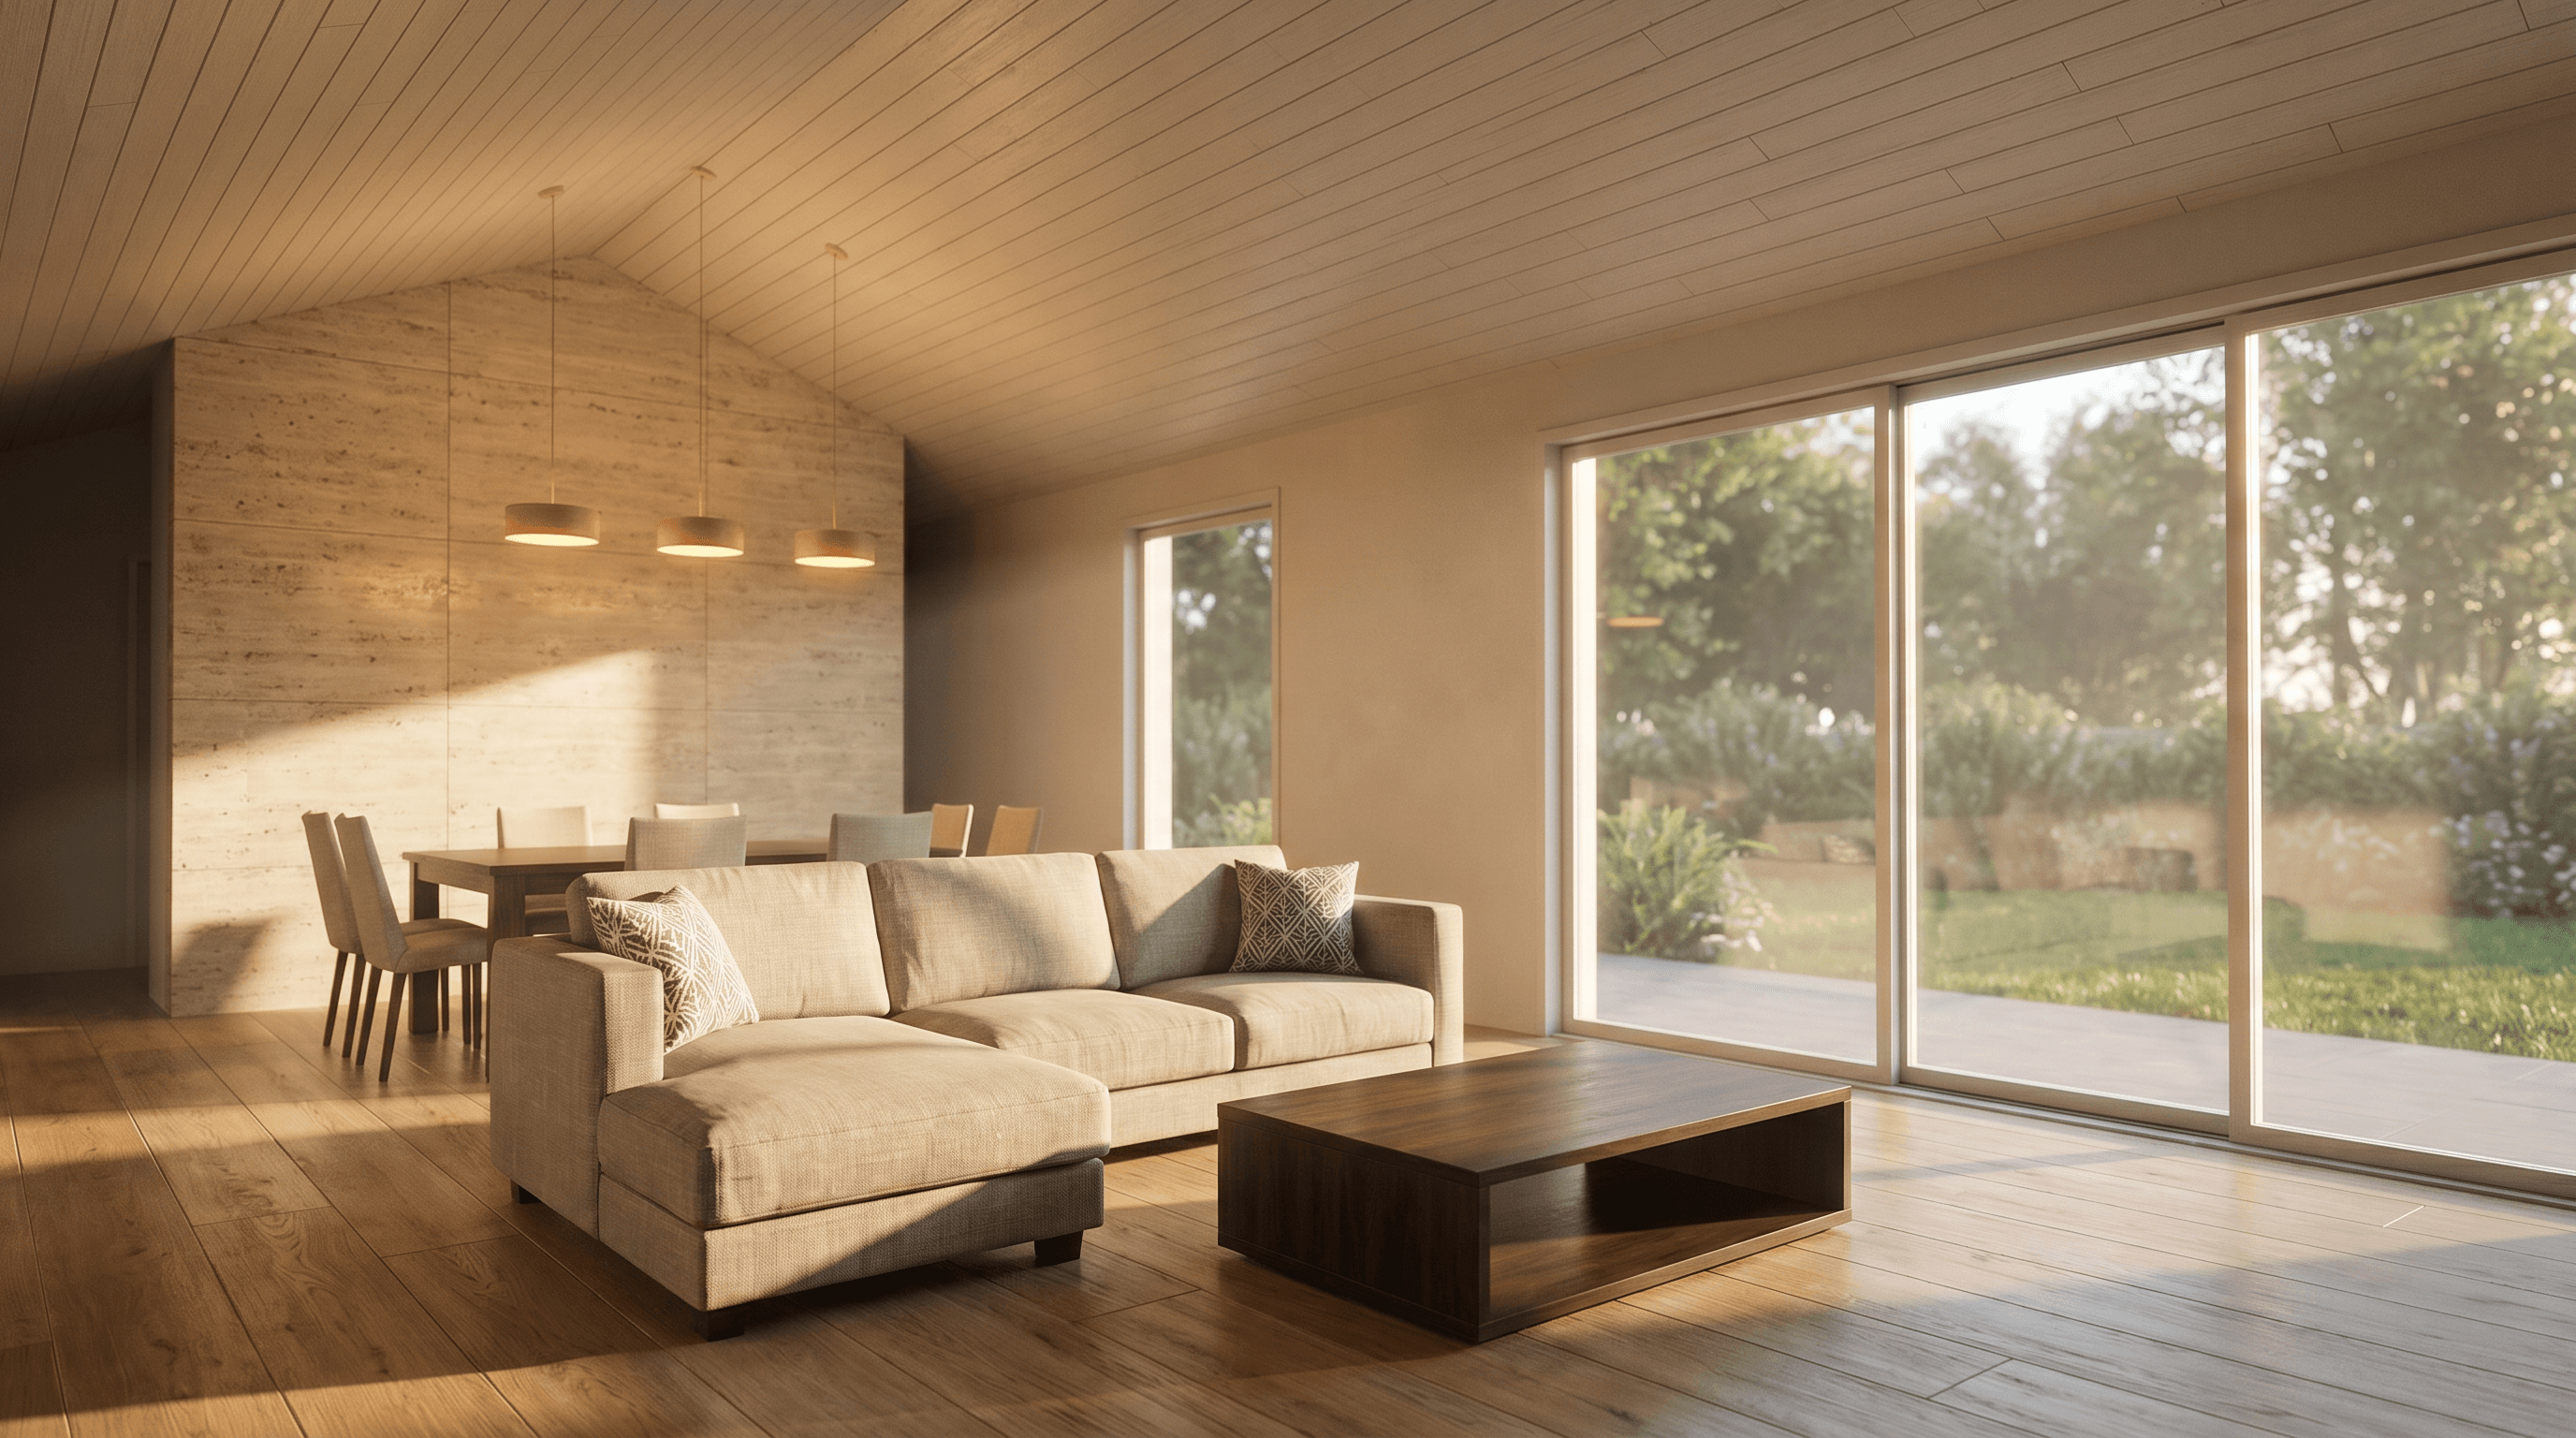
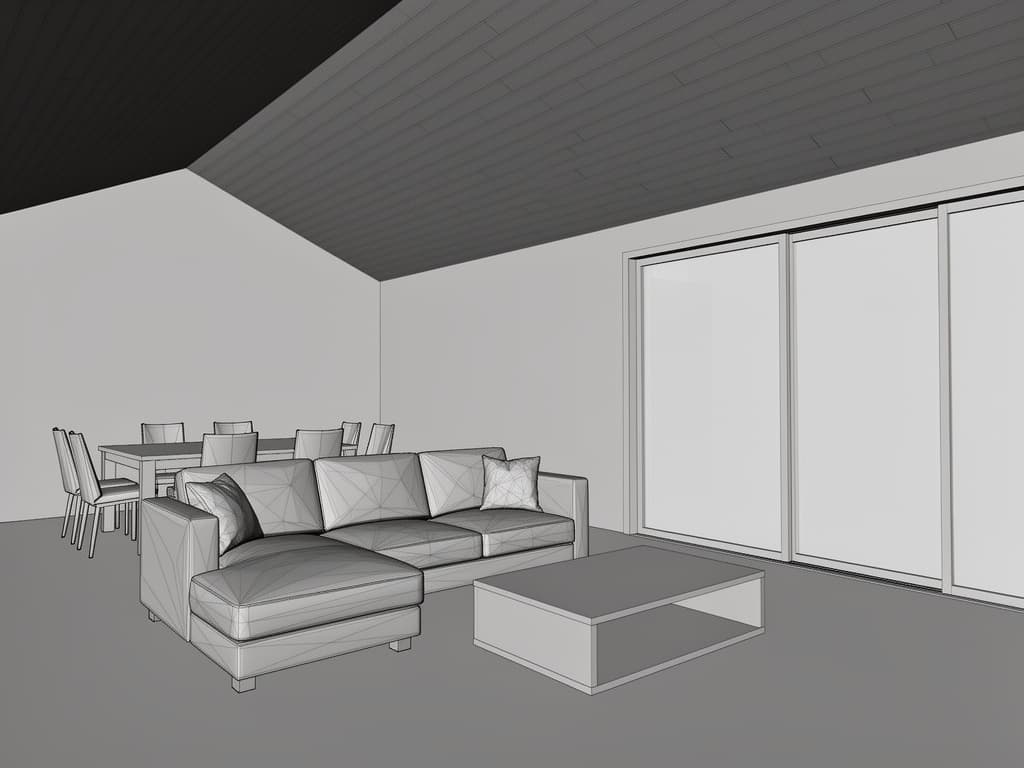
View to Render takes the viewport image from your 3D modeling software (SketchUp, Rhino, Revit, Blender, 3ds Max) and produces a V-Ray/Corona-quality photo render while preserving the same geometry and camera angle, without a material layer. No plugin installation, no render-farm wait.
Why this preset
Turn a plain viewport capture from your modeling software into a photorealistic presentation render
Modeling is finished but there's no time left to set up a render — presentation quality in the last 24 hours before delivery. It earns its place in scenarios like these:
- Last-minute 3D-model-to-render before a presentation meeting
- A fast alternative after a client revision, without re-rendering from scratch
- Producing a presentation image from a 3D model before a student jury
- A cost alternative for small offices without a render farm or render-engine license
How it works · 4 steps
The View to Render pipeline, step by step
The classic workflow means Material assignment + UVW unwrap + V-Ray light rig + render node + post-production → typically 4-10 hours plus render-farm cost; with the Syntina View to Render preset it becomes Viewport capture + preset + a short brief → ~30 seconds, no modeling software or plugin installation needed.
- 01
Capture the viewport
Take a viewport screenshot from your modeling software. 'File > Export > 2D Graphic' in SketchUp or the 'ViewCaptureToFile' command in Rhino is enough. Use a 16:9 ratio; the preset works with the same aspect ratio.
- 02
Select the View to Render preset
Choose the View to Render preset from the panel and drag in your file. The preset preserves geometry and camera angle while adding only the material/lighting layer.
- 03
Specify the material and light tone
Enter a short brief: 'warm late afternoon, oak + travertine, shallow DOF.' The preset uses this for material choice and color grading; it reads geometry from the viewport.
- 04
Download the render and add it to your presentation
A photo-quality render is ready in seconds. Drop it straight into your presentation PDF, or scale it up to 4K/8K with the Enhance preset.
Tip · Hide any objects that shouldn't appear in the material render before exporting the viewport — model cleanliness directly affects the result.
Tip · Set the camera clipping plane correctly — cut-off furniture or walls can cause the preset to misread material assignment.
Tip · For pitched roofs or complex ceiling geometry, turning on ambient occlusion in the viewport noticeably improves the result.
Limit · A viewport exported at very low resolution (< 800px) loses detail. Export at least 1600px wide.
Limit · Unfinished parts of a model (holes in walls, missing objects) can be interpreted by the preset as 'what it's supposed to be'; the render output will reflect the model's gaps.
Limit · For exterior scenes, sky and landscaping are added by the preset; if your office's brand identity requires a specific sky character, note that in the brief.
AI models · 5 options
Which AI models does View to Render run on?
You can run the same preset on different models — economical ones for quick drafts, premium photorealism for client presentations. Model costs are charged as credits; the credit system page lists the equivalents.
- GPT Image 1.5 EditStandardDefaultFast, economical and consistent — the default for most presets.
- Nano Banana Pro EditPremiumPremium photorealism — presentation-grade architectural detail.
- GPT Image 2 EditPremiumOpenAI's new generation — better understanding of long briefs.
- FLUX 2 Flex EditStandardPrecise with materials and facade texture — strong in the architectural photo palette.
- Seedream v4.5 EditMulti-referenceMultiple reference images — steer the scene with a moodboard.
Frequently asked
What architects ask about View to Render
- Do I need to install a plugin in my modeling software?
- No. This Syntina preset works entirely from a viewport capture. Dedicated plugins for SketchUp, Rhino, Revit, Blender, and 3ds Max also exist (under /plugins), but you get the same result from the web interface without them.
- Is this a full alternative to a V-Ray or Corona license?
- Not a full alternative, but enough for most work. It's economical and fast for early-stage variations, client presentations, and revision cycles. For delivery-quality output, façade documentation, or interior animation, the classic render pipeline still has the edge.
- Does the geometry change?
- The preset is calibrated to preserve composition and proportions, but it isn't pixel-level LoRA-style preservation. Furniture silhouette, window placement, and floor height are preserved; but if there's no flower in a vase, for example, the preset may design and add one. If geometry is critical, add 'preserve geometry strictly' to your brief.
- What's the difference between exterior and interior mode?
- The preset detects both modes automatically. Interior scenes get an artificial light rig plus soft golden-hour window light; exteriors get sky, landscape, and atmospheric perspective. Specifying 'interior' or 'exterior' in the brief sharpens the distinction.
- How many credits does the preset use?
- View to Render uses 3 credits at its default setting. For high resolution (4K or 8K), chain it with the Enhance preset for a total pipeline of about 6 credits.
- How do I get a daytime and a nighttime alternative from the same viewport?
- Run the same image with two separate prompts: one 'warm late afternoon golden hour,' the other 'nighttime, warm interior lights, blue hour sky.' Placing these two renders side by side builds a strong narrative in a presentation.
Presets used together
Companions to the View to Render flow
Sketch → Render
From a hand-drawn concept sketch to a photorealistic image your client can approve
Preset pagePreset · Add RealismAdd Realism
From the soft plastic look of a default render engine to a magazine-cover image in one step
Preset pagePreset · Floor Plan → 3DFloor Plan → 3D
From a CAD blueprint to a furnished, lit, and material-finished top-down render in a single step
Preset pagePreset · Change MaterialChange Material
When the client says 'what if this parquet were marble instead' — seconds, not minutes
Preset pageTry the View to Render preset for free
Generate your first render at no cost with the starter pack in the credit system.