
Turn a 2D floor plan into a client-ready top-down 3D render
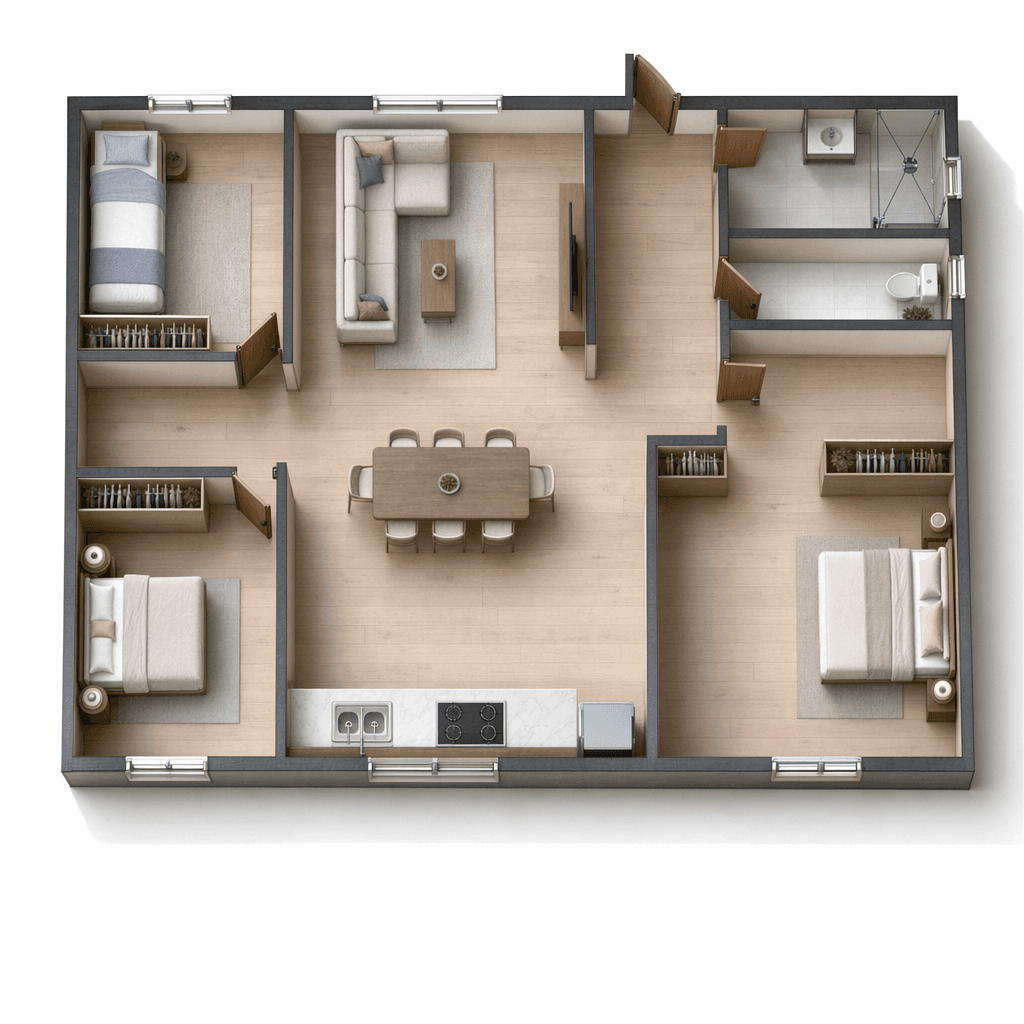
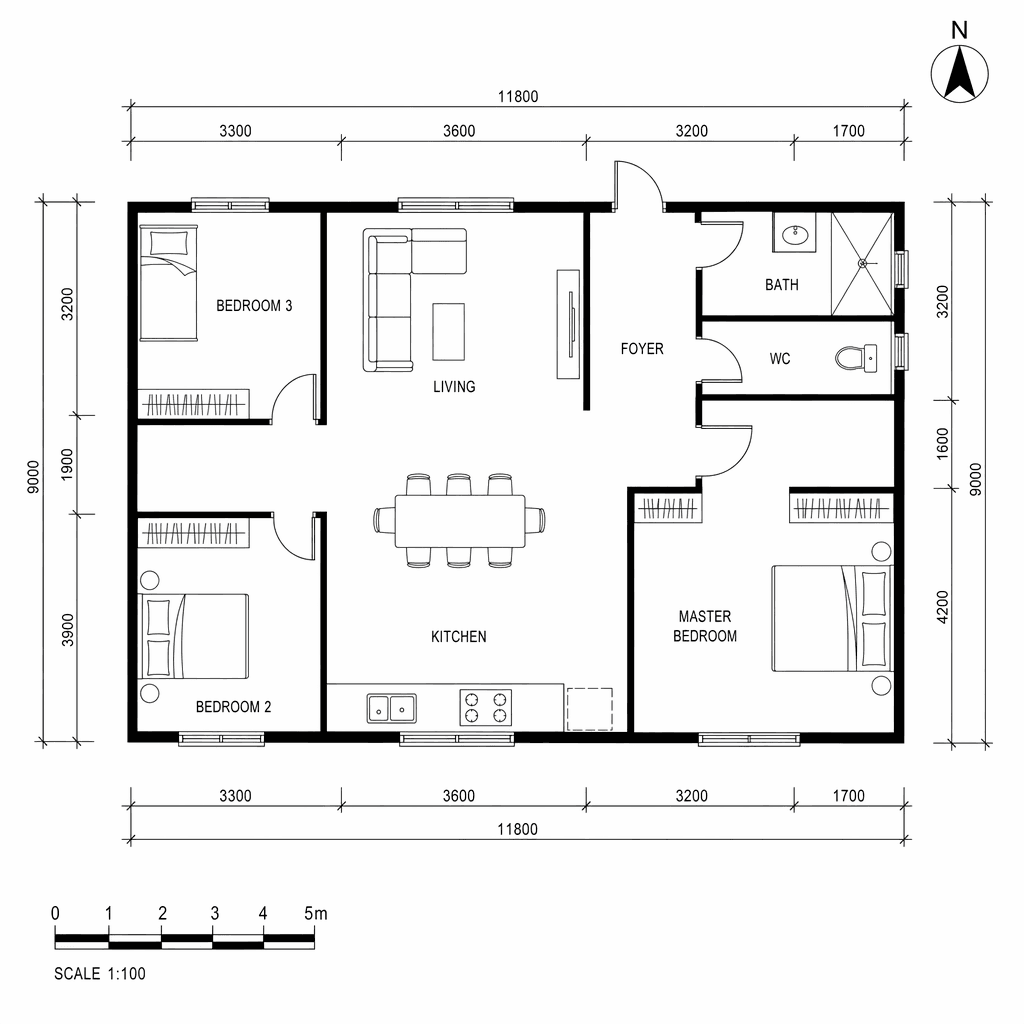
The Floorplan to 3D preset keeps your 2D floor plan as an orthographic top-down view (no perspective distortion) while adding wood flooring, upholstery, light, and shadow to produce an image you can share in a client meeting. Plan legibility isn't broken — only the material and atmosphere layer is added.
Why this preset
From a CAD blueprint to a furnished, lit, and material-finished top-down render in a single step
Quickly establishing a visual language at the proposal stage — getting the client to say 'yes, that's what we want'. It earns its place in scenarios like these:
- A top-down unit example in a project-proposal presentation
- Adding a 3D plan to a sales brochure for real-estate marketing
- A layout-plan image on an architecture competition panel
- Showing a client furniture-layout alternatives
How it works · 4 steps
The Floorplan to 3D pipeline, step by step
The classic workflow means Modeling in Revit/ArchiCAD from CAD + materials + lighting + render → 8-20 hours of office time; with the Syntina Floorplan to 3D preset it becomes Plan PNG/PDF + preset + brief → ~40 seconds.
- 01
Export the plan
Export the plan from your CAD software as PNG or PDF. Orthographic top-down view; black wall poché, white floor, 2D furniture symbols included. Use at least 2000px width.
- 02
Select the Floorplan to 3D preset
Choose the preset from the panel. It's calibrated with a strict orthographic camera lock to prevent perspective distortion.
- 03
Define the material family
Enter a short brief: 'modern Scandinavian, light oak flooring, white walls, porcelain tile in bathrooms.' This brief drives the preset's material assignment; it doesn't touch the plan layout.
- 04
Download the render and add it to your presentation
A material-finished top-down 3D render is ready in seconds. Drop it straight into your proposal PDF or sales brochure.
Tip · If dimension lines, angle arrows, or room labels remain on the plan, the render will translate them too. Work from a clean version of the plan.
Tip · Give a material hint for functional areas like bathrooms and kitchens ('polished porcelain tile in bathroom') — the preset assigns the right material automatically.
Tip · If walls are drawn very thin (< 2px), the poché may not be recognized; set line weight to 1.5pt in your CAD export.
Limit · The preset is calibrated for an orthographic top-down view; use the Section Drawing preset for a perspective render or a section image.
Limit · In very complex plans (50+ rooms, hotel-type layouts), the preset may simplify some details.
Limit · It has limited ability to work with vertical planes (wall cladding, window detail) from a top-down view; a separate workflow is needed for elevation renders.
AI models · 5 options
Which AI models does Floorplan to 3D run on?
You can run the same preset on different models — economical ones for quick drafts, premium photorealism for client presentations. Model costs are charged as credits; the credit system page lists the equivalents.
- GPT Image 1.5 EditStandardDefaultFast, economical and consistent — the default for most presets.
- GPT Image 2 EditPremiumOpenAI's new generation — better understanding of long briefs.
- Nano Banana Pro EditPremiumPremium photorealism — presentation-grade architectural detail.
- FLUX 2 Flex EditStandardPrecise with materials and facade texture — strong in the architectural photo palette.
- Qwen Image EditOpen modelOpen-ecosystem model — broad control parameters.
Frequently asked
What architects ask about Floorplan to 3D
- Which CAD formats are supported?
- The preset accepts PNG or PDF exports. You can export in these formats from AutoCAD, ArchiCAD, Revit, SketchUp LayOut, or Rhino. Vector PDFs work too; you don't need to upload native model files (.dwg, .rvt).
- Are the plan's proportions preserved?
- Yes. The preset locks the orthographic camera strictly and doesn't alter plan proportions. A room that's 4x5m in the plan appears at that same ratio in the output (pixel-wise). If measurement matters, leave a scale bar on the CAD plan.
- Does furniture layout change?
- No — the preset replaces the 2D furniture symbols in place with their 3D counterparts. If you want a different layout, make the change in CAD first and re-export.
- Can I render multiple unit types at once?
- The preset works one plan per page. Rendering unit type 1, type 2, and type 3 separately for a real-estate project and placing them side by side in a presentation is the standard workflow — each type takes about 40 seconds.
- How many credits does the preset use?
- Floorplan to 3D uses 3 credits at its default setting. For large plans (200+ sqm) needing 4K output, upscaling afterward with the Enhance preset is recommended.
- Can I get an isometric section instead?
- Floorplan to 3D is calibrated strictly for a top-down view. Use the Axonometric View preset for an isometric-angle, sectioned 3D plan; it's a different pipeline but works with the same plan file.
Presets used together
Companions to the Floorplan to 3D flow
3D View → Render
Turn a plain viewport capture from your modeling software into a photorealistic presentation render
Preset pagePreset · Exploded AxonometricExploded Axonometric
The construction-system drawing every competition panel needs — explained, then generated from an architectural photo or 3D render in about a minute
Preset pagePreset · Sketch → RenderSketch → Render
From a hand-drawn concept sketch to a photorealistic image your client can approve
Preset pageTry the Floorplan to 3D preset for free
Generate your first render at no cost with the starter pack in the credit system.